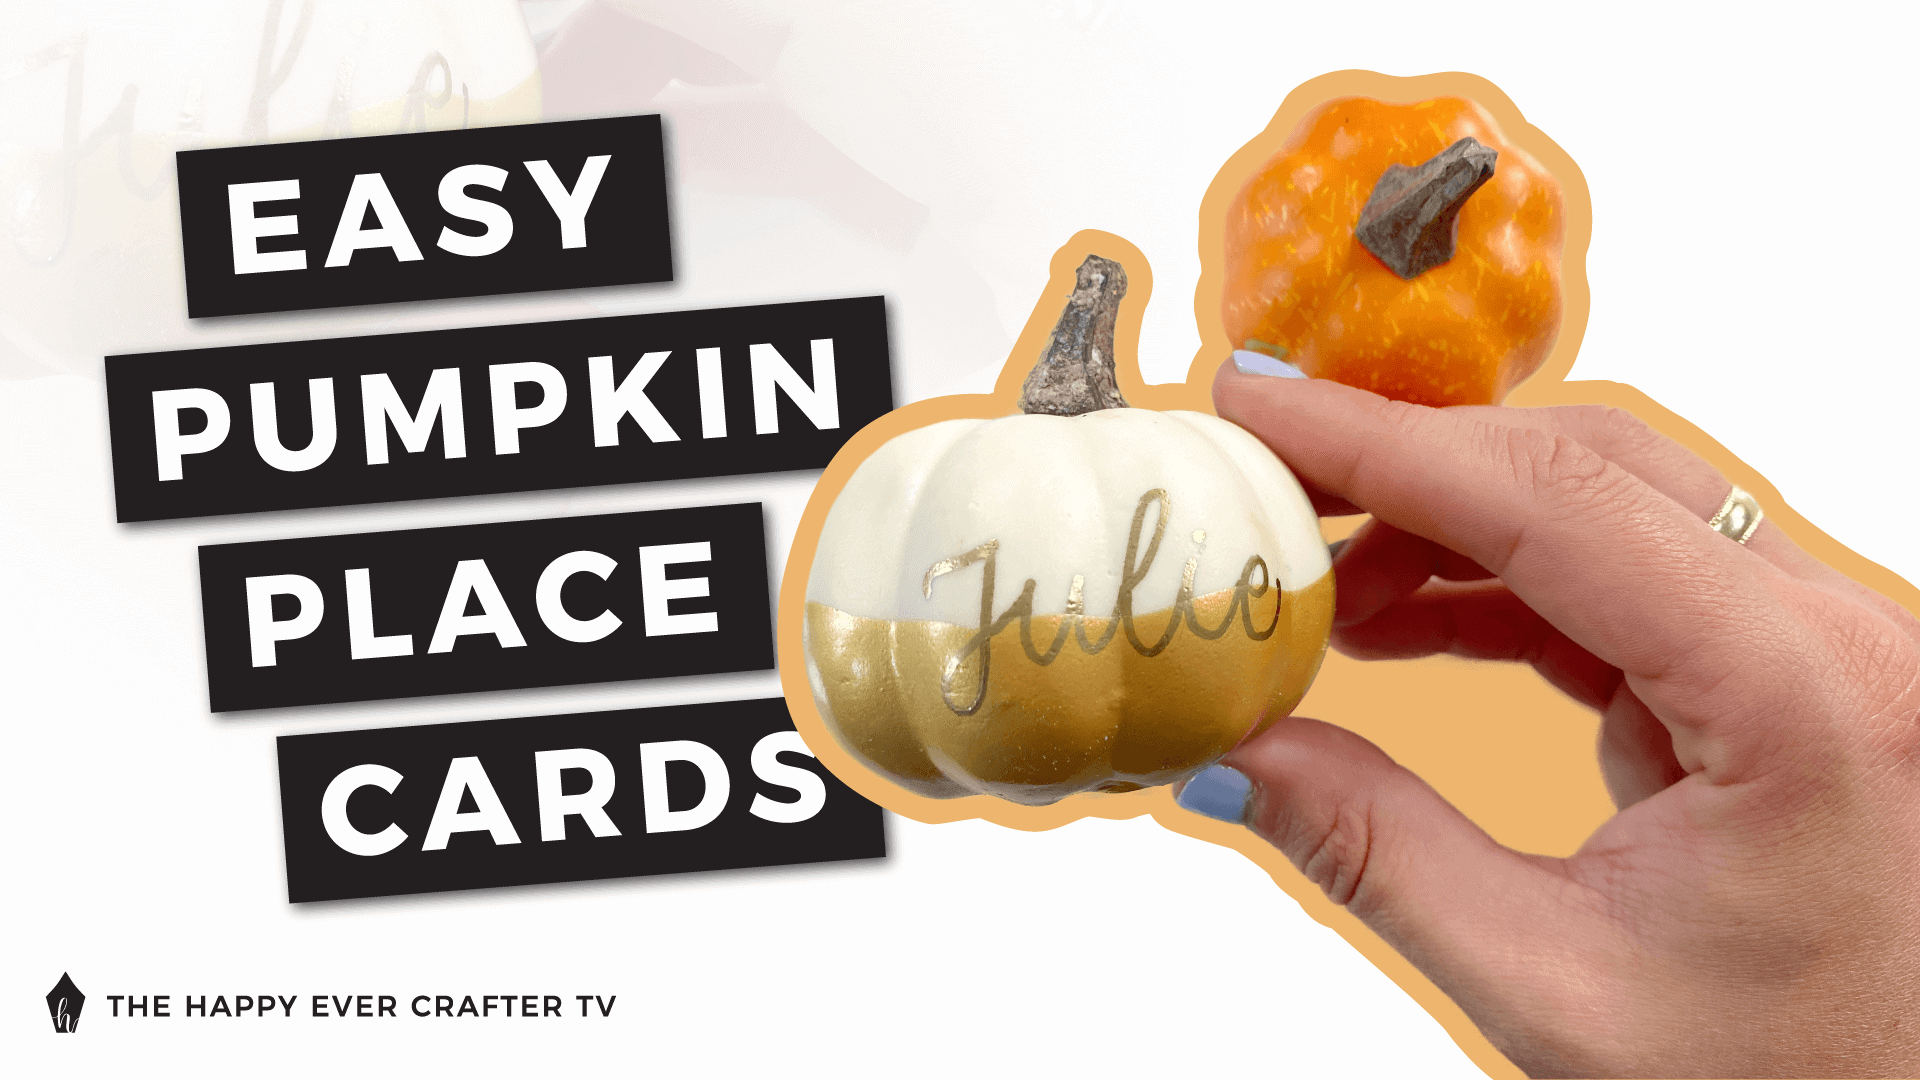
Looking for some super cute place cards for Thanksgiving this year?
I got you covered.
First Things First…
The links below may be affiliate links where appropriate. This means that your purchase through these links may result in a few cents in payment to me, to support creating further resources like this one! That being said, I will never suggest supplies that I do not personally use and fully recommend.
Supplies Used
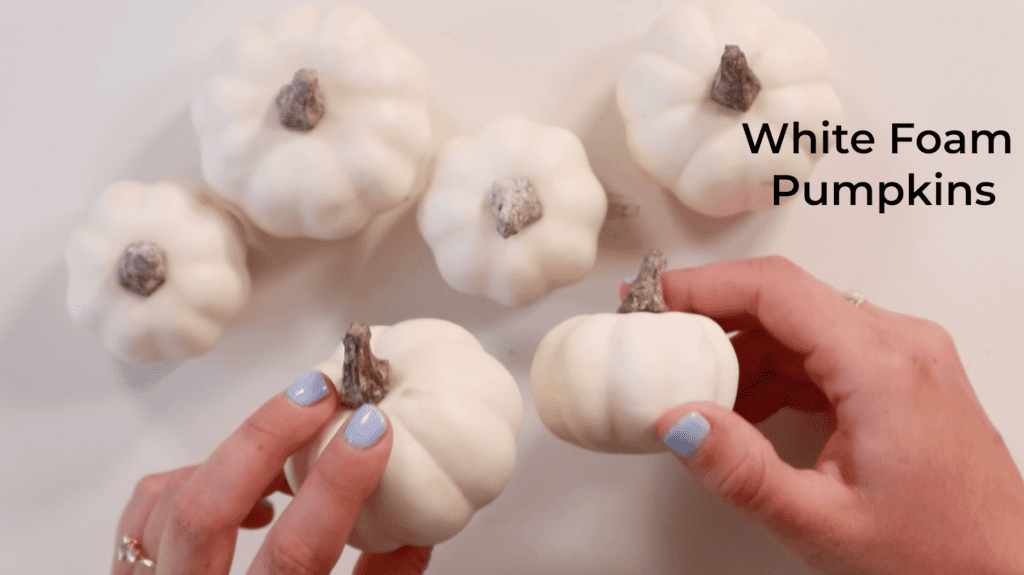
- White Foam Pumpkins
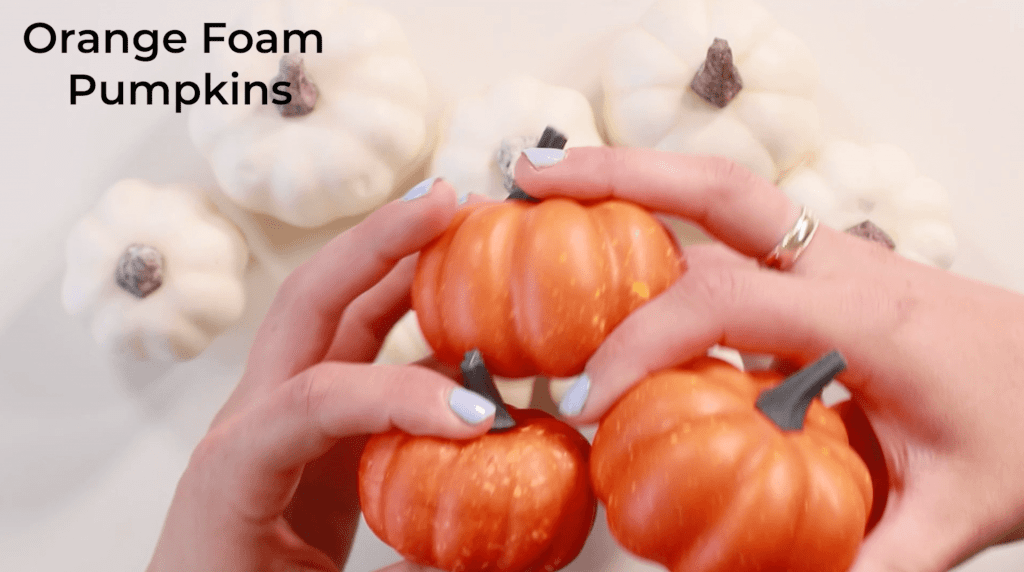
- Orange Foam Pumpkins
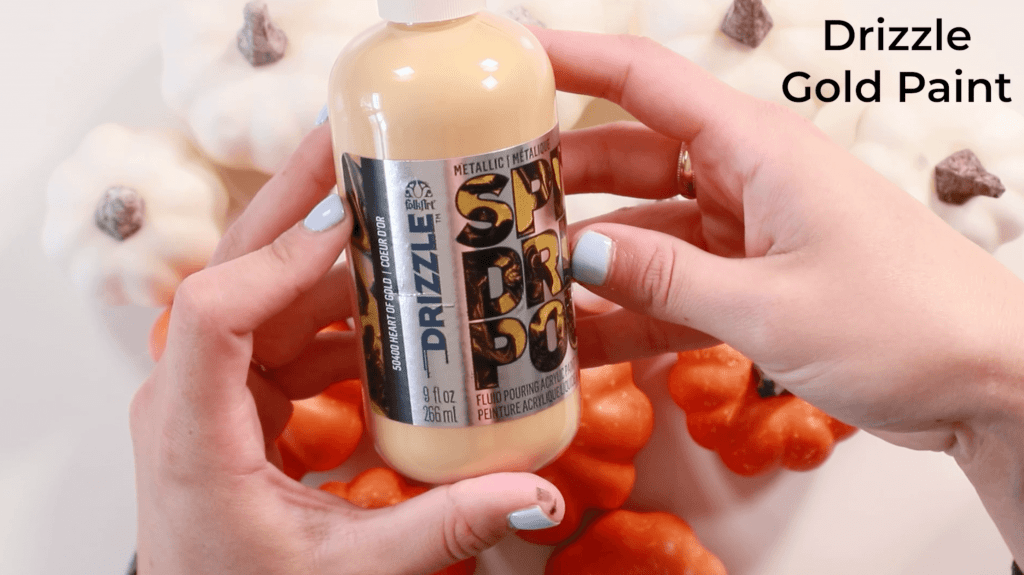
- Gold Paint
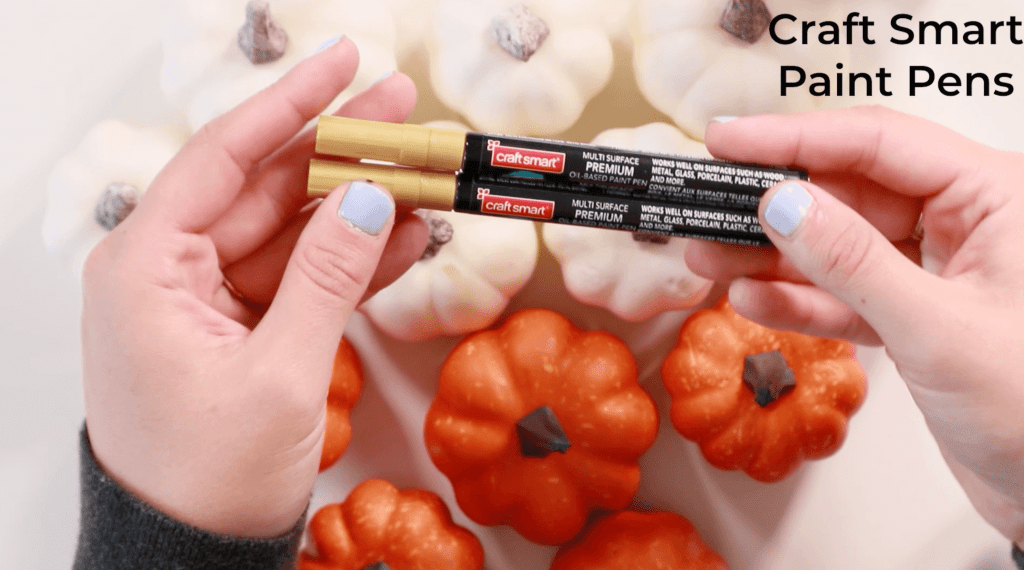
- Gold Paint Pens
- Floral Foam
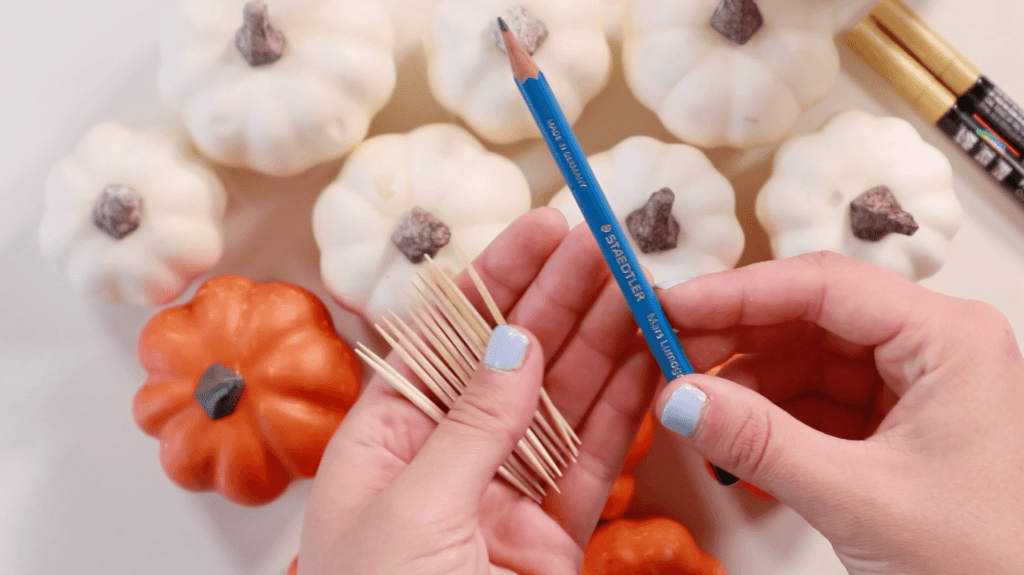
- Pencil
- Toothpicks
- Container
- Paper Towel
- Eraser (optional)
Rather watch than read? No problem! You can watch me create these cute pumpkin place cards in real-time by clicking the video below!
Let’s Get Started!
My list of supplies are above (pictured below), but you can adjust the supplies based on what you have available.

I turned little foam pumpkins into place cards for my Thanksgiving dinner table, and I’m going to teach you how to make them too!
Step #1: Fill a small container with gold paint.
Grab a small container for your paint (you can use whatever you have). Pour enough to have about an inch of paint in the bottom of it. You can pour whatever is left once you’re done back in the bottle!

Grab your floral foam and have it ready. Make sure you have your toothpicks, your foam, your paint container, and your pumpkins.
Step #2: Dip the pumpkins in the paint and dry on the floral foam.
It’s pretty simple – dip your pumpkin in the gold and get the coverage that you want on the bottom of it. You can also brush the paint on if you prefer that instead of dipping.
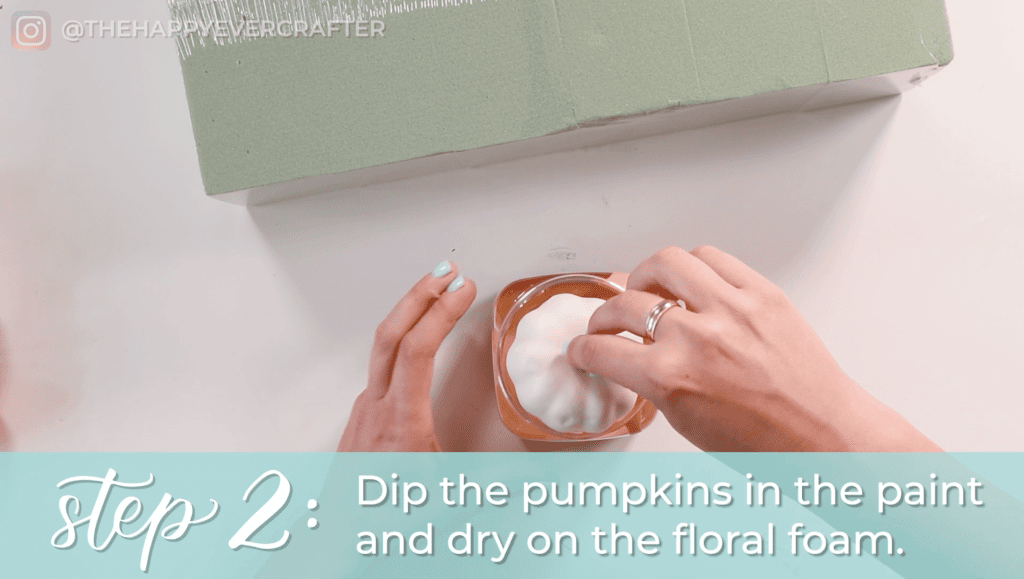
You might have to play with it a little bit (tilt it, move it around, etc.). Spin around, tip the container – whatever you need to get the coverage you want.
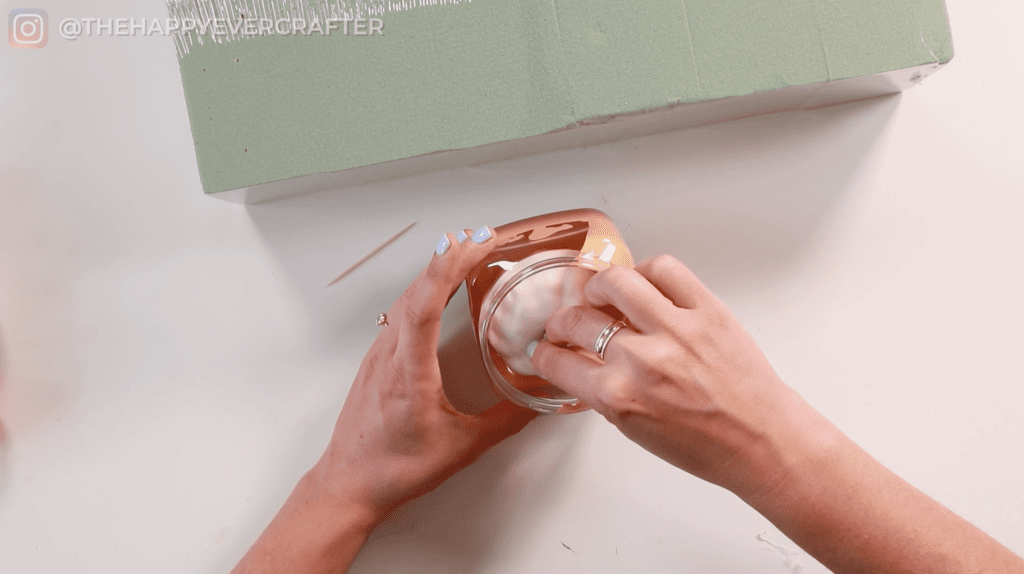
This can get messy so make sure that you have a paper towel nearby!
The height of coverage is up to you – I preferred about half way up coverage.
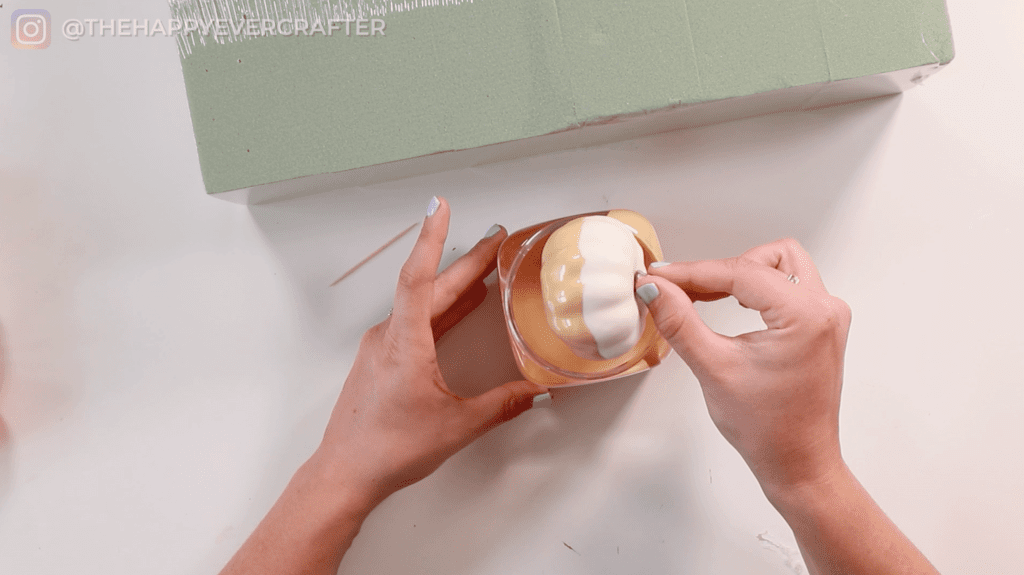
Once you’re happy with the coverage, let any of the excess drip off the bottom.
Next, stab a toothpick through the bottom of the pumpkin (this works because the pumpkins are foam).
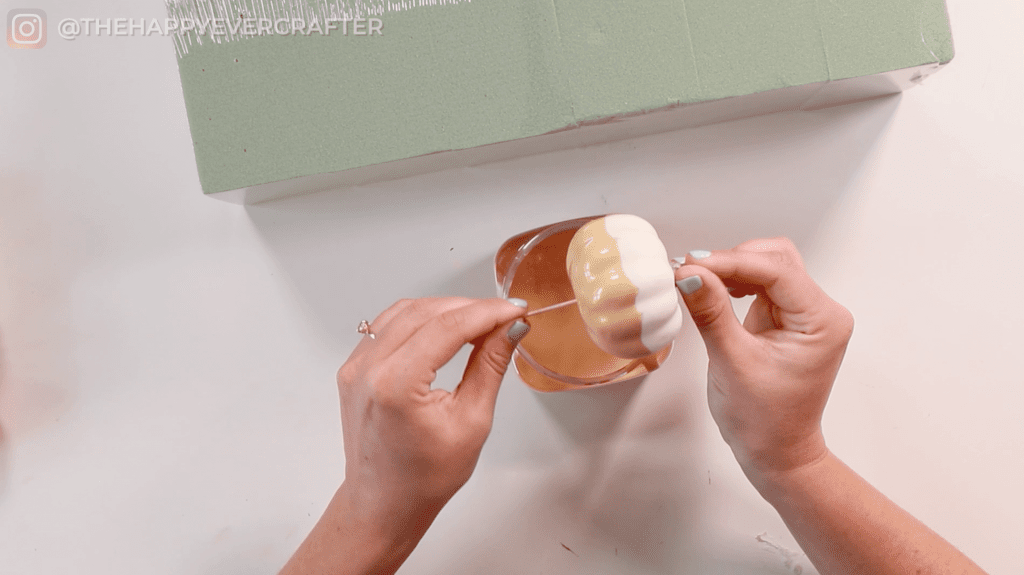
Then stab the other end of the toothpick into your floral foam. This will hold up the pumpkin while it dries and will also allow for any excess paint to drip off. (This also protects your table and the pumpkin itself from getting paint everywhere!)

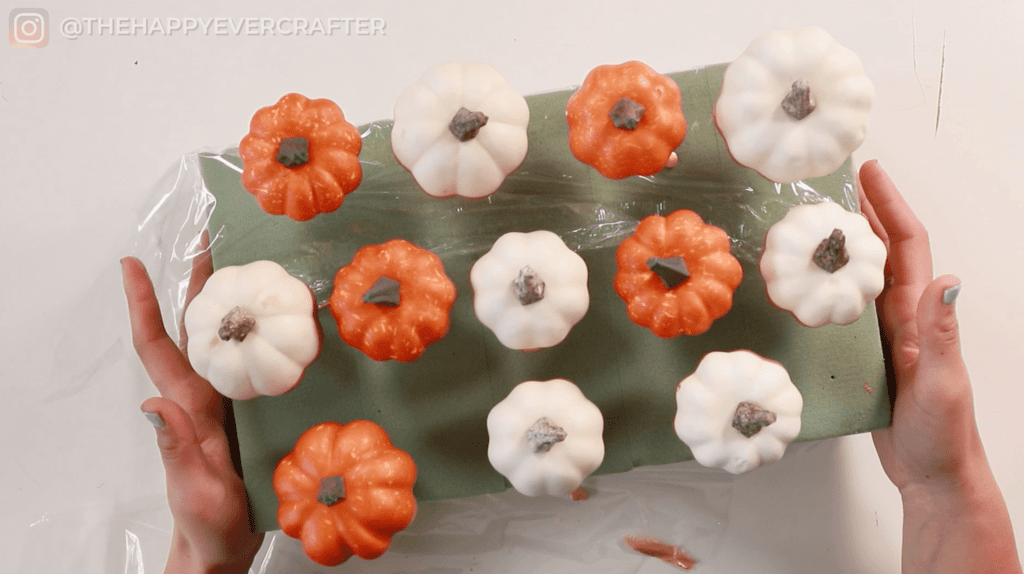
Do this exact same thing with all of the pumpkins you need. I did some orange and some white, but use what you have!

Once all of your pumpkins are dipped, give them a couple hours to dry (you might want to leave them overnight so that they’re fully fully dry).
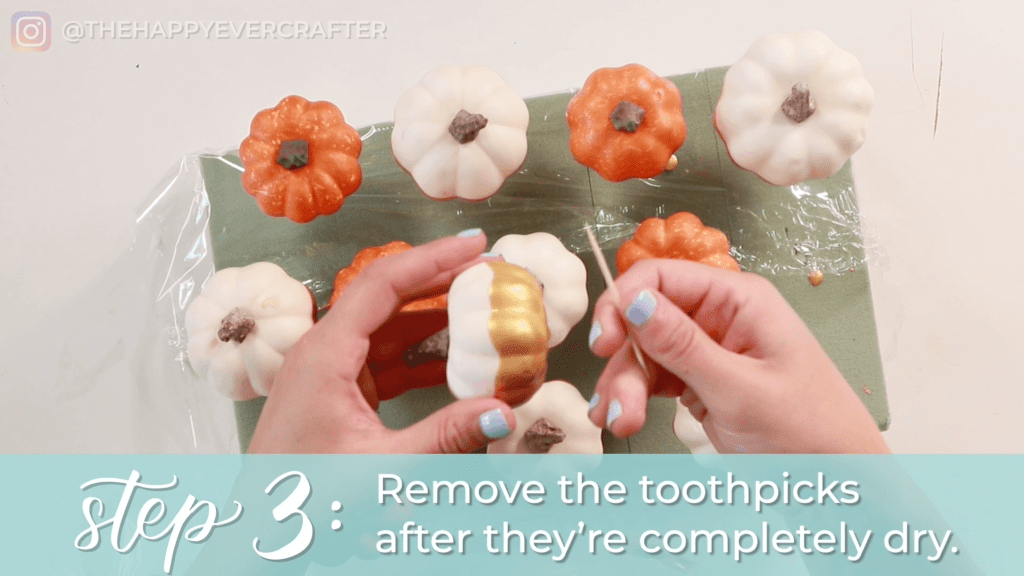
Step #3: Remove the toothpicks after the pumpkins are completely dry.
Make sure they’re completely dry before you remove the toothpicks! You’re going to add names next, so the pumpkins need to be completely dry.
Step #4: Lightly pencil in your guests’ names.
Grab your pencil for this next step (and an eraser too if you think you’ll need it).
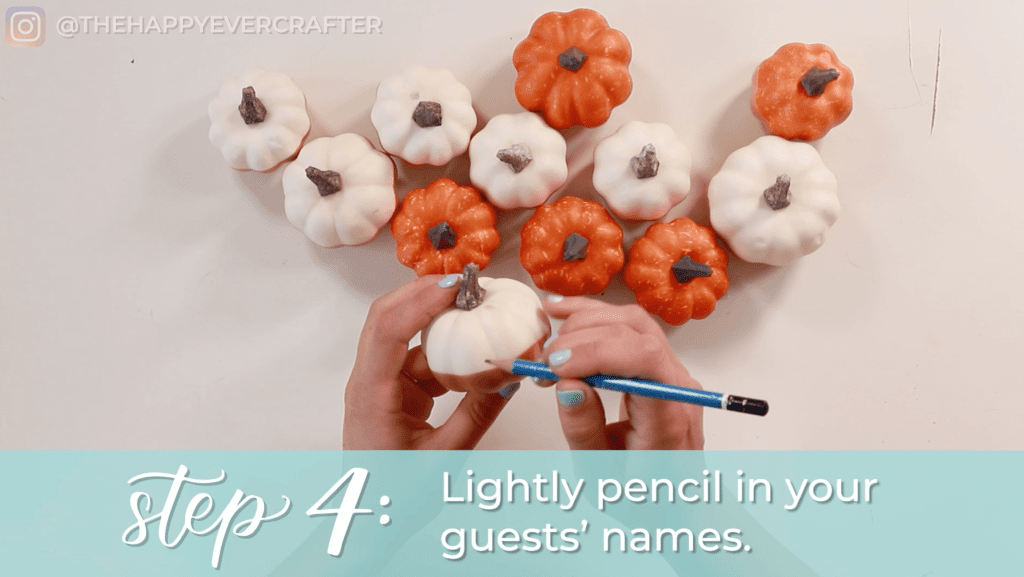
Note: Make sure you write in really really light pencil lines because if you mess it up, it can be hard to take it off of the paint and off of the actual pumpkin surface. Just be sure to write really lightly!
Have a list of the names that you need to create for my place cards.
Write your names half on the pumpkin colour (white or orange) and half on the paint colour (gold). I used slightly different gold colours, so you could definitely see the name still, and it gave it a really cool texture to put gold over top of gold.
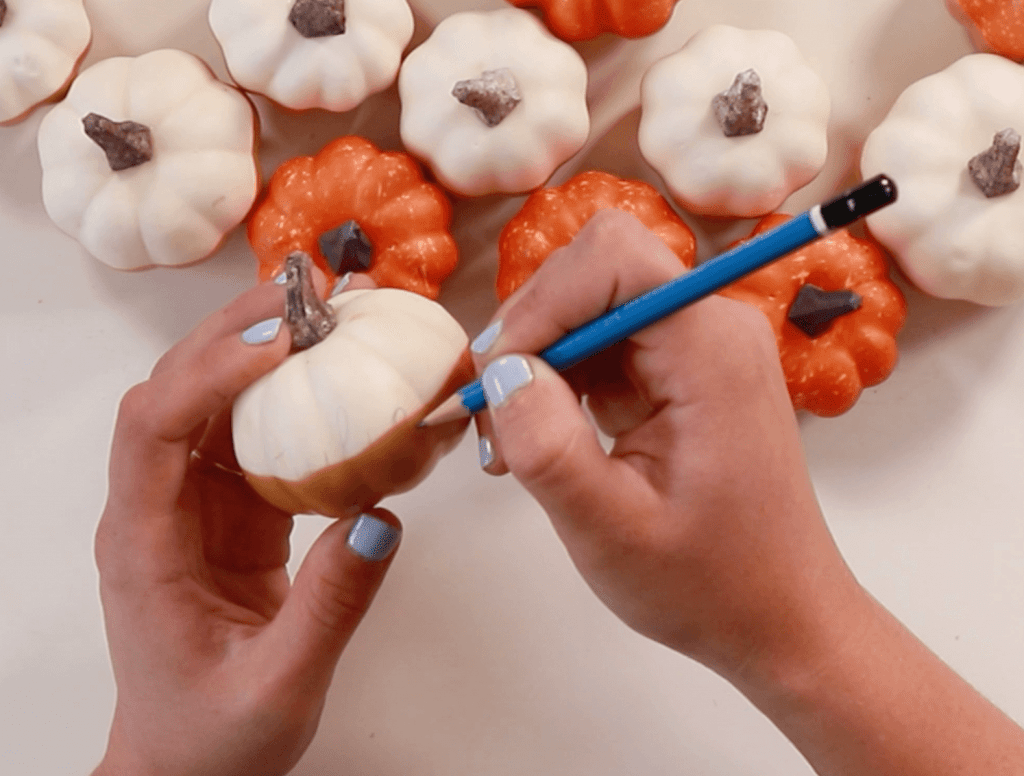
Be sure to write really lightly with your pencil and create an outline. If you’re really comfortable with writing in calligraphy, you could do this without an outline, but I highly recommend doing it with a pencil if you’re not a professional calligrapher.
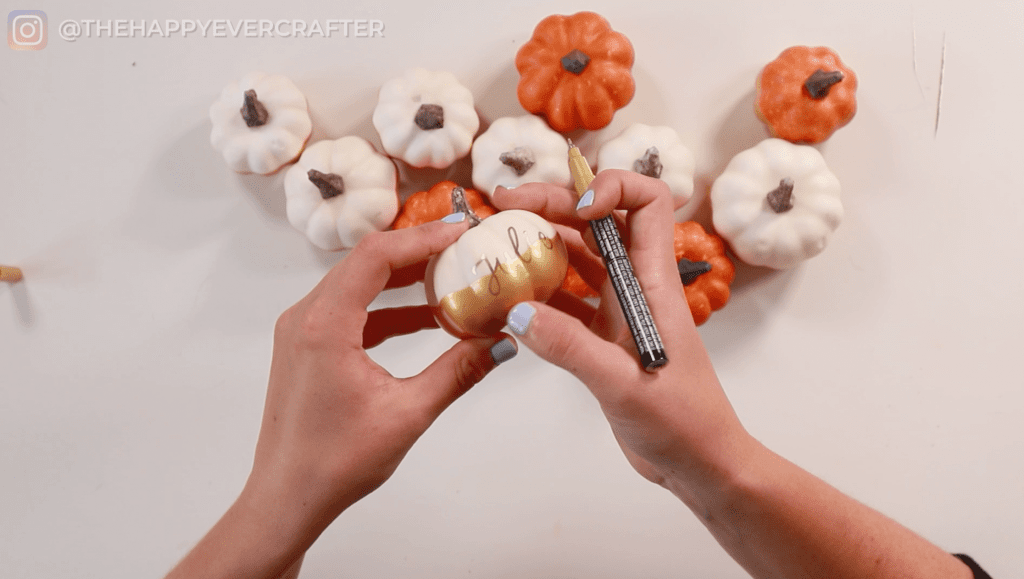
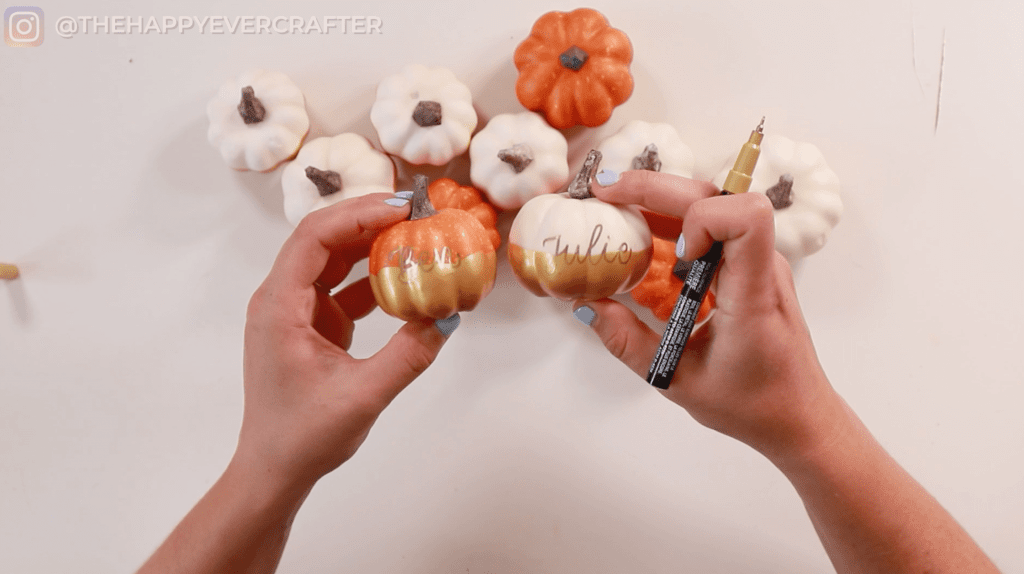
Step #5: Go over your penciled name with the paint marker.
Once you have your names outlined in pencil, grab your paint pens. I recommend using extra fine tip paint pens but fine tip should work too. If it’s a brand new paint pen, you’re going to have to shake it and pump it to get the ink flowing.
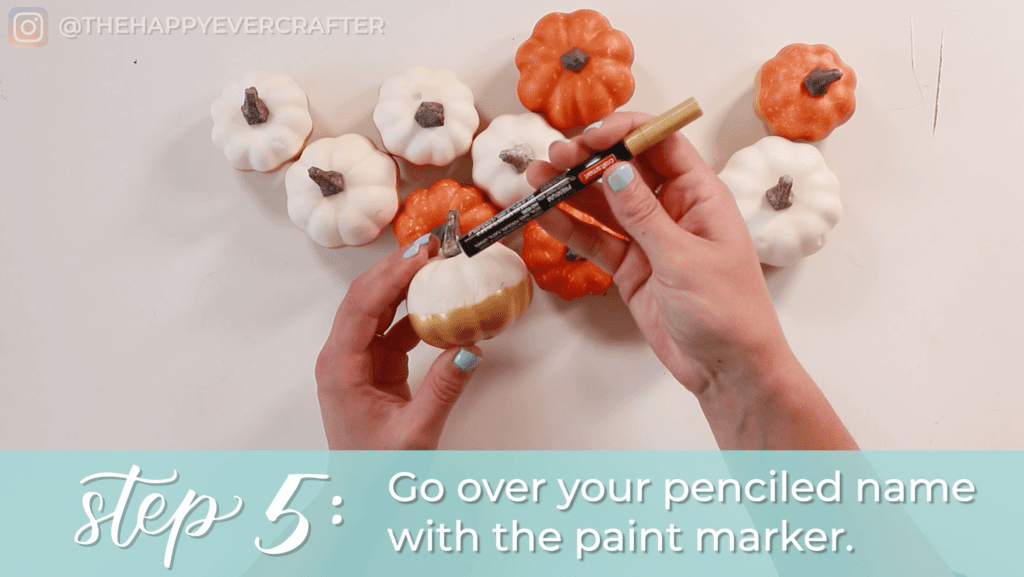
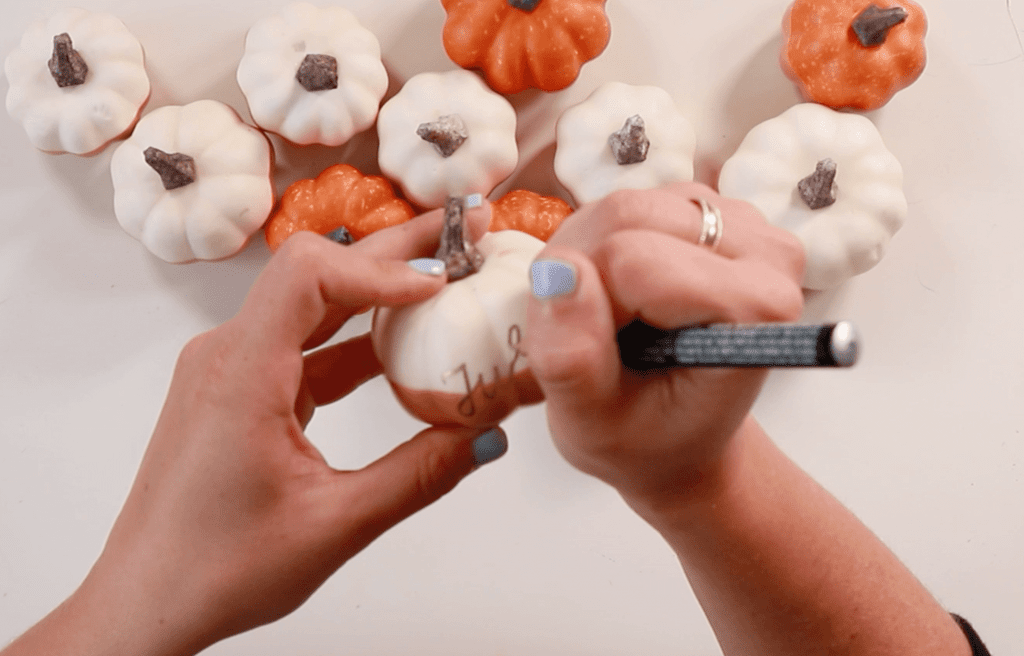
Using your paint pen, trace over the outlined name. I used monoline calligraphy for my pumpkins because it’s so simple, but feel free to use faux calligraphy if you prefer. For faux calligraphy, thicken your lines as you go (don’t want until the end).
If you don’t know what faux calligraphy is, check out this post.
Continue with your paint pens until all of your pumpkins are finished.
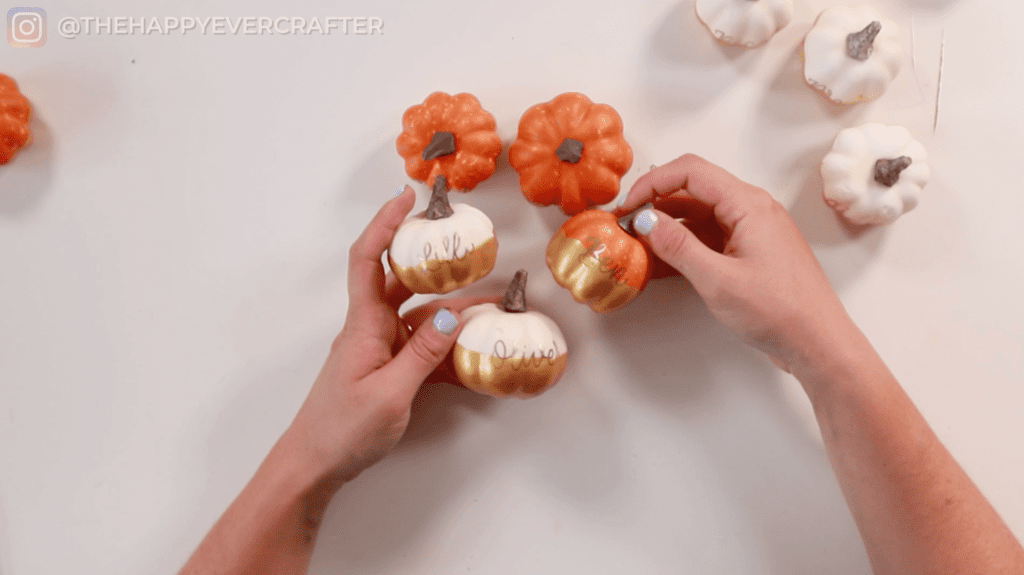
There you have it. The gold on gold is subtle, but I think it’s really really beautiful. Hopefully you do too! Here’s the final product with the white pumpkins:
And here’s the final product with the orange pumpkins:
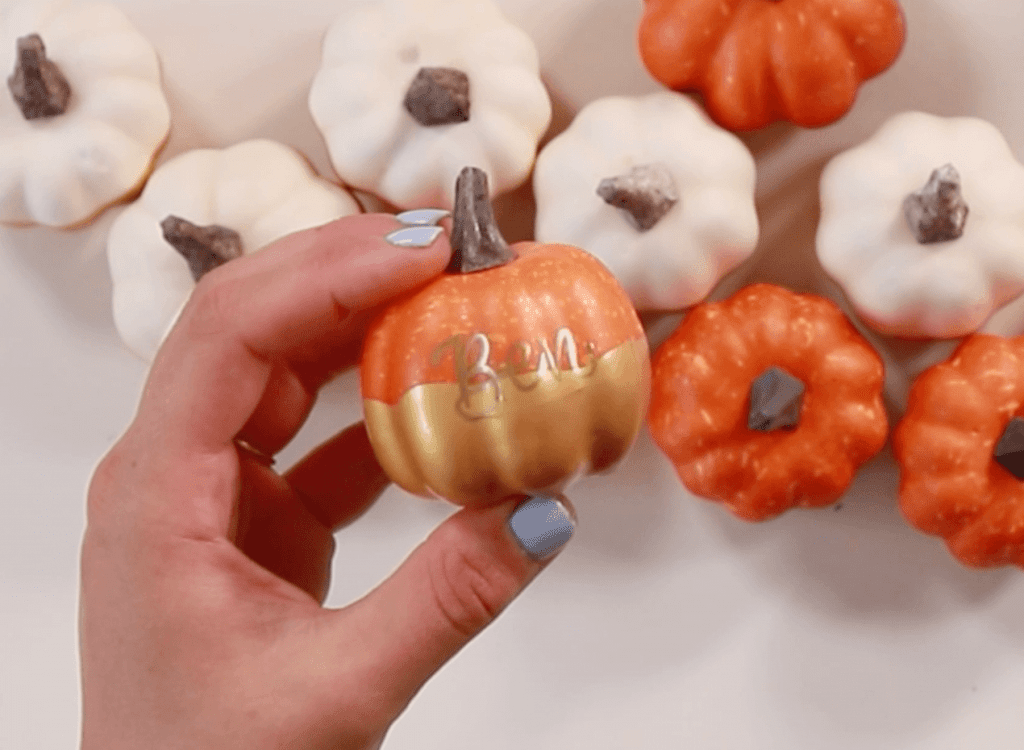
The orange pumpkins have a little bit of a different effect, but I love them both!
And that’s a wrap!
I have my cute little pumpkins ready for my Thanksgiving table – now I want to see yours! Make sure to tag me @thehappyevercrafter on Instagram!
If you’re looking for more pumpkin crafts, check out this post.
And finally, your dad joke…
How does a pumpkin listen to Halloween music?
On vine-yl.


I think the names show more on the white but I love both. I am going to try this in both colors. I have seen black pumpkins as well. They would look nice with white pen. Ty