
In this review, I’m going to tell you all about my new Createroom Dreambox (aka the coolest craft storage system you can imagine!).
Prefer watching over reading? Feel free to skip right to the video!
Psssst! If you want to buy a Dreambox, they gave me a coupon code for you!
Click here: createroom.com
FOR US or CANADA orders, use code: THEHAPPYEVERCRAFTER for a discount!
The links in this post may be affiliate links where appropriate– including the link to buy a Dreambox! This means that your purchase through these links may result in a a small payout going to me, to support creating further resources like this one! That being said, I will never suggest supplies that I do not personally use and fully recommend!
Okay so… is it worth it?!
In this post, I want to walk you through the whooole process of this thing… what it was like receiving it, what this office looked like before, and ooooobviously how it opens and closes!
I will definitely also be doing some MORE videos and FAQ’s about this baby, so please feel free to leave comments and questions down below!
PART 1: The “Before”
So the first thing to explain is that the timing of this Dreambox was perfect for me. I actually ordered this DreamBox at the same time that I was moving into my new house (and new studio)!
Before I moved here, I had a tiiiiiiny studio with 3 measly Ikea shelves and a closet PACKED full of unorganized boxes.
And speaking of boxes… here they all are, piled into my new studio once the movers were finished.
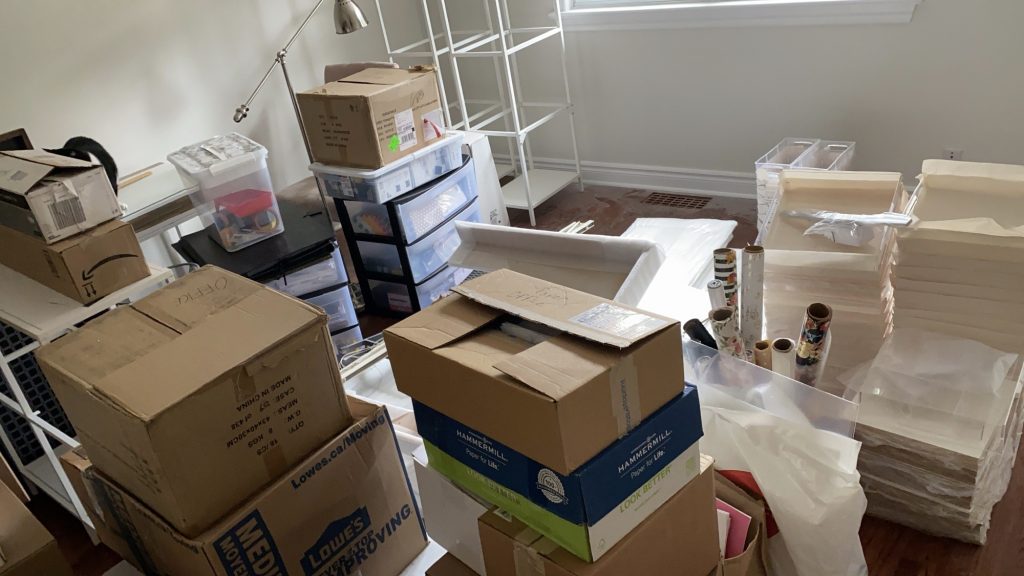
I have a LOT of art supplies, and I’ll be honest, they were NOT organized very well.
So like I said, the timing of my Dreambox order and arrival couldn’t have been better.
PART 2: The “Setup” Phase
The day my Dreambox arrived was the day that kicked off what I like to call “The 3 Stages of Dreambox Emotions.” ?
STAGE 1: Excitement
Pure excitement as the truck pulled up, and all of the obligatory “OMG MY DREAMBOX ARRIVED” photos. (I’ll spare you, and only show you one of them, LOL!)
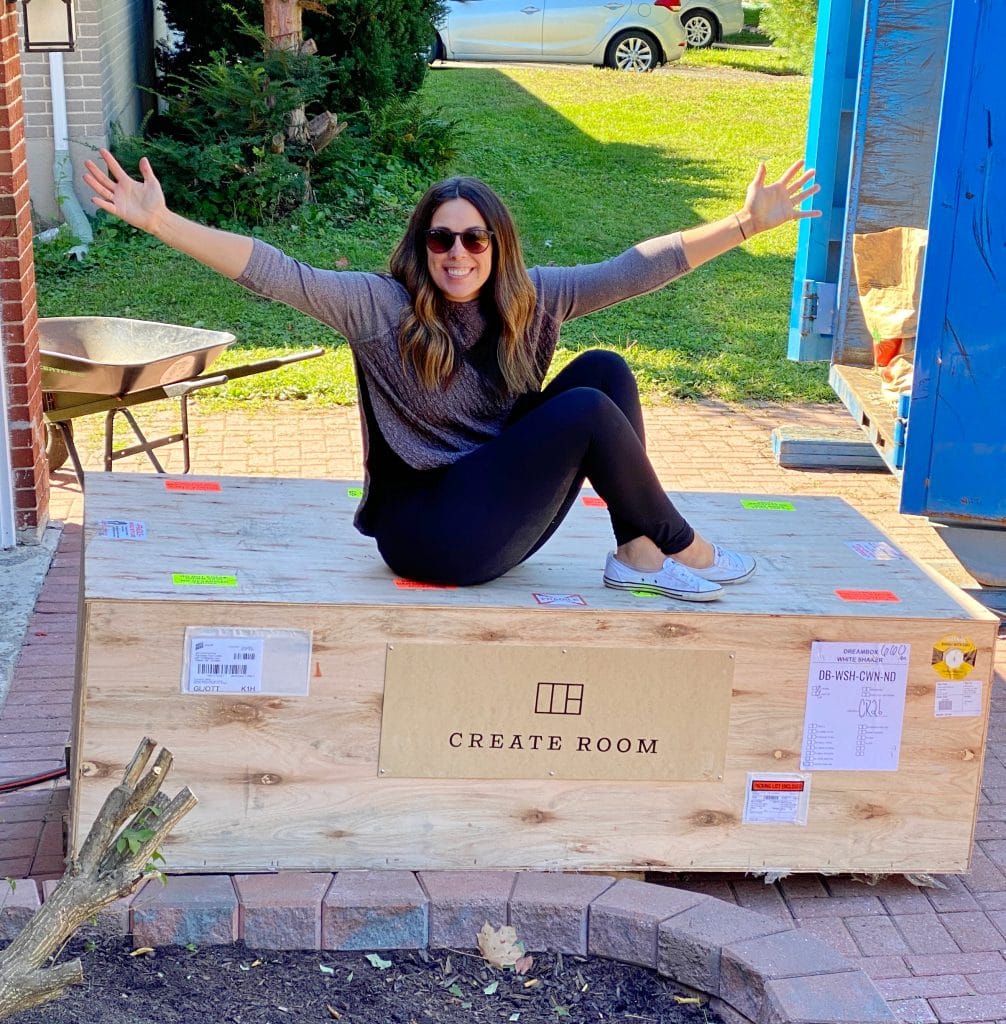
STAGE 2: Panic
The realization and sheer panic after realizing that this box was labeled “660lbs” and the delivery man did not bring it inside for me. He left it on my driveway. (*Note: see the YouTube video for a clip of me realizing this in real-time, LOL)
STAGE 3: Acceptance
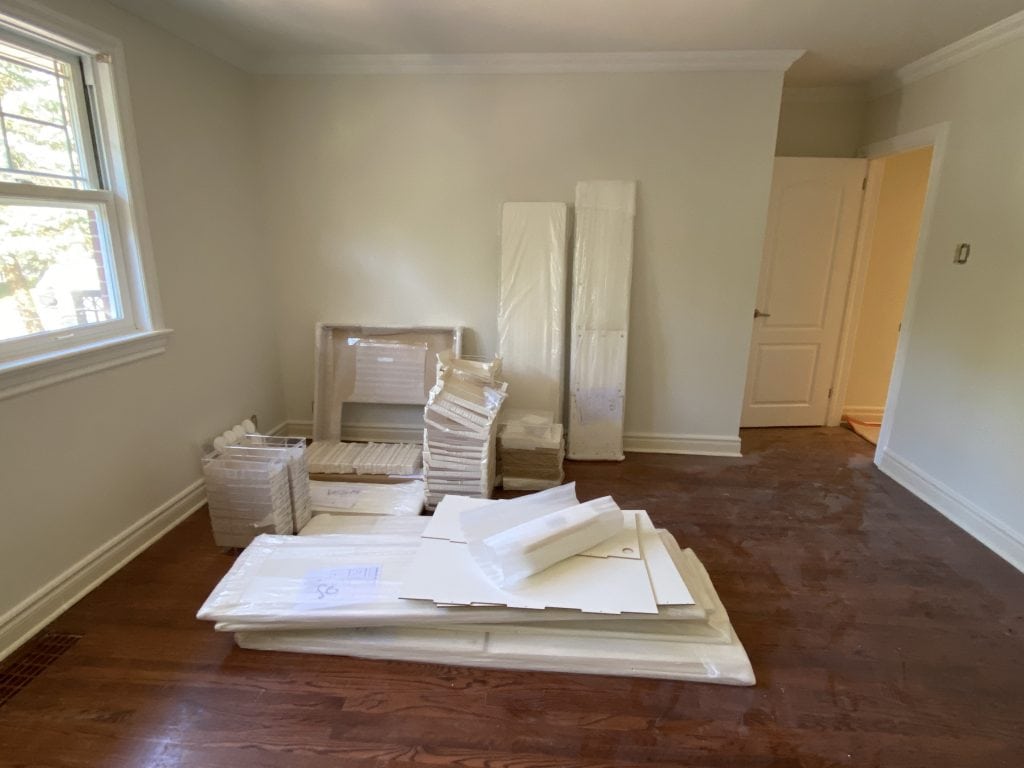
Acceptance of a full-fledged workout, that is. I realized the only logical way to get this giant box into my house was to do it in pieces. So I opened up the box and carried it all inside, piece by piece. Honestly, it wasn’t bad– the pieces were broken up in a way that made it super easy for me to do by myself.
Note: if you’re in the USA, you CAN get a “pre-built” version that comes in a few bigger chunks instead of having to assemble each piece. We just don’t have that option in Canada!
Once I got everything in and my workout was over, the excitement kicked back in. Now that it was all in the room, I was genuinely just SO excited to get it all set up!
My lovely fiancé, though? Not as excited as I was ?. He was in charge of putting it all together, while I unpacked all the art supply boxes I showed you earlier.
I’ve gotten a lot of questions about how long it him took to build, and the answer is truthfully about 7 hours. It’s not difficult assembly, it’s just a lot of steps and small pieces.
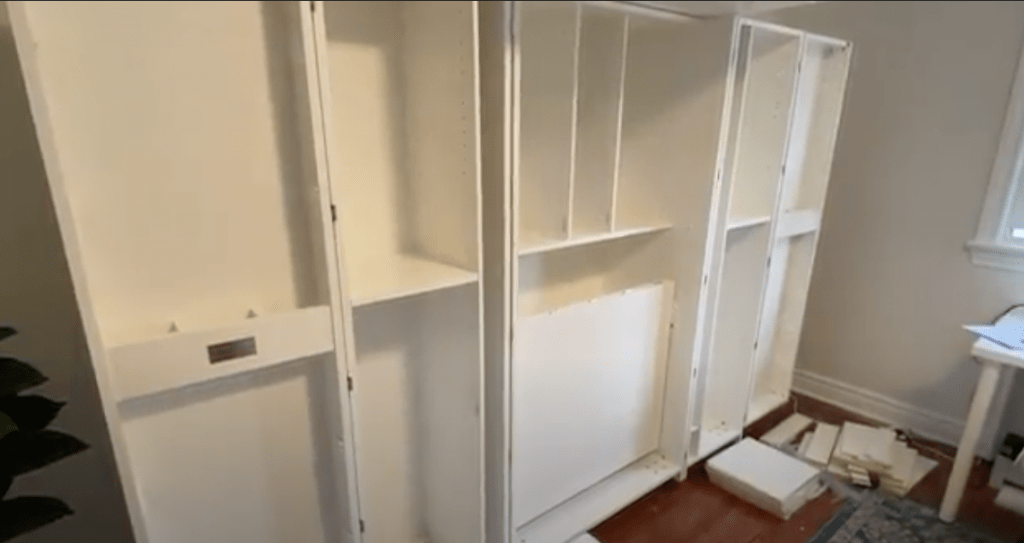
Once the actual shell was built though, I’m not gonna lie… I got totally paralyzed by HOW I wanted to fill this thing. Should I just use the recommended layout the CreateRoom team provides, for where all the bins and rods and everything should go? OR, should I scroll Pinterest and YouTube seeing what everyone ELSE has done, and then do something creative to make mine extra special?
In the end, I did both of those things.
I’m very much a “done is better than perfect” person, so I decided to set mine up in the basic, recommended way for now. Then, over time, I can tweak and perfect it. Stay tuned for that!
Createroom even provides a printable you can use to plan where everything will go– here’s a shot of my plan before I put it all in!
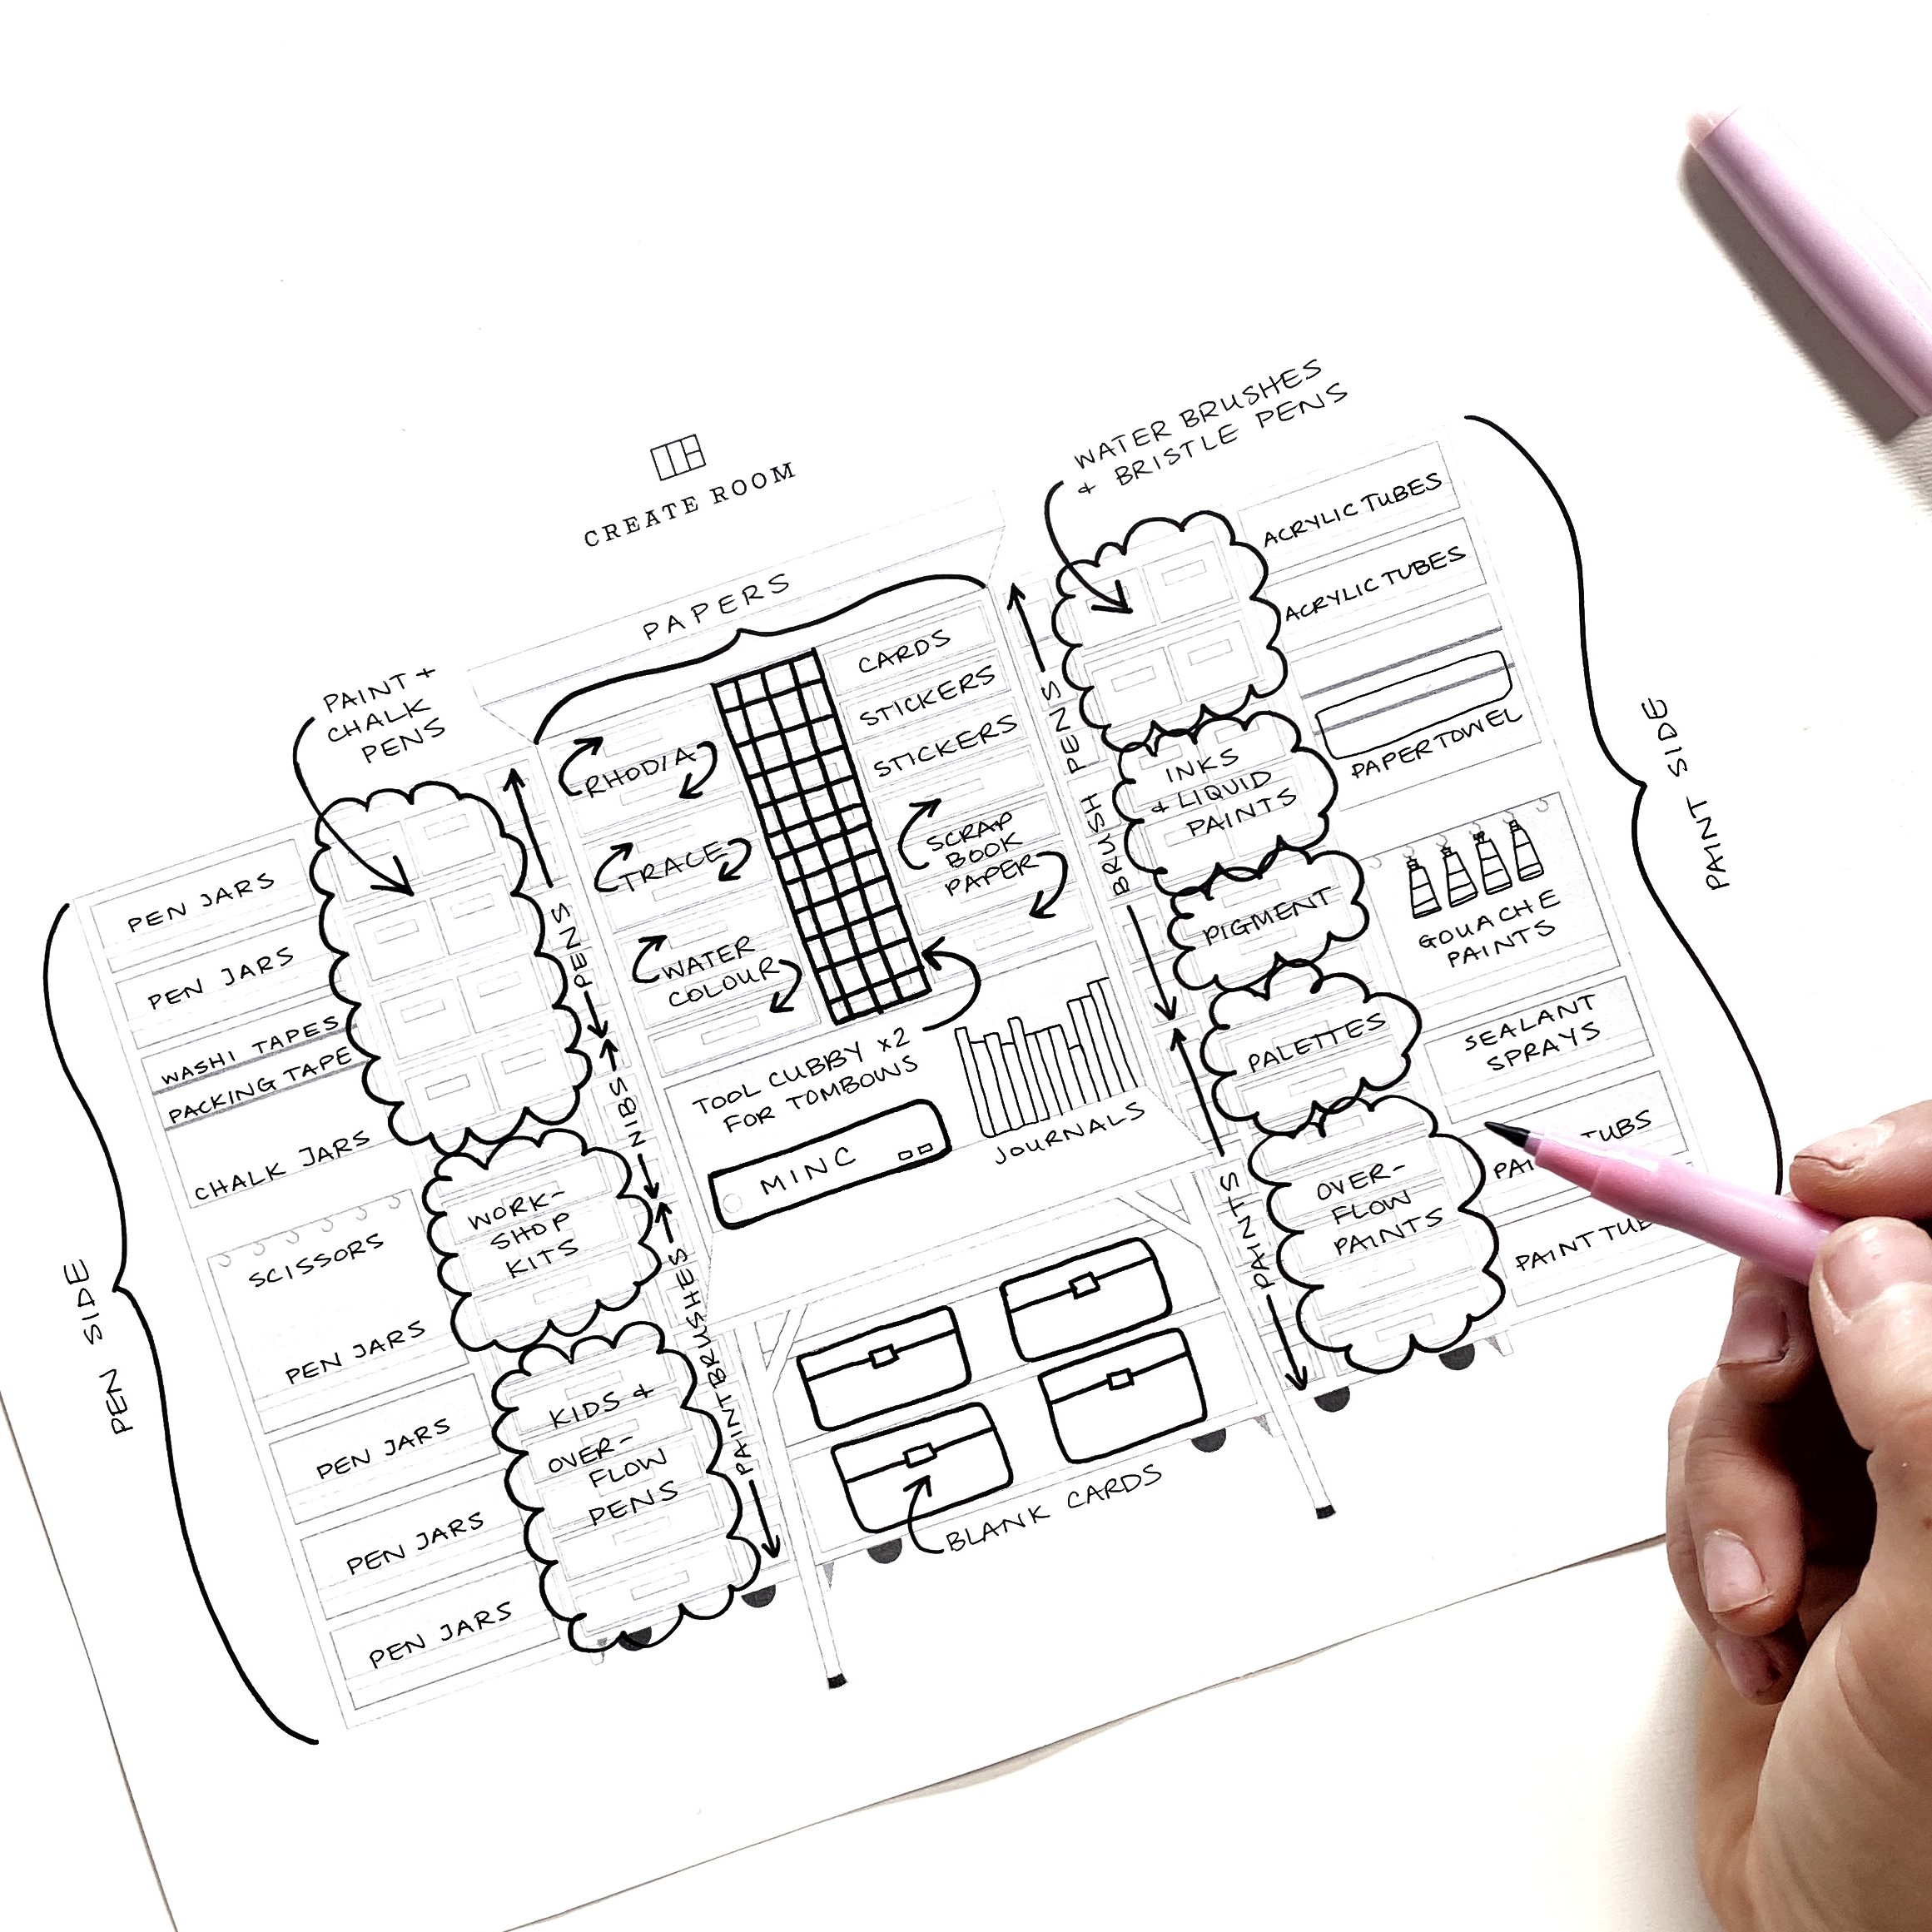
Once I had my plan, I was ready to fill it all up.
In my YouTube video, I show a whole hyperlapse of that process– so make sure you check it out to watch it happen!
PART 3: The “After” Phase

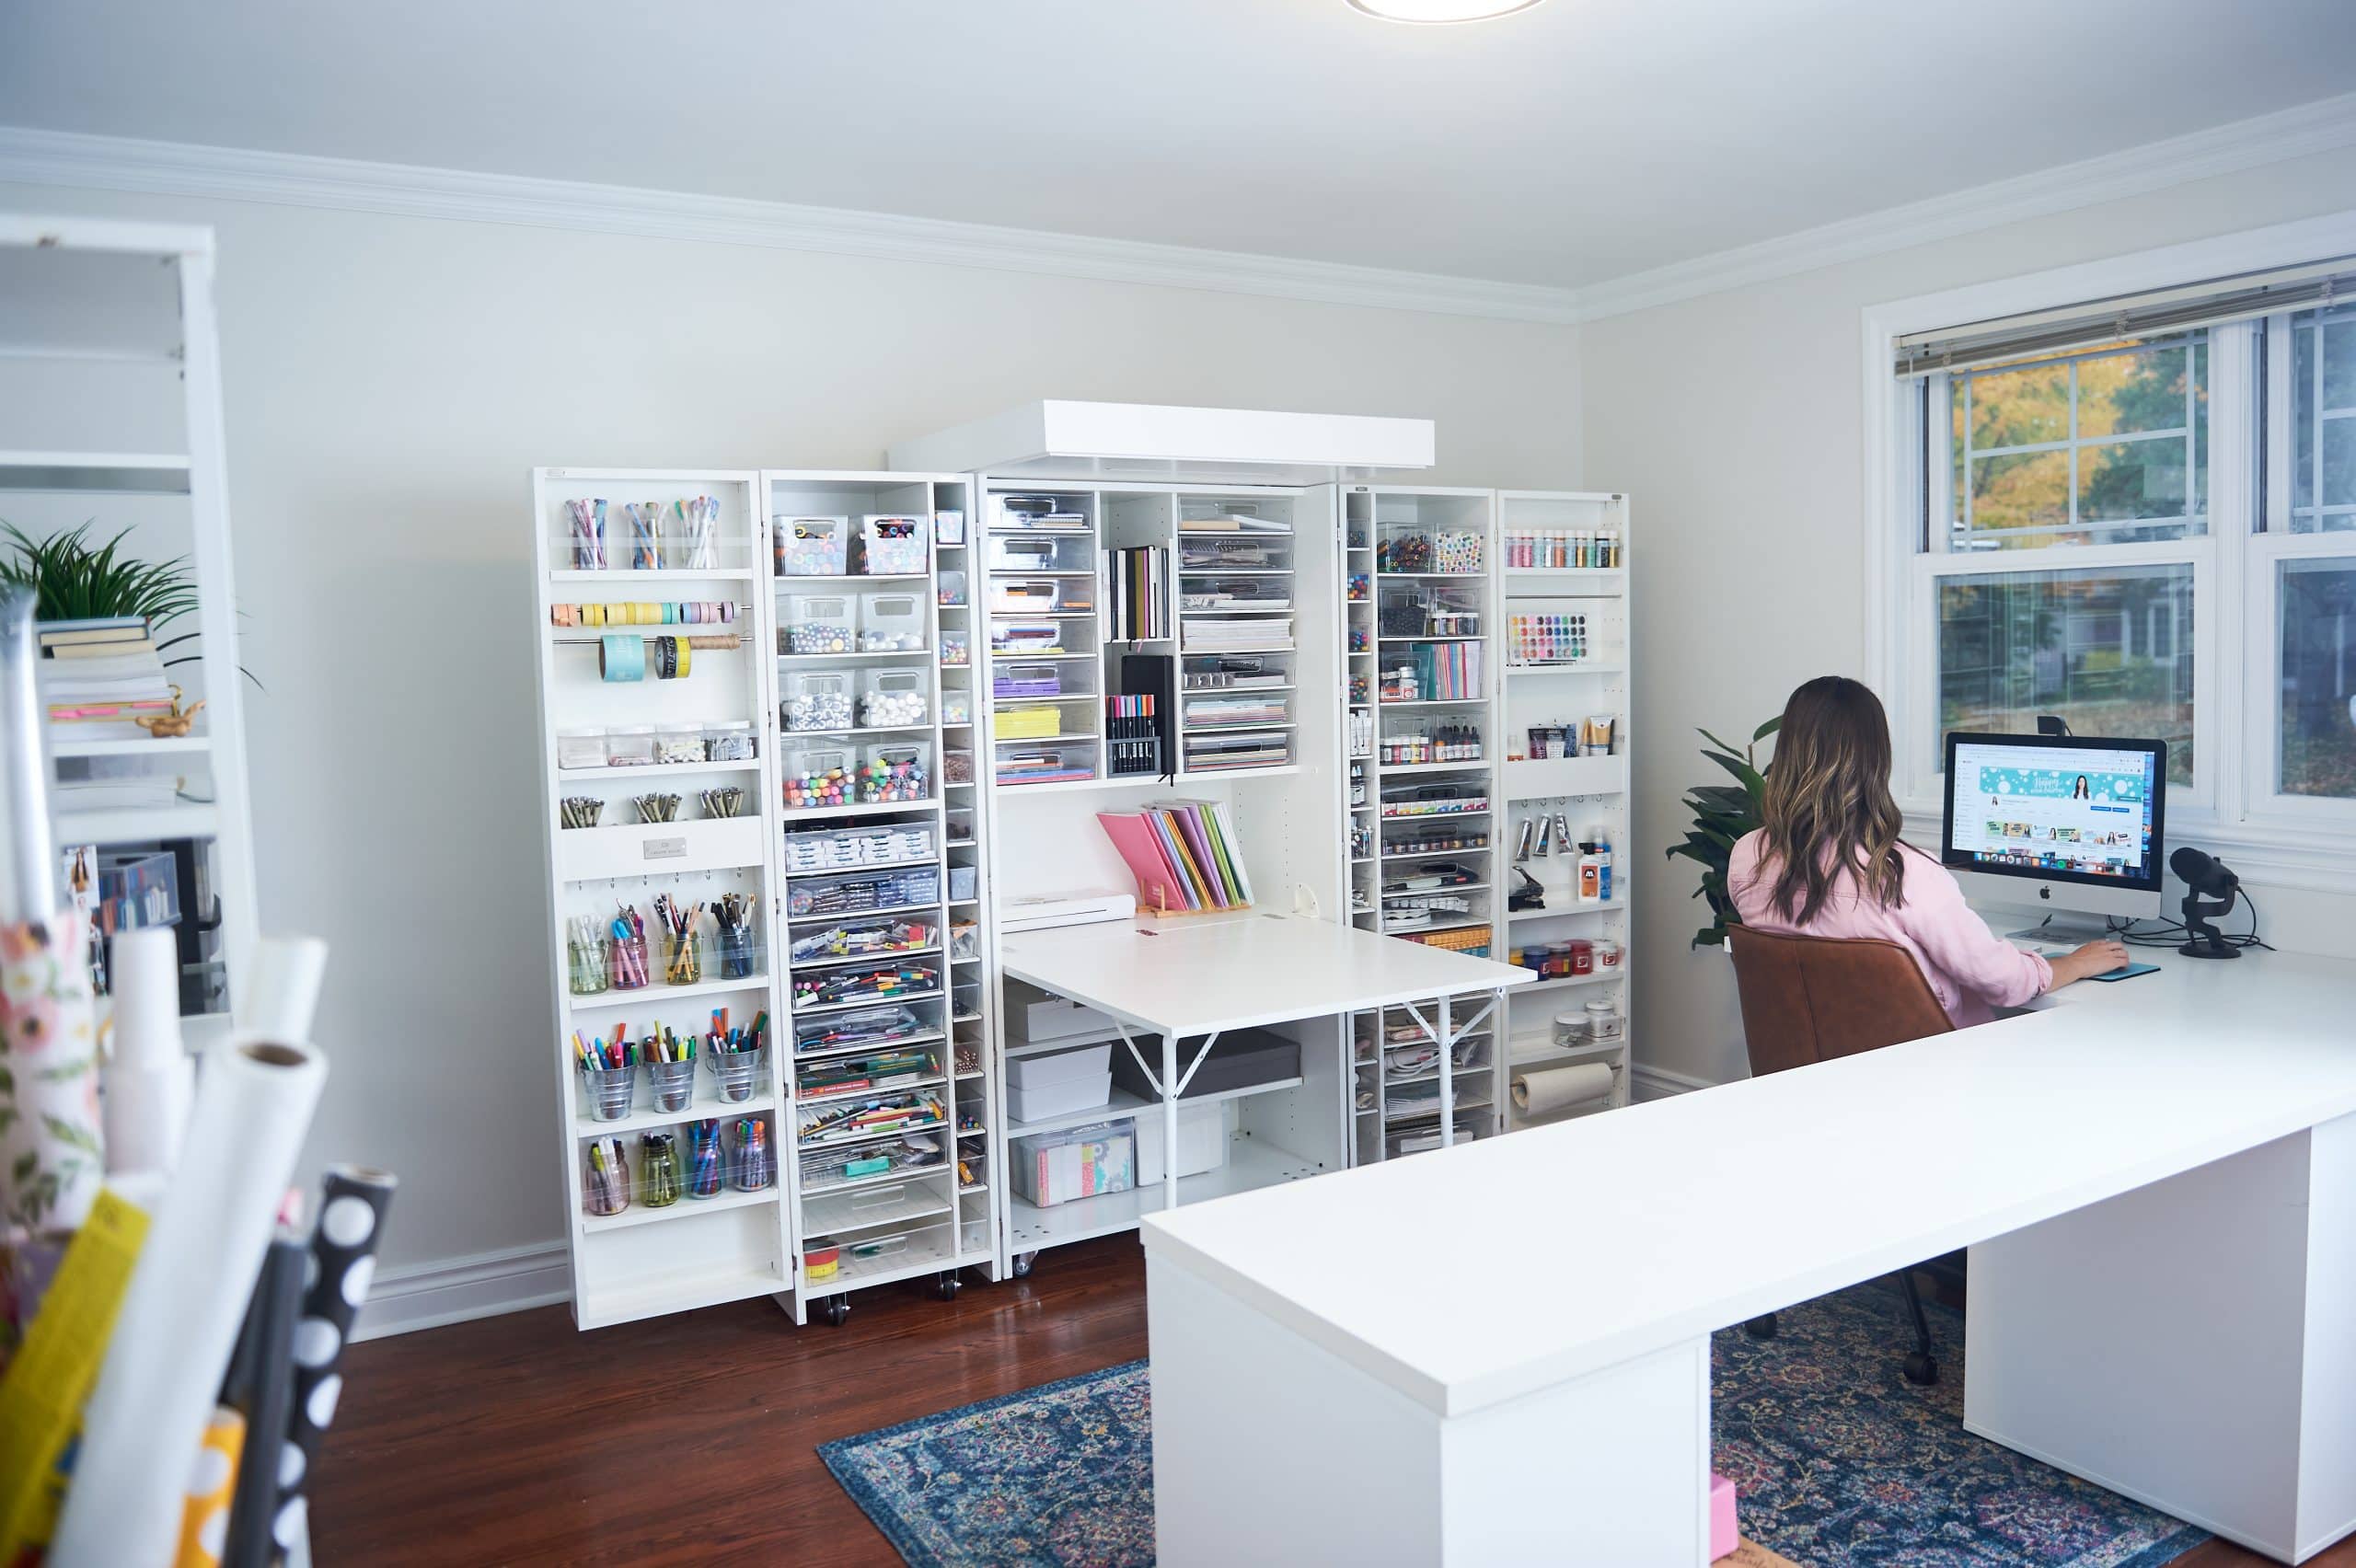
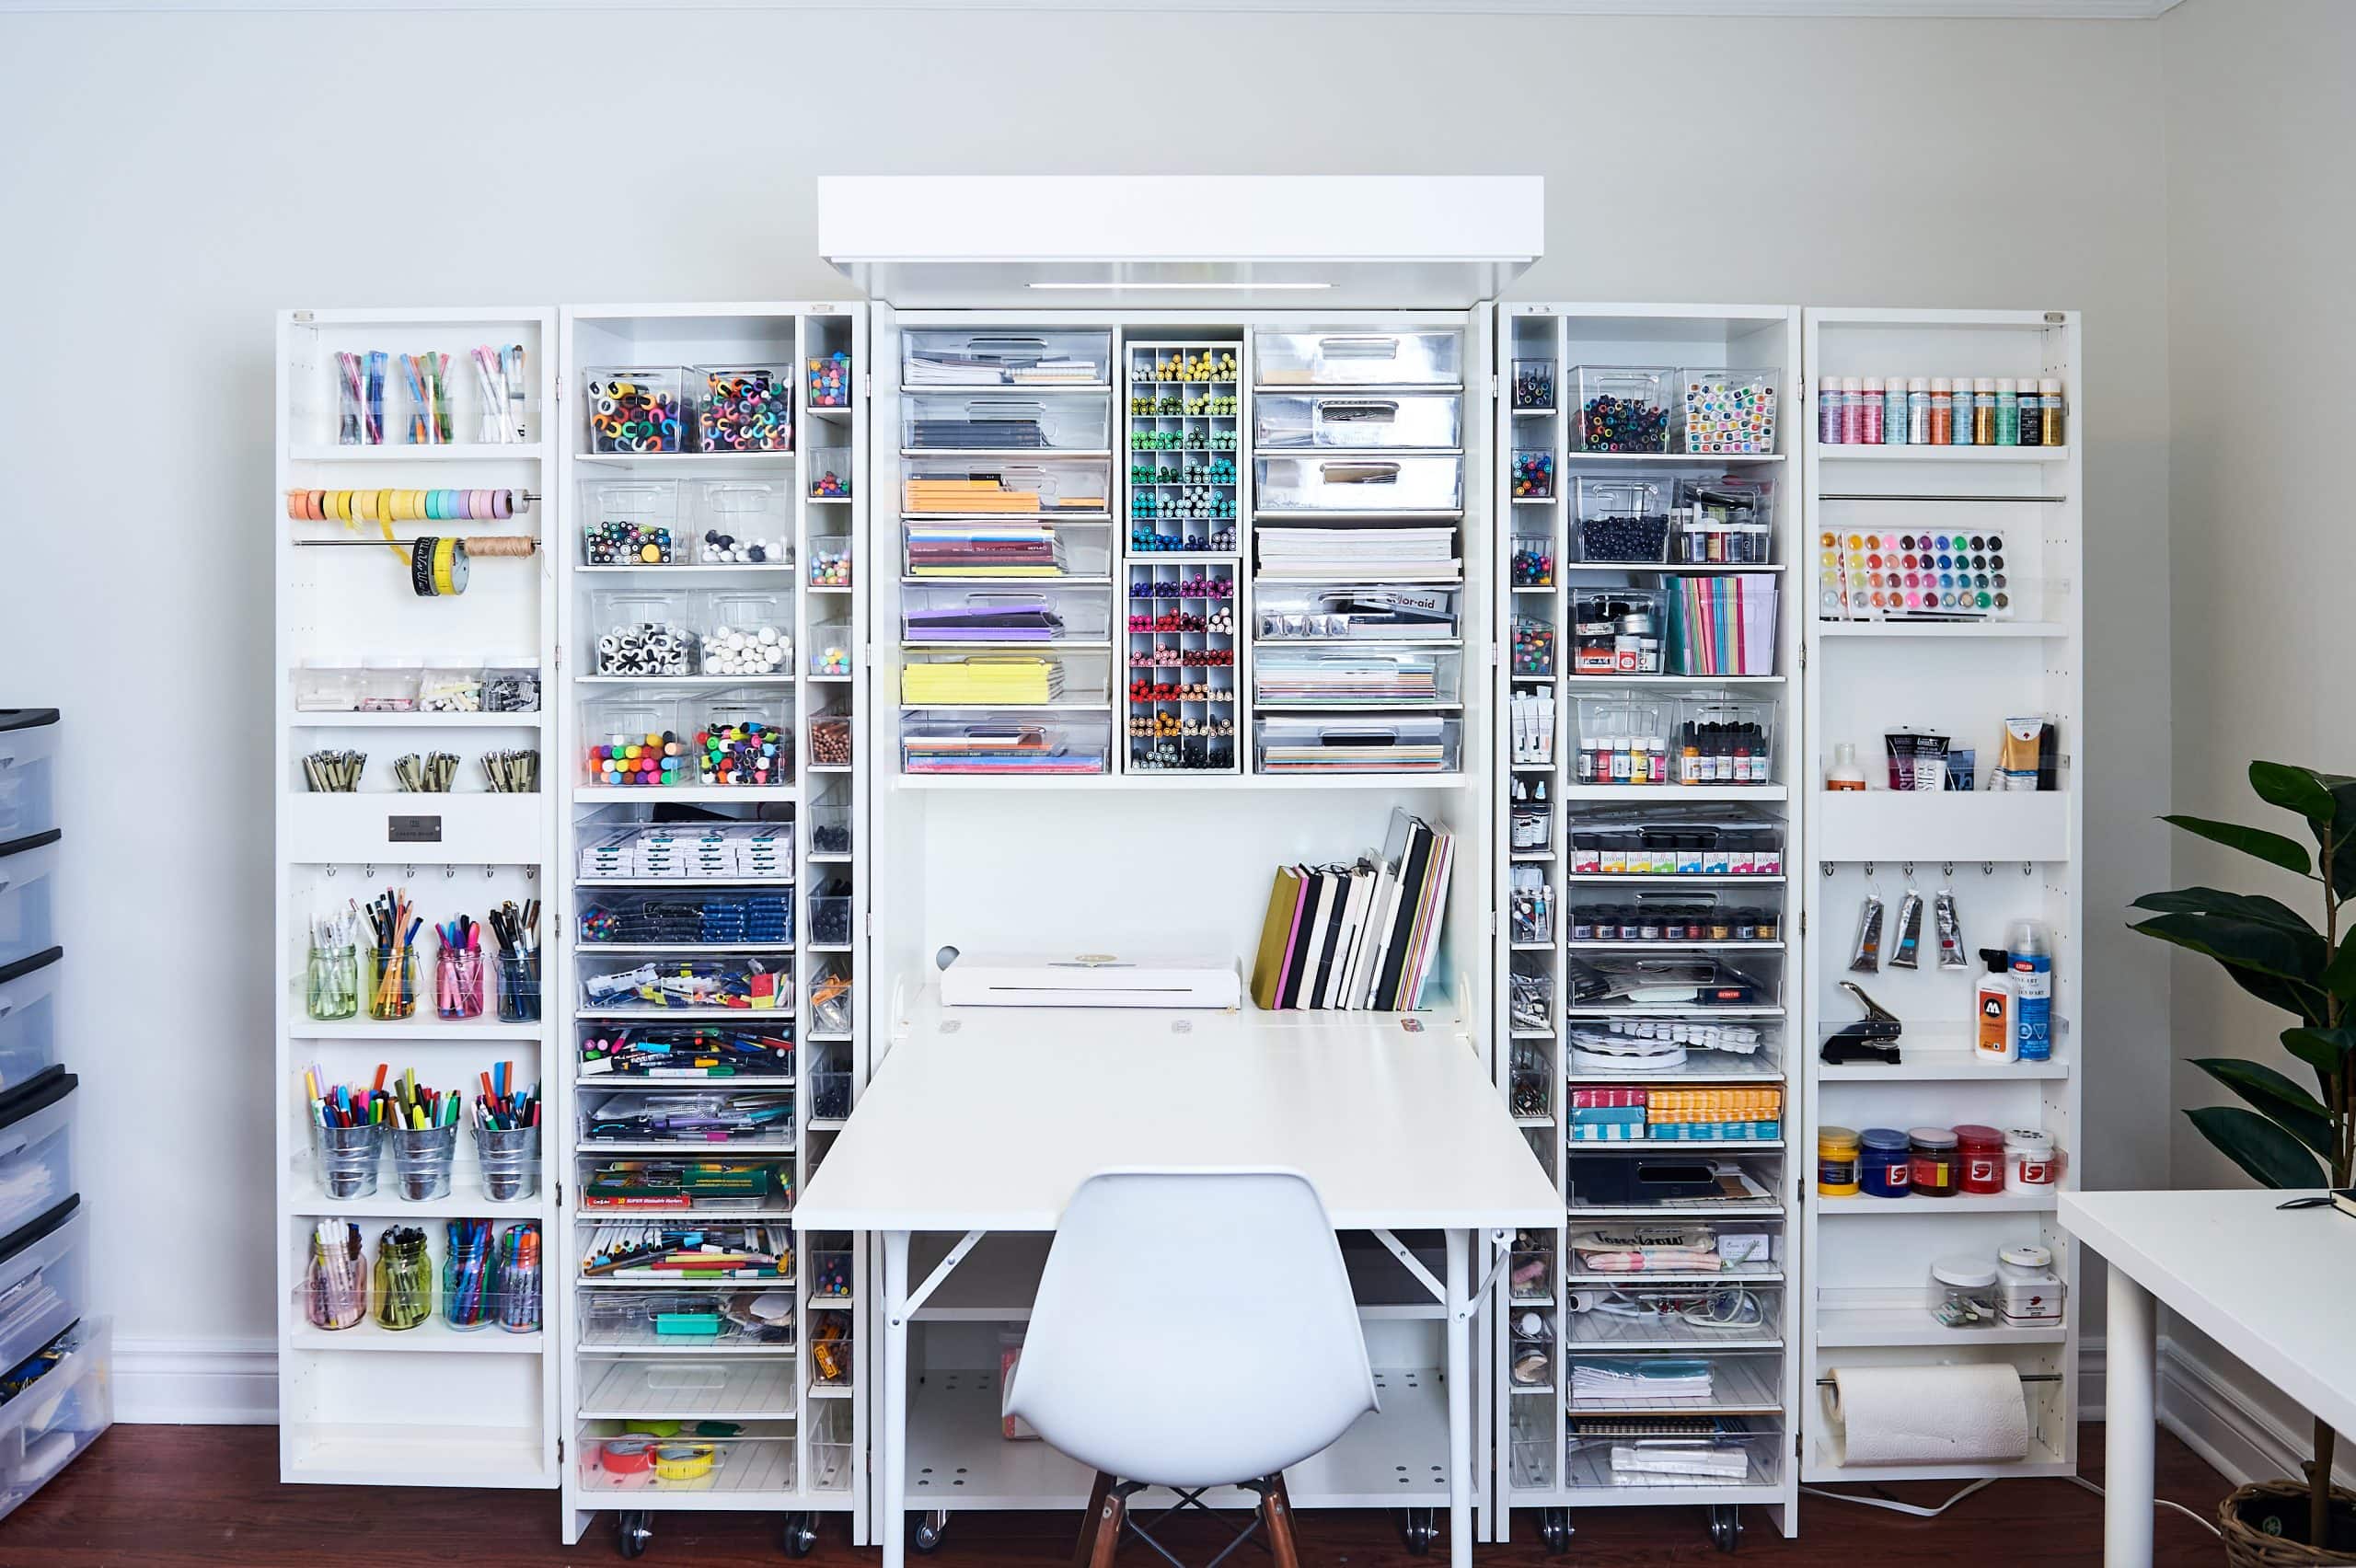
I’ll definitely do a full video showing exactly what supplies I put where and a tour of the whole thing, but for now, I will say… the Dreambox has toooootally met, and even exceeded, my expectations!! It has totally changed the game for me in terms of being able to actually quickly FIND the things I need for projects and for filming tutorials. It’s sooo much easier now knowing EXACTLY where things go to put them back, and keeping things tidy instead of having piles of items everywhere in my studio.
Plus, it folds up SOOO easily! Everything’s on wheels and is super intuitive.
I did take me a full day to get everything in and set up but… I can tell you, IT WAS WORTH IT!
And that’s a wrap!
I hope you found this review helpful, and if so, hit the subscribe button on YouTube to stay tuned for Part 2!


Floral! To be fair, I really dislike chalkboards 😀
I would absolutely go for floral illustrations. It would make your DREAMBOX more aesthetic and beautiful. The white background of your Dreambox panel will look good with floral illustrations.
Definitely go with the floral option – if you have it always open, you won’t see those panels enough to use them effectively if it’s chalk – you would end up not seeing them for weeks and forgetting what you wrote 🙂
I think doing chalk paint surrounded by flowers on both sides could work. What a nice decision problem to have!!
Definitely a chalkboard I love that idea. Later if you don’t want it you can paint over and do florals.
Wish you well with whatever you decide.?
I actually really like both ideas…what if you did 1 side chalkboard and the other side with floral mural? Just my thought! God bless!
Chalk paint surrounded by florals…but only florals that look good when the unit is closed and keeping in mind that that’s the only time you would see your lists, etc. on the chalkboard paint panels….would a cork board or ribbon matrix picture board be an option??
Where did you get the “L” shaped desk shown in the last picture?