In this post, I’m gonna show you my #1 most used hack for lettering on signage.
Seriously, I use this baaaaasically every time I do a signage job.
The chalk transfer.
And by the way, before we jump in, if you’re into using your lettering/calligraphy for signage jobs or are interested in more things like this, go to www.signingupcourse.com. Just saying.
First Things First…
The links below may be affiliate links where appropriate. This means that your purchase through these links may result in a few cents in payment to me, to support creating further resources like this one! That being said, I will never suggest supplies that I do not personally use and fully recommend.
Supplies Used
- Your design on paper… basically whatever you want to transfer onto your sign
- Chalk
- Sharpener
- Pencil
- Your signage item
- Light box or light pad (optional) – I used the Cricut BrightPad
Rather watch than read? No problem! You can watch me complete a chalk transfer in real-time by clicking the video below!
Let’s Get Started!
For starters, you’re going to need your design. It can be digital or hand drawn. It can be on transfer paper, printer paper, card stock – it can be on pretty much any kind of paper. It needs to be the size you want it on your sign though.
For mine, I digitized my lettering and created this design that I want to transfer.
You’re also going to want chalk, a sharpener, and a pencil. You also want your sign.
This is optional, but you might want a light box. Again: totally optional!
Time for a step-by-step of how to transfer this exact design onto a sign without having to draw guidelines or do any rough copies or aaaanything. It is just sooooo much easier to do your writing or drawing on paper as opposed to on big signs… so anywhere I can get away with using this method, I do.
This method is AMAZING for intricate designs. Like if you’re doing, say, a super complicated logo that a client wants you to recreate. Instead of freehanding it and hoping you’re a good enough drawer, just transfer! It’ll look a lot more perfect using this method.
Another example – if I were to do a giant chalkboard menu at a restaurant on site, I would do my entire design on paper ahead of time at home before going. I’d get a giant roll of paper and write everything out on the paper beforehand to the exact scale I needed. And then I would use this exact method when I get on site – I could just show up, transfer, and not have to measure or use guidelines or ANYTHING. It saves a ton of time and a ton of mistakes.
And for those of you thinking this is cheating, it’s not! It’s working smarter not harder. These are my designs, and I’m the one transferring them. I’m not cheating anything – I’m just saving myself a ton of time.
So here’s what you do…
Step 1: Trace over the back of your design with chalk.
Take your design, flip it over, and take your chalk to trace over it.
I used a really thick paper that’s hard to see through, so I used my light pad for this just so I can see easier. You could even hold this up to a window if you need to!
Pro-tip: Sharpen your chalk. Having the chalk have a sharp point makes it much easier to use and much more precise.
Yes, chalk can be messy. Don’t care. This hack is still worth it.
With sharpened chalk, trace over everything – all of the lines, the full design. You don’t have to fill things in though (espeically with block letters). Just an outline of everything will work. It’s up to you though. I just find the less chalk dust on the paper the better.
Your chalk lines also don’t have to be perfectly perfect. If it’s something suuuuuper intricate that you don’t think you can fix freehand, be more careful with your chalk tracing. For my lettering though, I know my chalk tracing can be pretty rough because I can fix it freehand. Especially on my calligraphy lettering. I have the skills needed to do it freehand, so I’m not worried if my tracing isn’t perfect.
For my calligraphy parts, I just give myself a rough outline. I don’t distinguish between thin and thick lines. If you are more comfortable doing that though, go for it! Feel free to trace over your lettering perfectly, so your chalk transfer has everything you need. The more precise your chalk tracing is, the more precise your transfer will be.
Once all the tracing is done, you don’t need the bright pad anymore.
You can see the chalk on my design here:
Grab your sign (make sure it’s clean and prepped), and line up your design wherever you want it to go on your sign (center it or however you need to line it up). You can tape your chalk transfer to your sign to make sure it doesn’t move around.
Step 2: Retrace your design to imprint the chalk on your sign.
Once it’s lined up where you want it, trace over it again with your pencil, pressing nice and hard. You want to make sure the chalk on the back is transferring to your sign.
For client jobs, I definitely recommend being precise here. But since this is just for me, I’m not too worried about it.
There’s another method for retracing with your pencil if you don’t want to go over your redesign line by line. This method isn’t my favourite because I like to be a bit more precise. But because you don’t have chalk on your design on the back, you could do this with your pencil:
This will transfer any chalk that’s on the back in this area. I just don’t love using my pencil that way. I’d rather just do the regular method of retracing. It’s up to you though! The scribbling method is good if you’re really in a rush.
Essentially the goal here is to put enough pressure on the front of your design to transfer the chalk from the back of your design onto your sign.
I’ll add a note here that maaaany people think this only works for chalkboards. And that’s so not the case! I do this with EVERYTHING – wood signs, mirrors, glass, you name it! The harder the surface, the harder you have to press and the more chalk you have to put on, but it definitely works on more than just chalkboards.
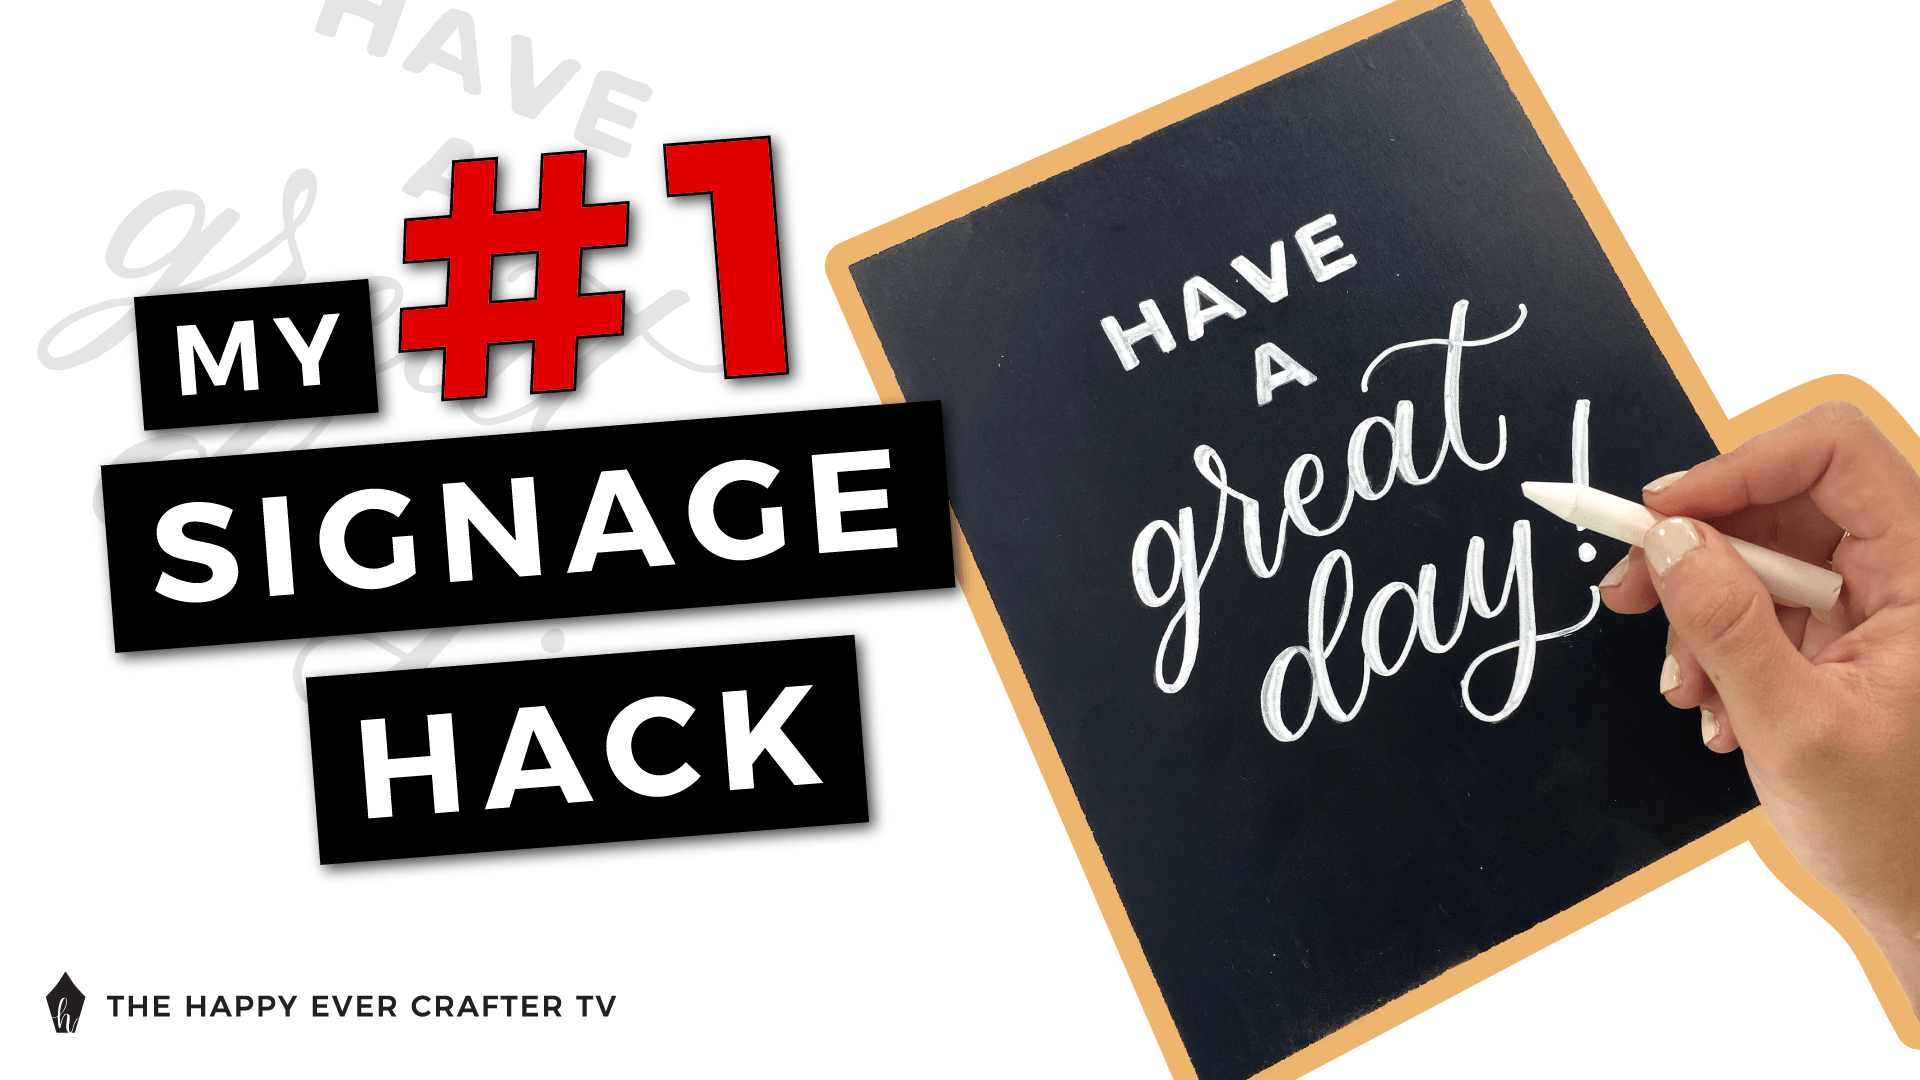
Now for the moment of truth… When you peel off your design, you should have a perfect transfer.
Voila! You have a chalk transfer.
My transfer here was pretty simple. I didn’t go into detail with the thin and thick lines on my calligraphy and I didn’t fill in my block letters, but I can still see the full design.
Step 3: Use your marker/pen to go over your design.
Once your transfer is complete, you can then go over it with whatever tools you’re using. For me, that’s usually chalk markers or paint markers.
I used a Posca paint pen for this project.
You do want to be really careful here because your hand can smudge your chalk transfer.
Paint pens work right overtop of the chalk – no worries there. Again, I’m not being super precise with my paint pen since this project is just for this post, but you get the general idea.
This method is just SO much quicker and saves so much time. I didn’t have to create guidelines or tape up my sign or freehand anything. Which those are all super fair methods of doing things! And that’s the real skillful way to do things. I’m just reeeeally a person who likes to work smarter not harder. I like to work more quickly because it works better for me and for the client. Plus, the projects end up looking better when I use this method. They’re more precise and the outcome is better in the end.
For the calligraphy portions, I can use my general outline for the lettering and then thicken the downstrokes as I go. I naturally and quickly know where those go and can fill them in along the way. I don’t need guidelines for them.
If you’re ever doing a design where artistically you just aren’t super confident, trace it more precisely with your chalk.
And That’s A Wrap!
And there you have it!!
If you have leftover chalk on your sign, wait for your lettering to dry. Then you can go in and remove any of the remaining chalk. If you used chalk or chalk pens for your final design, just use a cotton swab and be suuuuuper careful.
Do this method on any sign, any size, any surface… It saves SOOOOO much time and makes your work SOOO much more precise!!!!!
Don’t Forget!
Last thing I’ll say is again, if you’re interested in signage jobs and learning more hacks like this, I have a course called Signing Up all about that. Go to www.signingupcourse.com!
Here’s another sign related post that I think you’ll love!
And finally, your dad joke…
What did the chalkboard say to the eraser when they broke up?
Can’t we just chalk about it?


Another option is to use white graphite transfer paper instead of the chalk on the back. It will create a crisp line for you and cut the tracing process in half. It’s easy to remove any leftover lines and chalk and paint will go over it easily.
Thank you!
Interesting read. I’m excited to try it and see the results. Thanks for sharing your gift.