
I’m going to show you how to make three, easy hand-lettered holiday tags to add to your gifts!
As a bonus, I’m also going to show you how to “fake it” if you don’t have any tags handy! But first…
Do you know what’s an elf’s favorite kind of music is?
A Christmas Wrap ???
You’re welcome!
In this tutorial, I’m going to show you:
- How to create easy hand-drawn embellishments to jazz up your tags
- Ways to make your giftee’s name pop
- How to fake a tag on a gift if you don’t have any on hand
First Things First…
The links below may be affiliate links where appropriate. This means that your purchase through these links may result in a few cents in payment to me, to support creating further resources like this one! That being said, I will never suggest supplies that I do not personally use and fully recommend.
Tools
- Sakura Pigma Micron Fineliner Pen
- Tombow Brush Pens
- Tombow Fudenosuke Brush Pen
- White Gift Tag
- Ruler
- Uniball Signo White Gel Pen
- Kraft Gift Tag
- Black Sharpie Marker
Now let’s get started!
Prefer watching over reading? Feel free to skip right to the video and see these in real-time! ??
Gift Tag #1: The White Gift Tag
Tools for this one: Black Monoline Pen (the Sakura), Blue Marker (one of the brush pens), a Brush Pen (the Fudenosuke), and of course a white tag.
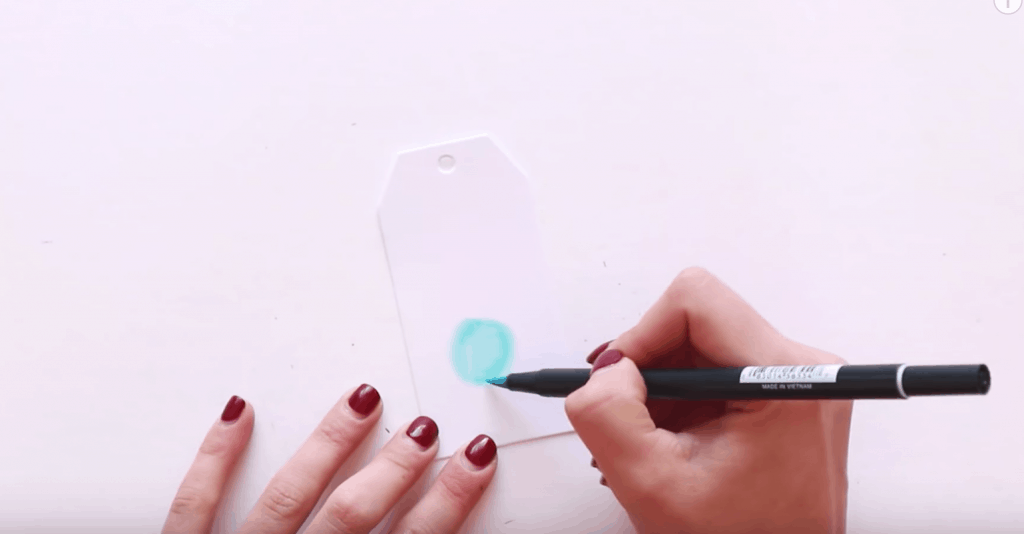
Step 1: Draw a big blue circle and the bottom of your tag
Step 2: Write out your lucky giftee’s name using your brush pen
Note: If the name you’re writing is longer, adjust the dimensions of how big you are writing the name.
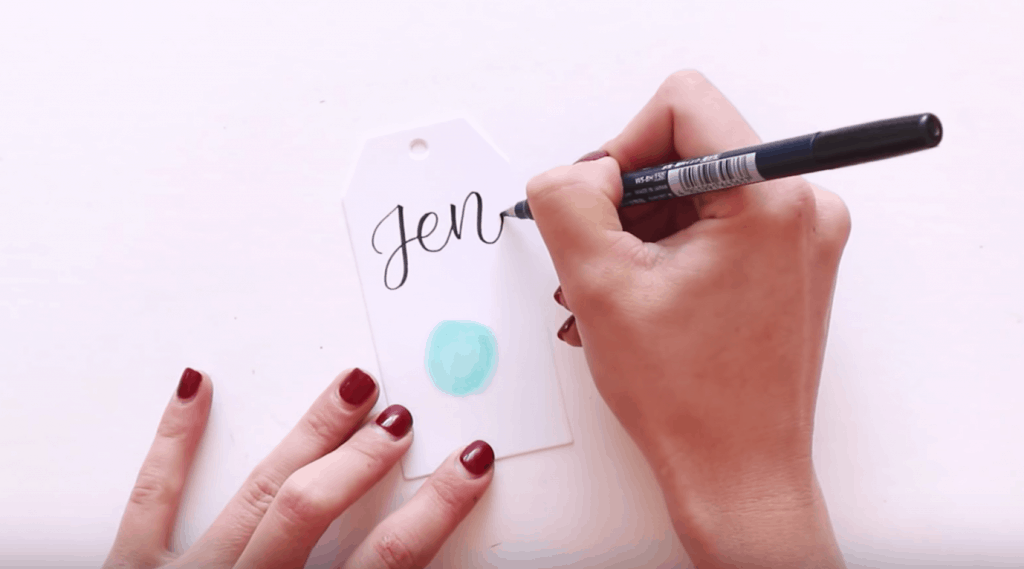
Go ahead and thicken your lines if they look too thin. You could also use a thicker brush pen right off the bat.
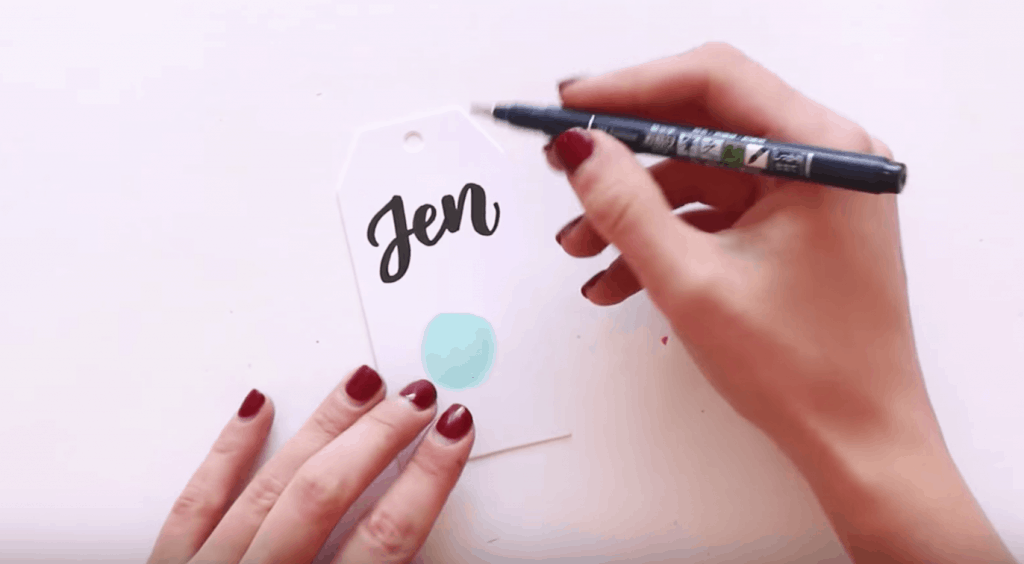
Step 3: Draw a snowflake on your blue circle using your monoline pen
Start by drawing a wide “X” across the blue circle, followed by a line directly down the middle.
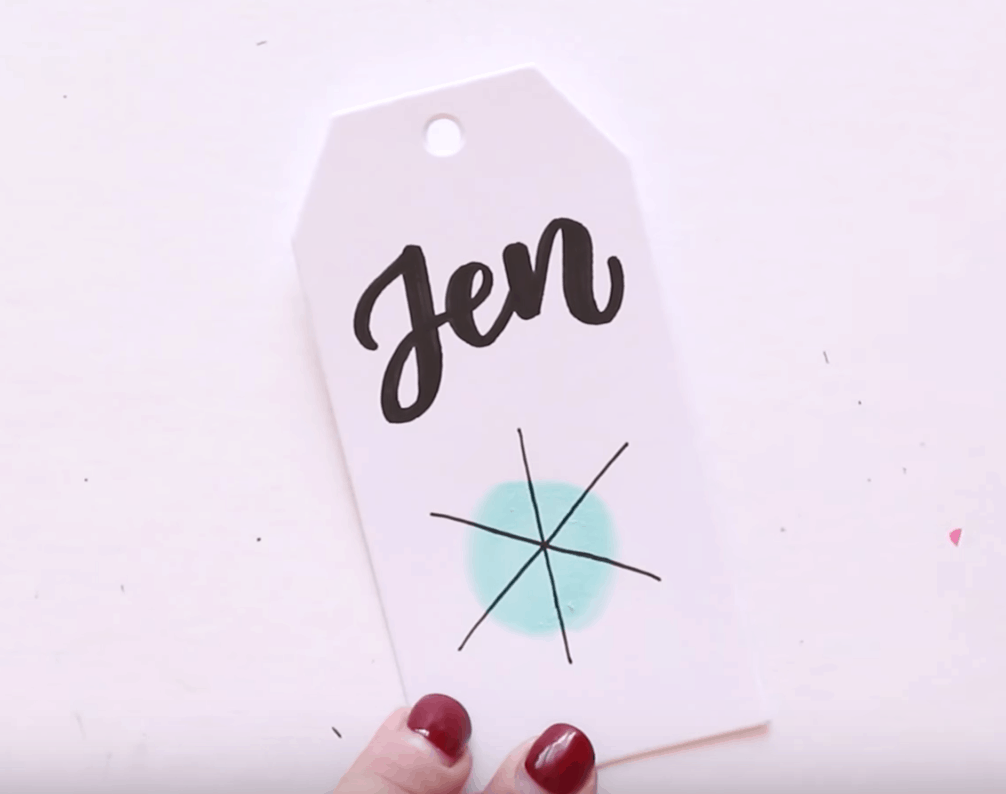
Follow with drawing in open triangles in between each of the six lines.
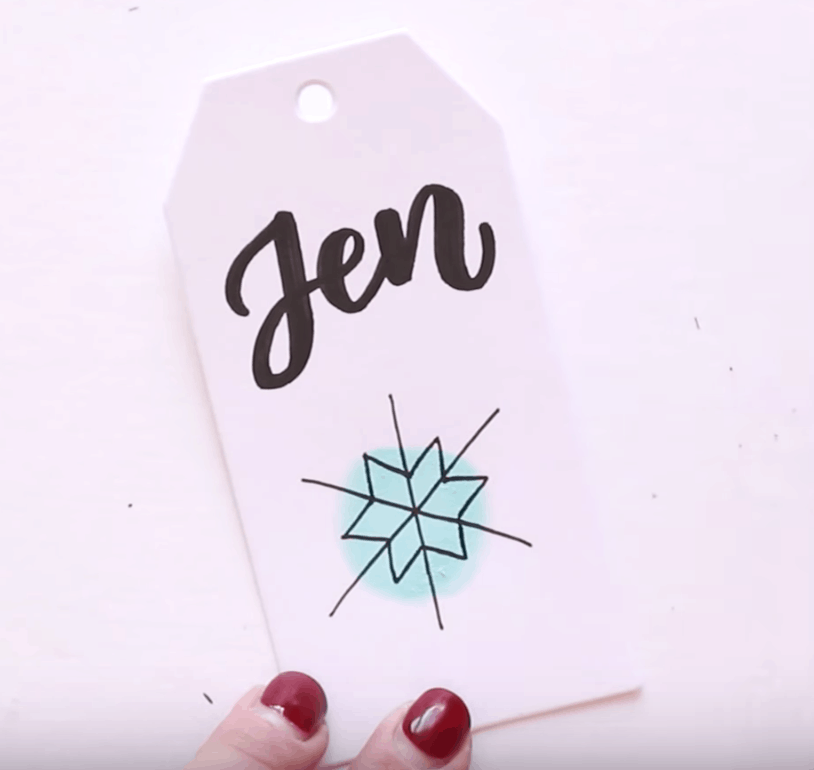
Now add in some arrows.
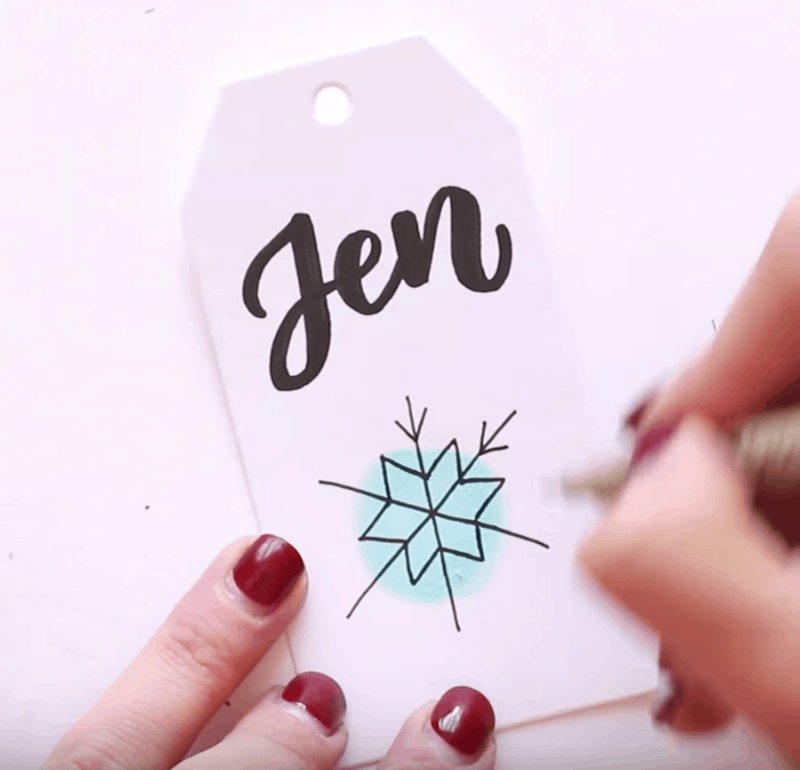
Step 4: Embellish your tag with tiny snowflakes
Lastly, add in some little circles and dots throughout the tag to resemble little snowflakes, and fill in the rest of the card this way.

Step 5: Leave some room at the bottom to sign your name

Lastly, go ahead and fill in the any empty spots with some more circles and dots!
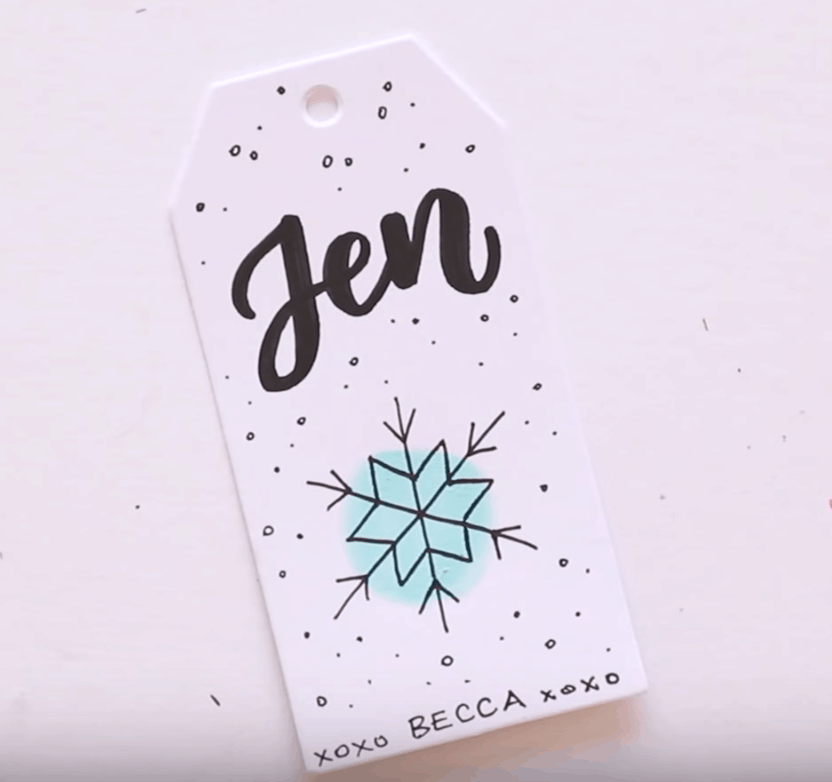
You can also take your blue marker and add some shading to the letters to make them pop. Check out this video on shading if you’ve never tried.

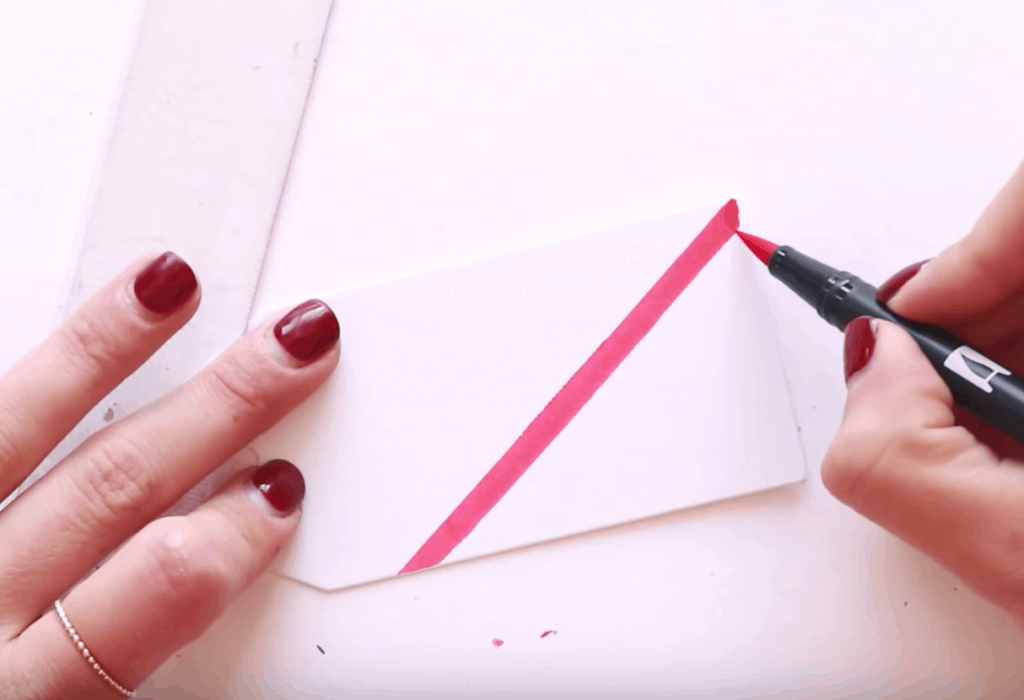
Gift Tag #2: The Non-Customized Gift Tag
Tools for this one: Black Monoline Pen (the Sakura), Red Marker (one of the brush pens), a ruler, and another white tag.
This is a great tag to add as just some extra decor, and since it’s one-sided artwork, you can always add some customized names to the back.
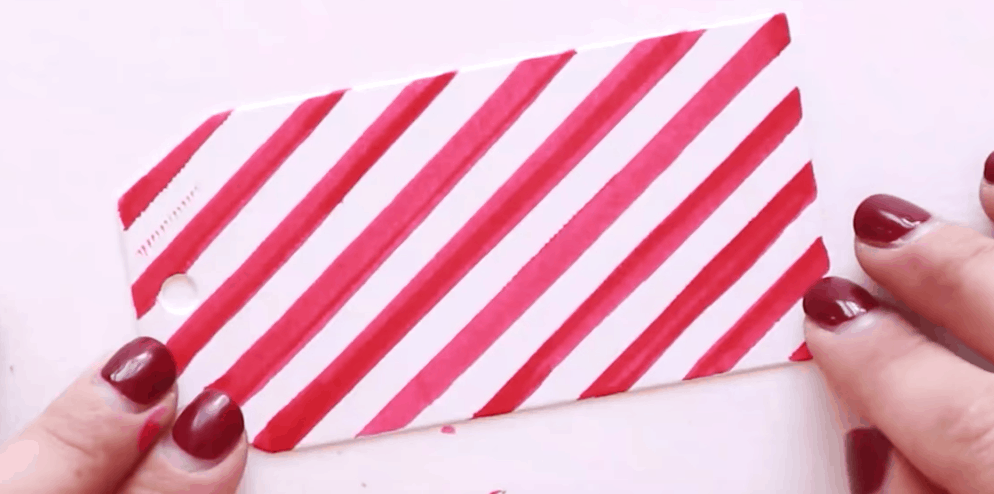
Step 1: Draw a diagonal line with your red marker
Starting at one corner and using your ruler, draw a diagonal line.
Step 2: Fill out the whole tag with similar lines at the same angle
Make sure to space each line with approximately the same width.
Step 3: Write “HO HO HO” with your black monoline pen throughout the white areas
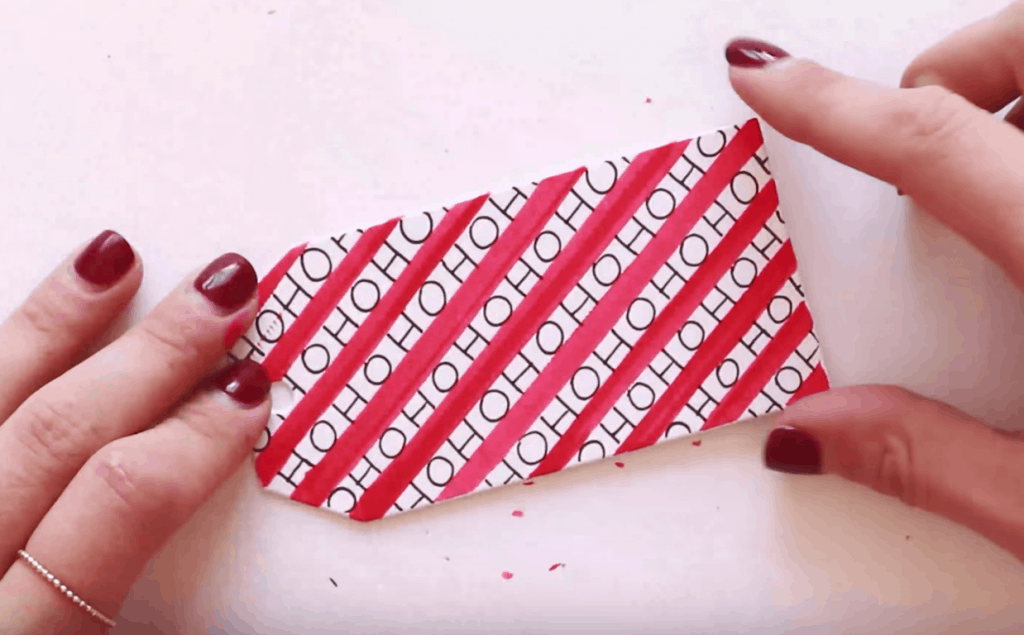
And that’s really it for this one! It’s so super-duper simple. If you wanted to, you could always continue the design on the back, or alternatively write in someone’s name overtop. You could always swap out the “Ho ho ho” wording for someone’s name for another fun idea.
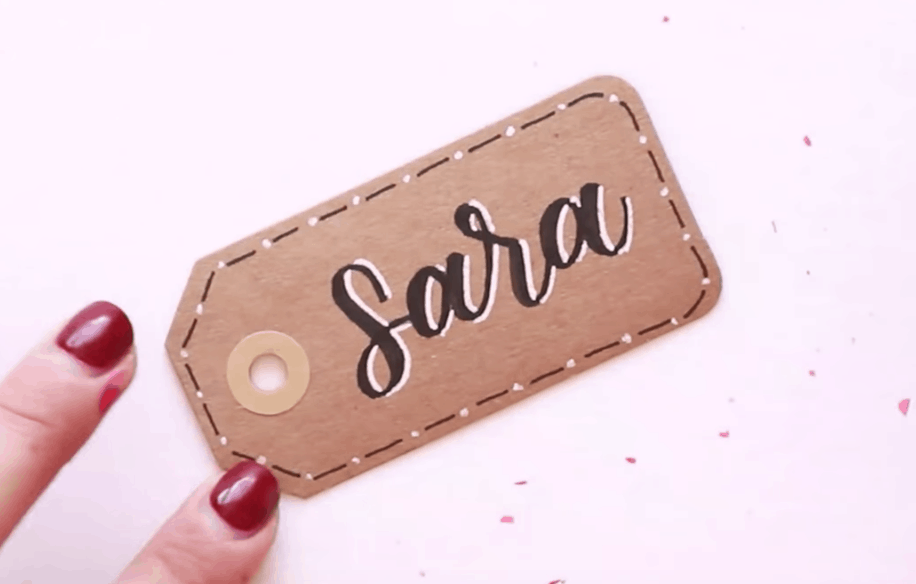
Gift Tag #2: The Non-Holiday Gift Tag
Tools for this one: Black Monoline Pen (the Sakura), Black Marker (one of the brush pens), a white gel pen, and a brown tag (the Kraft one).
This is a great versatile non-denominational gift tag option!
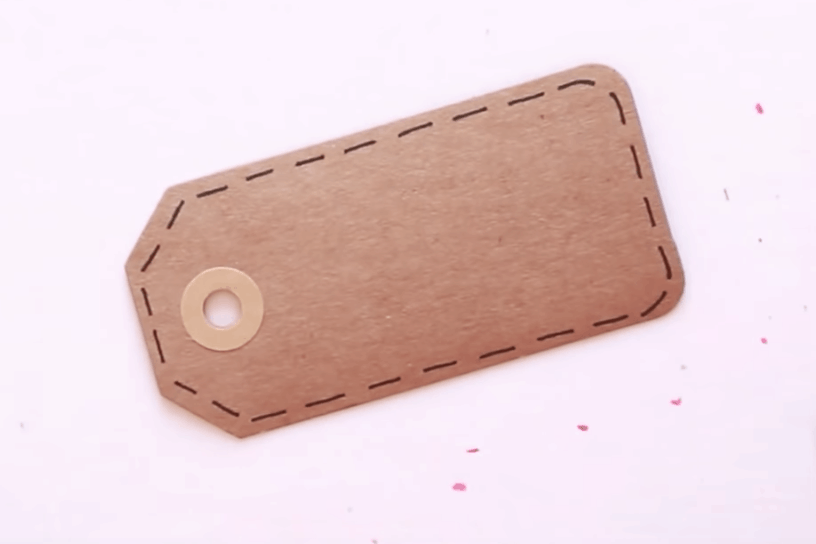
Step 1: Using your black monoline pen, draw a dashed outline around the tag
You want each dashed line to be the same length and spaced evenly all the way around. Note that when you get to a curved portion of the gift tag, follow the curve by doing the same with your line.
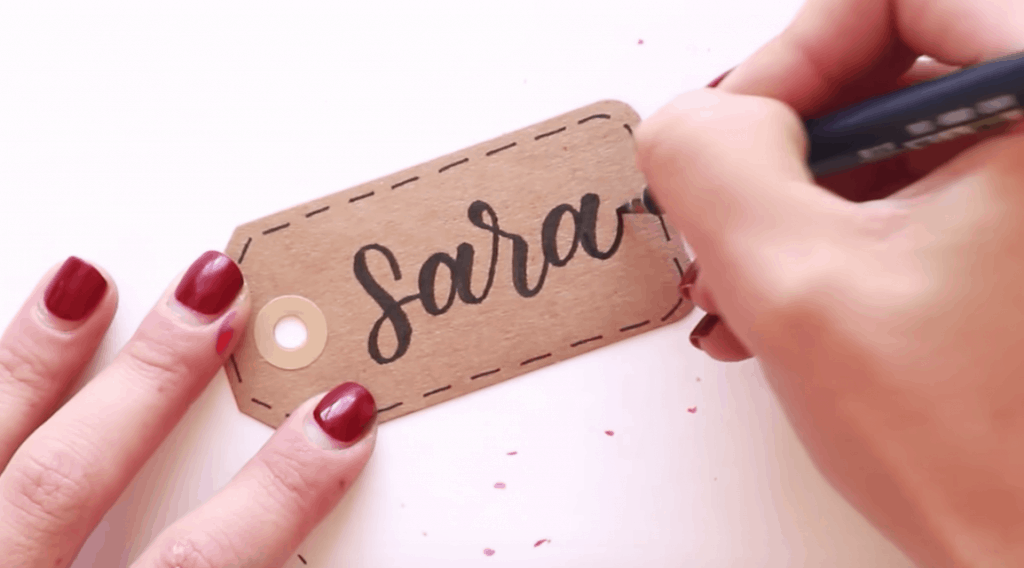
Step 2: Write your giftee’s name using your black brush pen
Because I am experienced with calligraphy, I am going to just jump right into lettering the person’s name, but if you’re new to calligraphy, check out this video for a beginner’s guide. And of course, and standard writing will work as well!
Step 3: Add a shadow line with your white gel pen
For the shadowing, you are essentially going along the right side of every stroke.

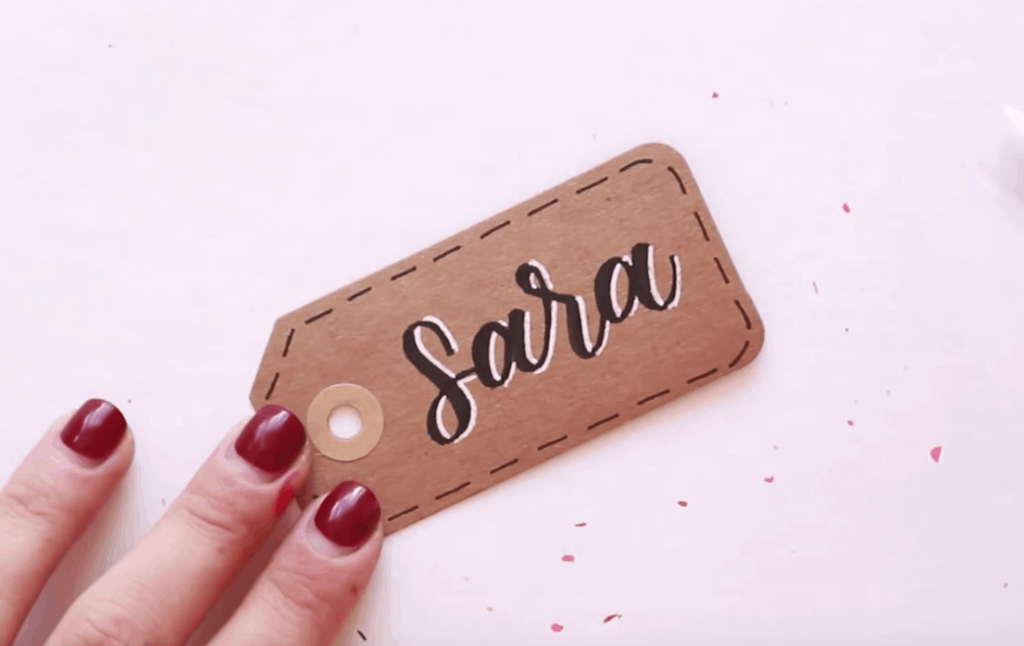
Step 4: Add white dots in between each dash
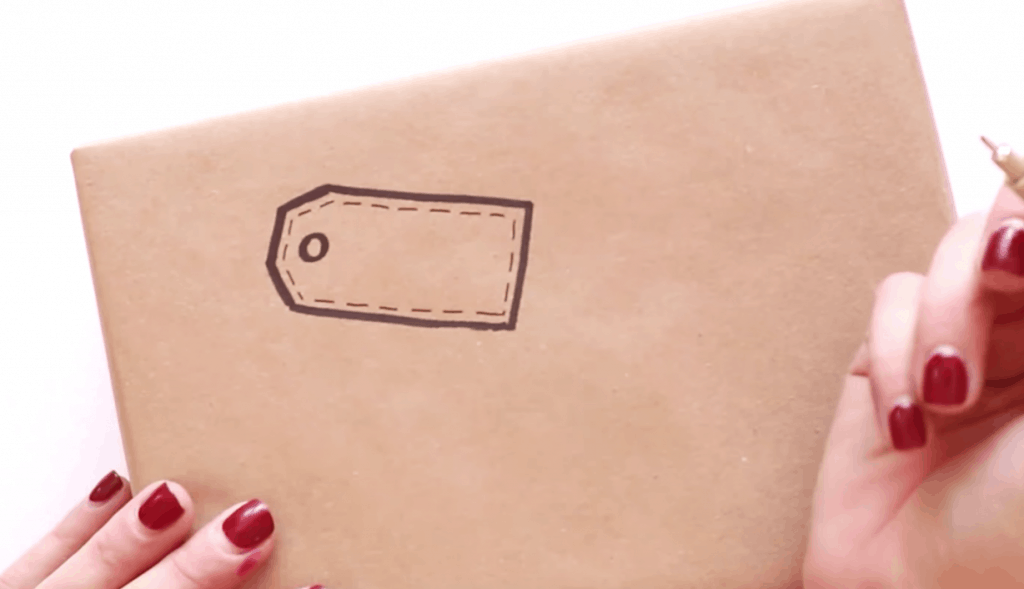
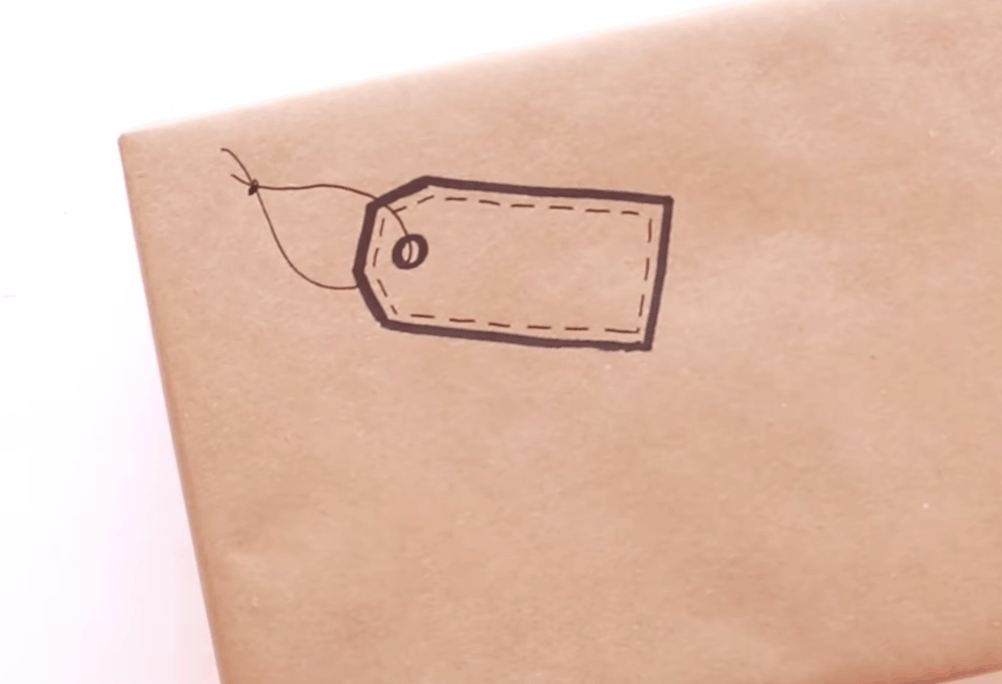
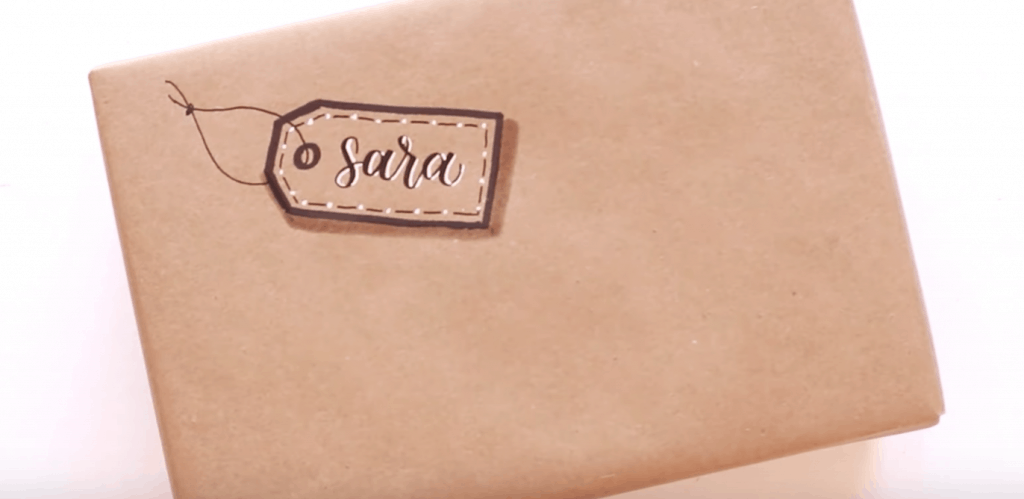
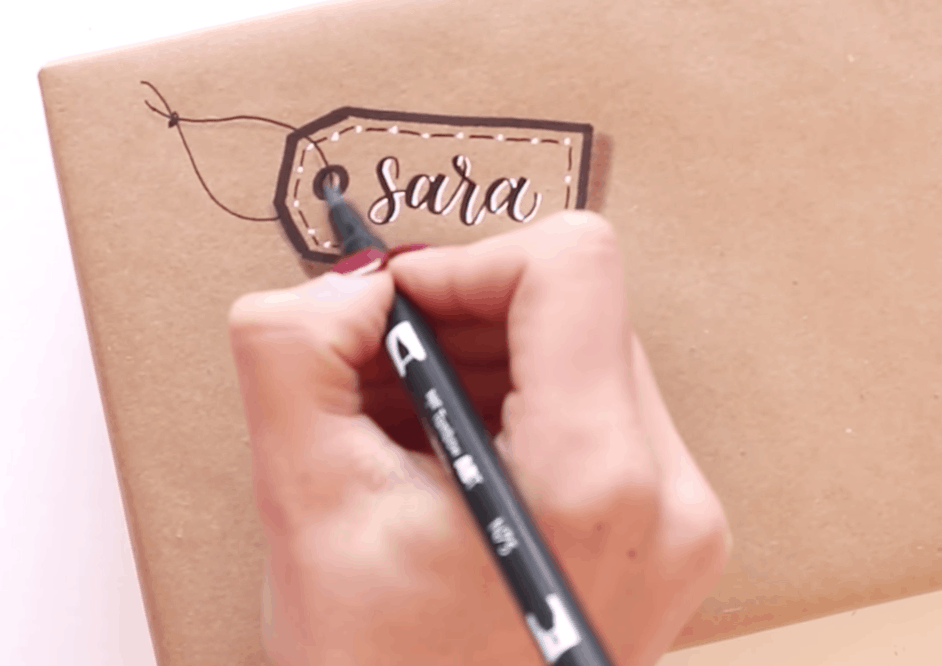
BONUS: The Tagless “Gift Tag!”
Tools for this one: Black Monoline Pen (the Sakura), Grey Marker (one of the brush pens), a white gel pen, and a black Sharpie (optional – festive washi tape).
I’m going to show you how to fake a gift tag directly on a wrapped gift.
Step 1: Draw an outline of a tag with your Sharpie

Step 2: Using your black monoline pen, draw a dashed outline around the tag
Step 3: Add strings as if the tag were attached to the gift
Picture where your string would go through the hole in the tag, including the little knot where they connect.
Step 4: Write the giftee’s name using your brush pen

Step 5 & 6: Add a shadow line with your white gel pen, and some white dots in between each dashed line
The same type of embellishment as above!
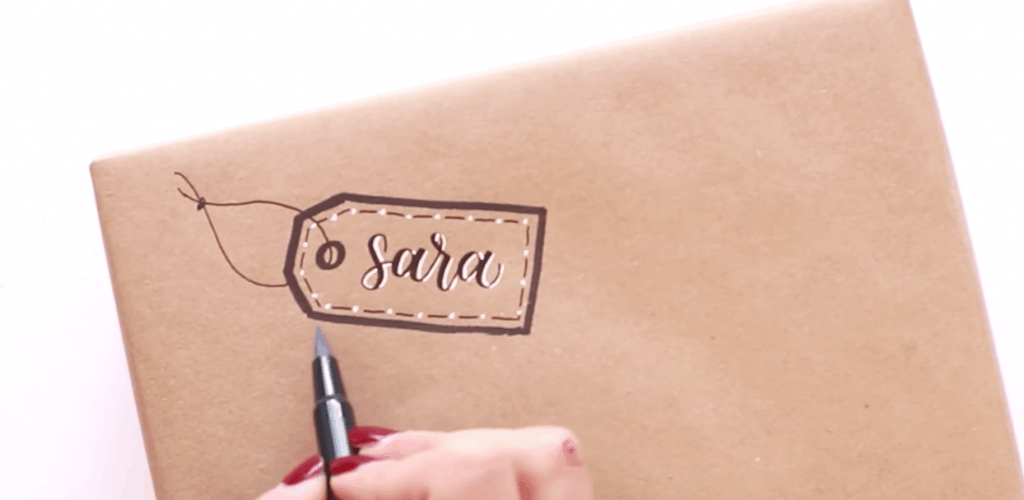
Step 7: Add a shadow with your grey brush pen
This will really give it that 3D effect.
Step 8: Add a shadow to the string
OPTIONAL: Add a little piece of wrapping tape, as if it’s holding the tag in place.
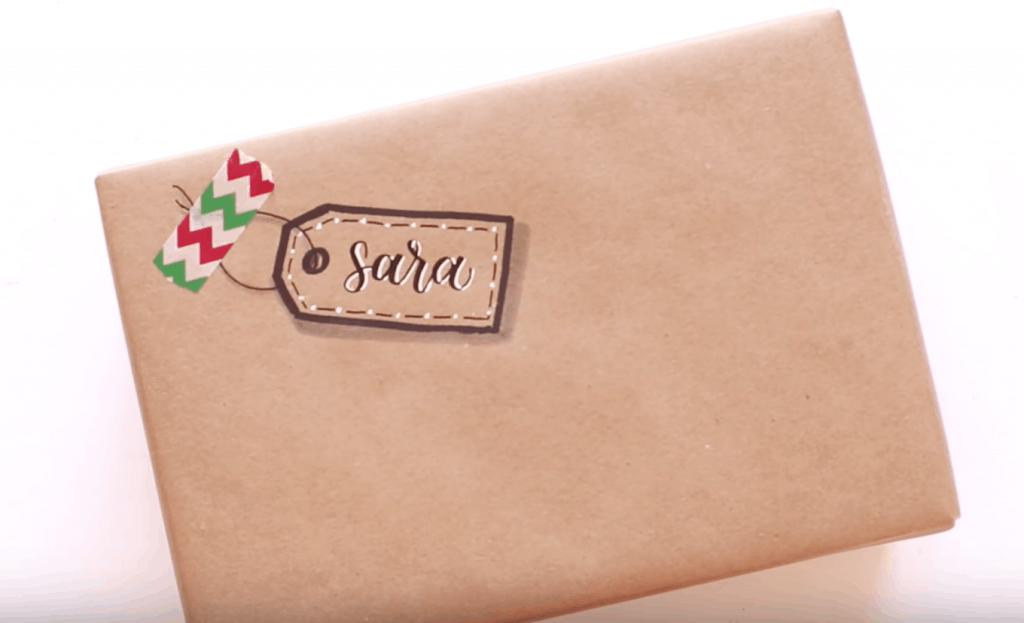
And that’s a wrap!
There are tons of cool ways to put your own DIY spin on your holiday gifts. Check out this video, where I show you how to make your own wrapping paper!


Comments