
Wanna know how to draw a lily step-by-step?
Great! Because I’m going to teach you how in this post. 🙂
Aaaaaand I also have some free worksheets for you to help!
The worksheets are part of a workbook essentially with step-by-step tutorials for a bunch of other flowers – sunflowers, daisies, dahlias, peonies, and others. Like I said, a BUNCH of other flowers.
You can use the worksheets to trace or to have them for reference as you freehand alongside me. The link to download them is at the end of the post.
First Things First…
The links below may be affiliate links where appropriate. This means that your purchase through these links may result in a few cents in payment to me, to support creating further resources like this one! That being said, I will never suggest supplies that I do not personally use and fully recommend.
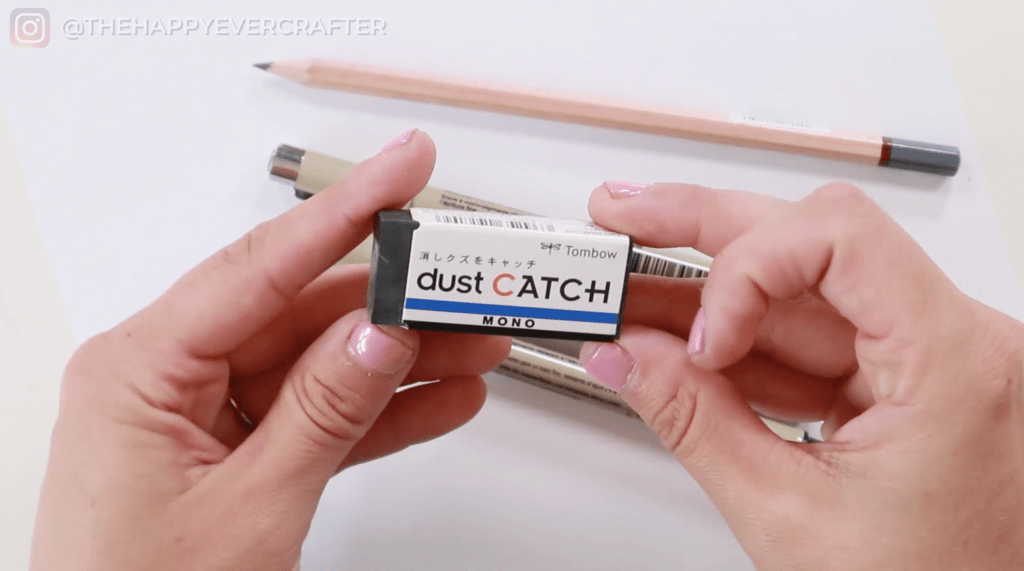
Supplies Mentioned
- Micron Pens (sizes 01, 03, 05) – You don’t have to have multiple sizes (or even these exact pens). One pen is totally fine if that’s what you have available.
- Rhodia Paper – Any paper will work!
- Pencil – Any pencil will work!
- Eraser – Any eraser will work!
Rather watch than read? No problem! You can watch me draw a lily in real-time by clicking the video below!
Let’s Get Started!
Supplies are pretty simple for these. I used blank Rhodia paper, a pencil, an eraser, and Micron pens in sizes 05, 03, and 01. You can use any paper, any pencil, any eraser, and any pens you’d like to use. These are just the supplies I personally used.
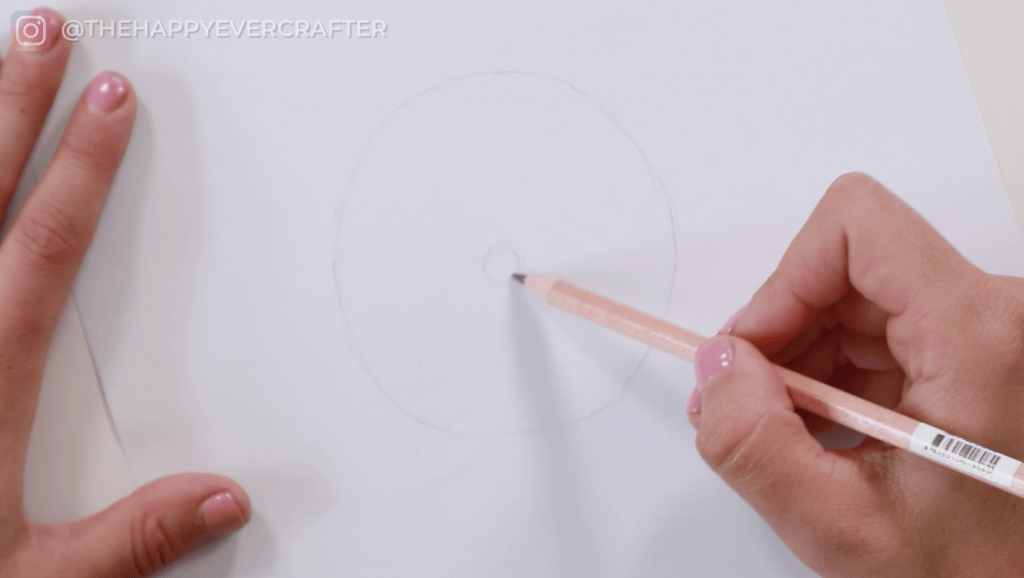
Step 1: Draw circular guidelines

To start off, use a pencil and draw a rough circle guideline super lightly. Since these are flowers, no need to be perfect. Nothing in nature is perfect!
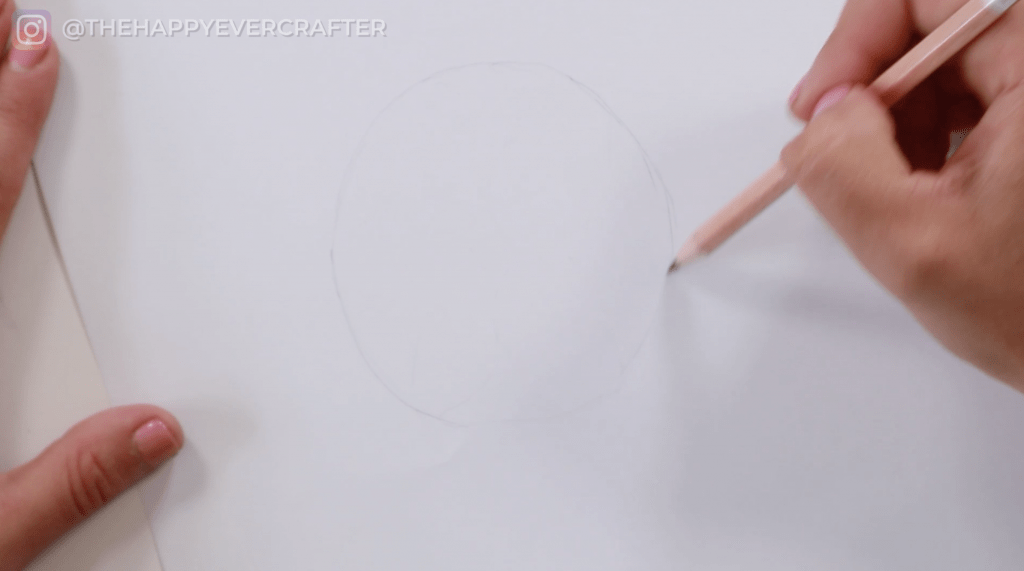
And then draw a second circle in the center. Again, it doesn’t have to be perfectly centered or perfectly circular. However, you two circles should roughly resemble what’s pictured. Be sure to draw lightly!
Step 2: Sketch out your petals
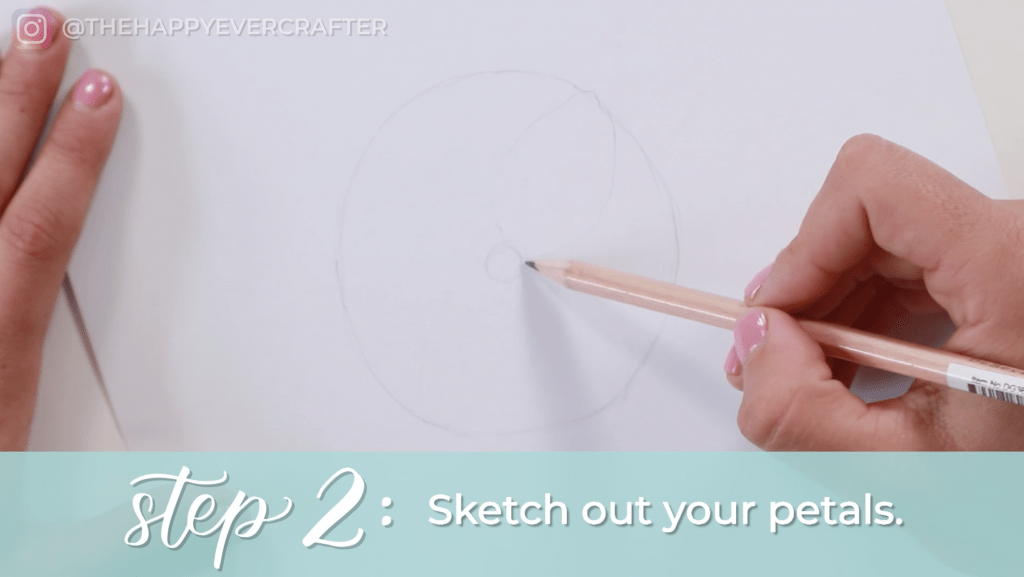
If you want to, feel free to jump right into using your pen. Me personally – I prefer to stick with a pencil while I’m rough sketching my petals.
I don’t draw lily flowers super often, so I’m more comfortable with a pencil at the beginning.
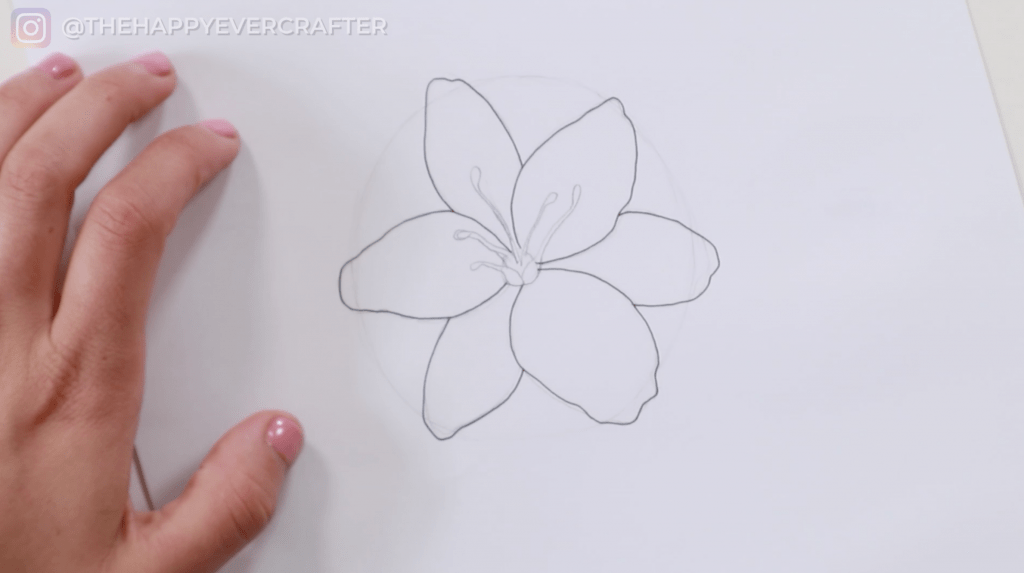
This particular lily will have six petals, so sketch out your three main ones. You can make them imperfect – notches, varying sizes and shapes, etc. You want them to extend about out to your circular guideline – the petals can go a little bit over or under though!
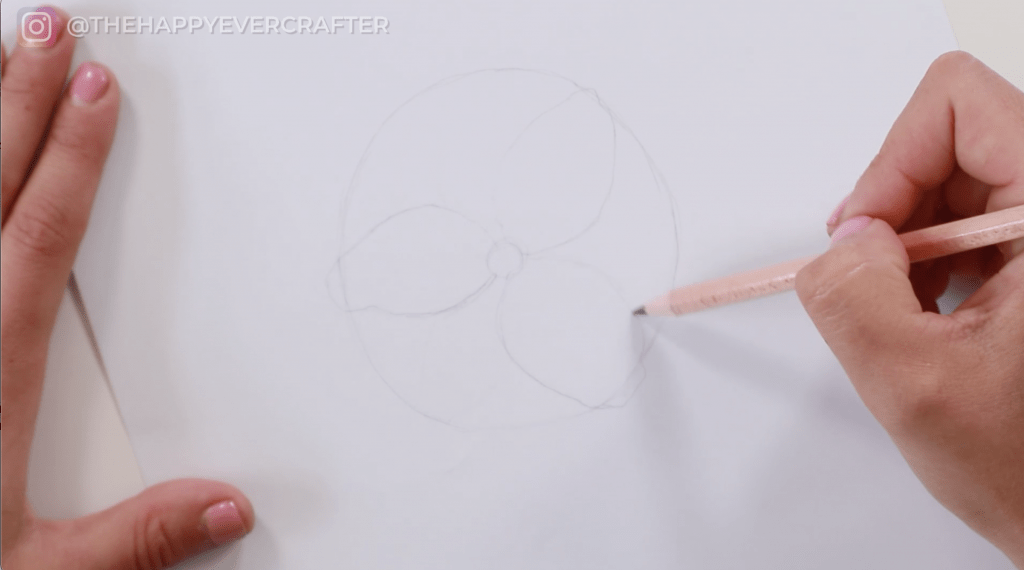
So essentially you want three imperfect, unevenly spaced petals.
Next, add your next three petals.
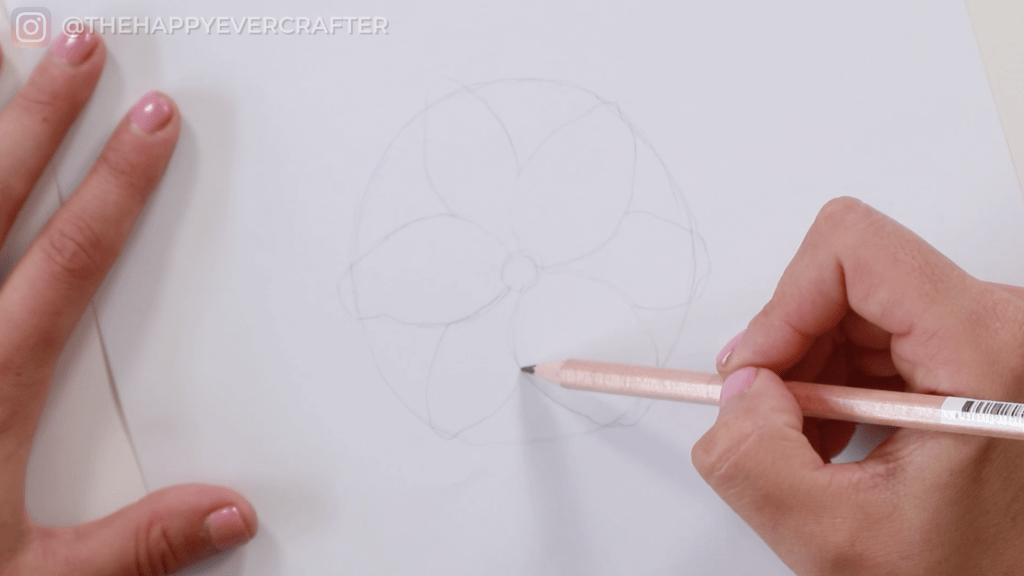
These will come out from behind your existing three petals. These can again be imperfect, irregularly shaped, etc. I tend to make my further back petals a bit smaller than my three main ones, but it’s totally up to you. They can be whatever you want.
Once you’re happy with your sketched out petals, grab your Micron 03 (or whatever pen(s) you’re using).
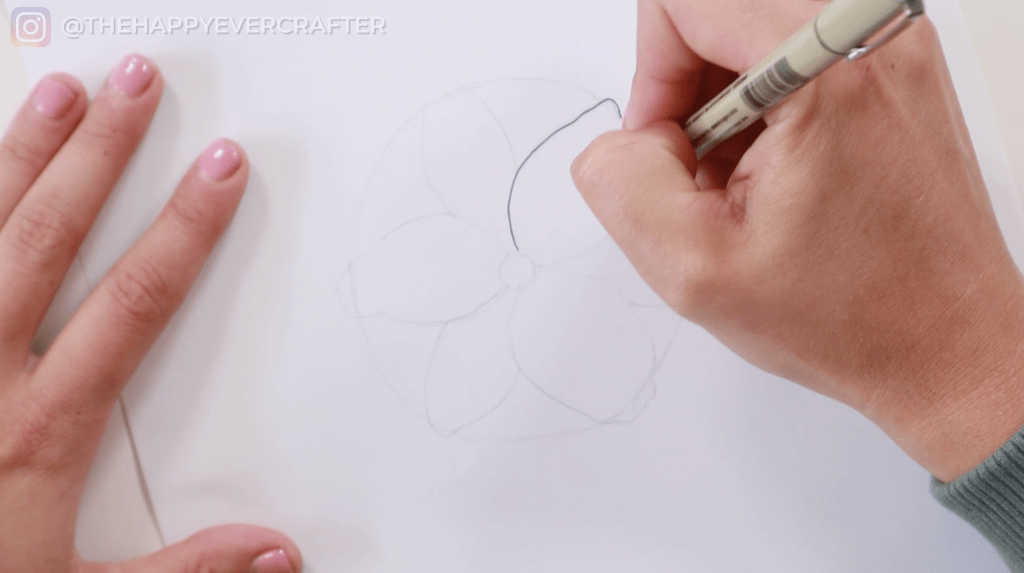
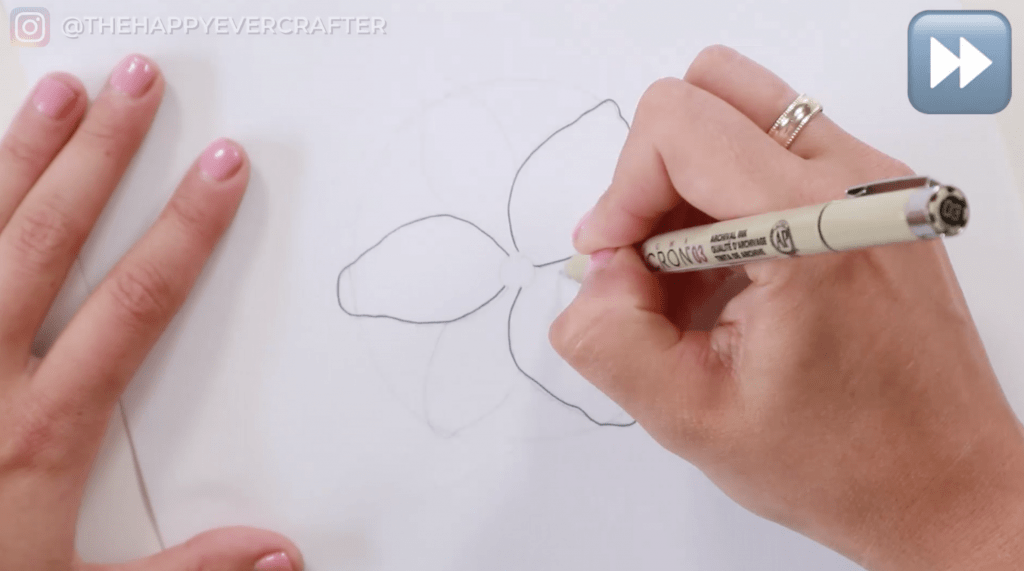
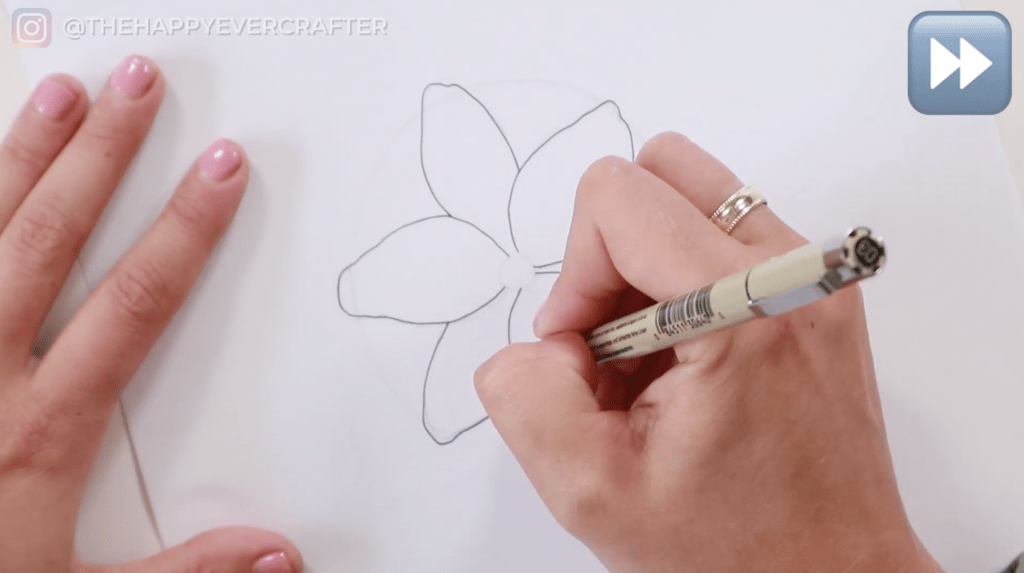
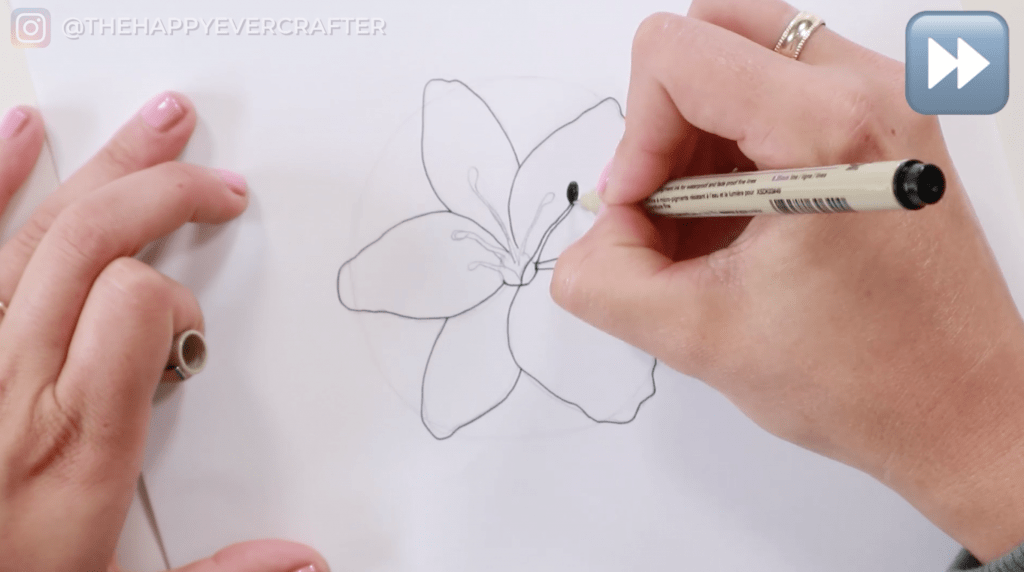
Step 3: Ink your petals
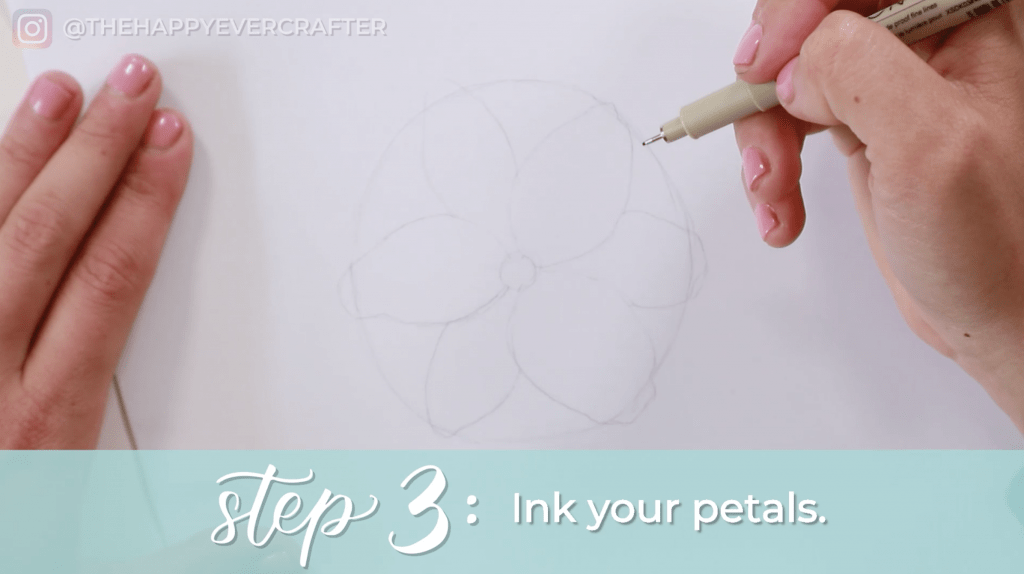
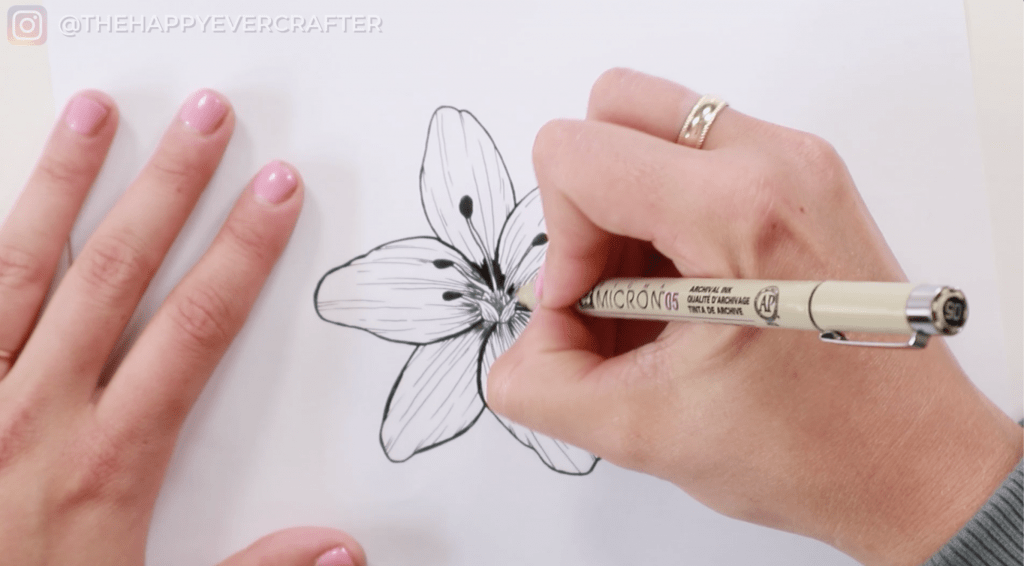
You don’t want to ink the center yet, but go ahead and ink your petals.
Step 4: Draw and ink the centre of the lily
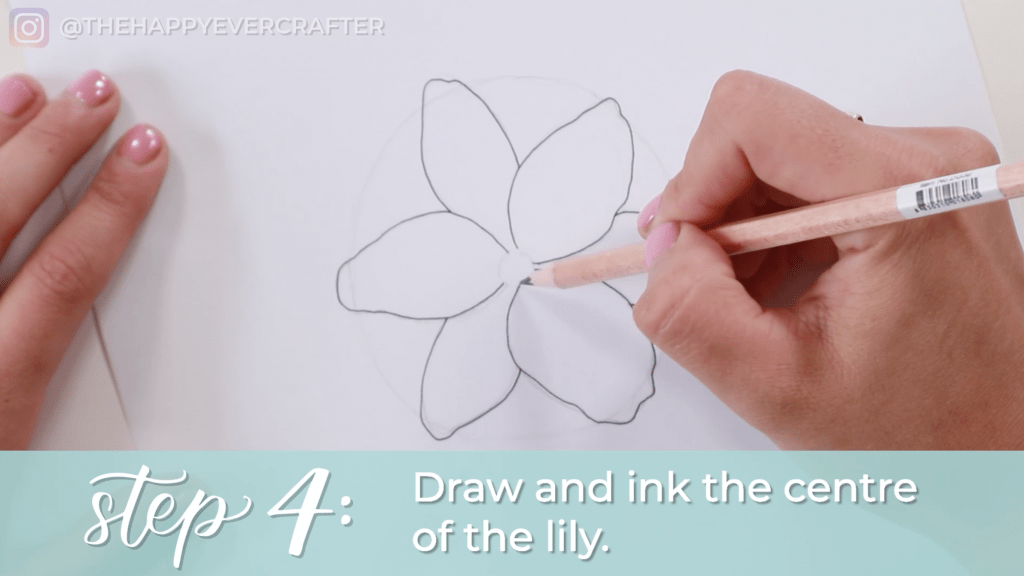
The center of a lily is kind of a strange shape, so I like to use a pencil to sketch it out before using ink.
Sketch out your stamen – they’re a weird shape for sure. Draw little stems with bulbs on the end. Feel free to copy what I’m doing in the photos! It’s a bit tricky to explain the exact shape of these.
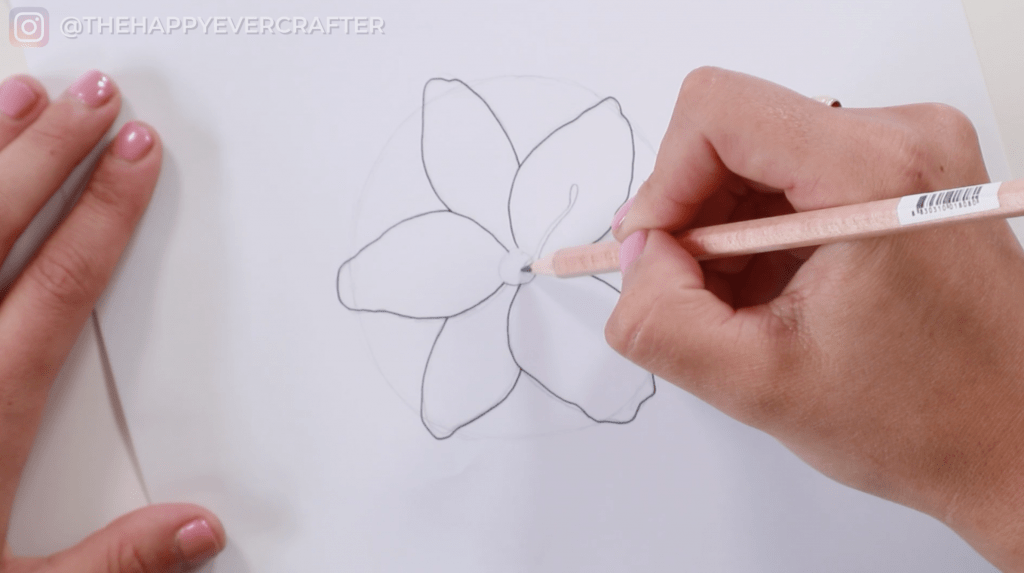
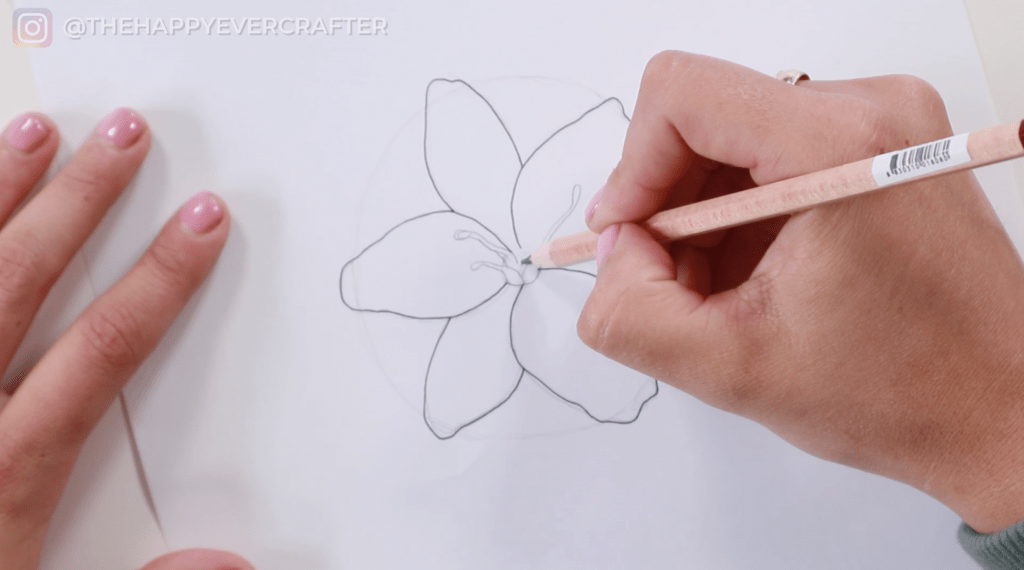
Just keep working with it until you’re happy with it. Next, grab your pen (I used my Micron 03 again) and trace the center of your lily using ink. Fill in the ends of your stamen in solid black as you go.
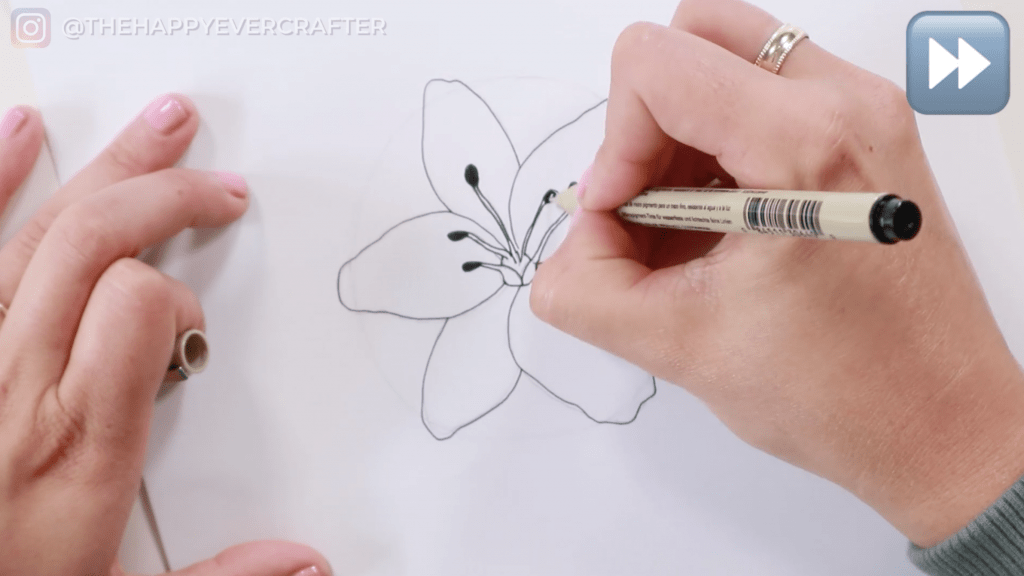
You have the majority of your flower already done!
Next, grab a finer pen if you have one available (I used a Micron 01).
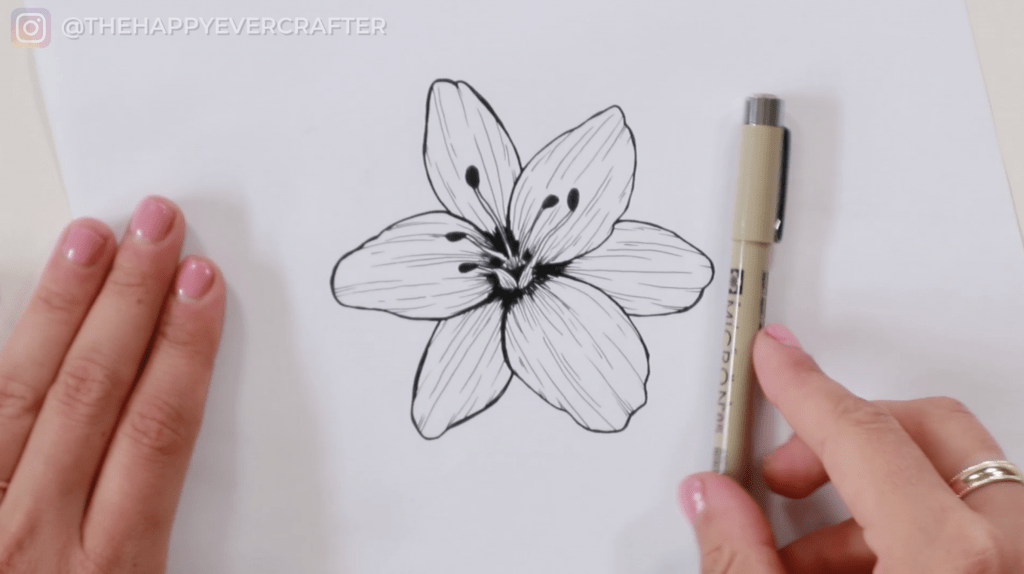
Step 5: Add finer details
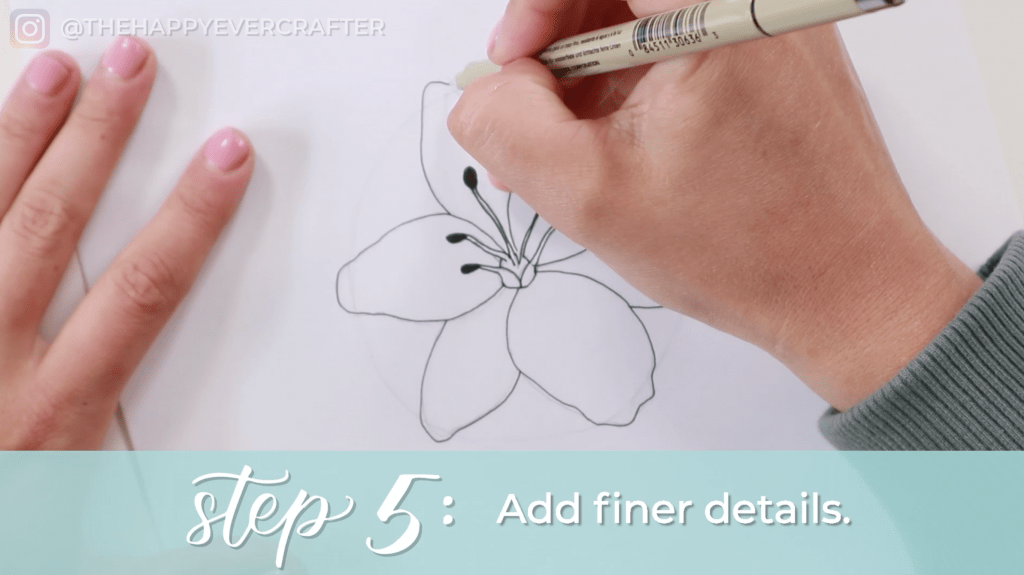
It’s time to add some details to your petals. If you’ve seen any of my other floral tutorials, this step is really similar to what I do in the others.
You’re adding some really fine, light details to the petals. Really freely – don’t connect them across the entire petal. Some come from the middle, some come from the top.
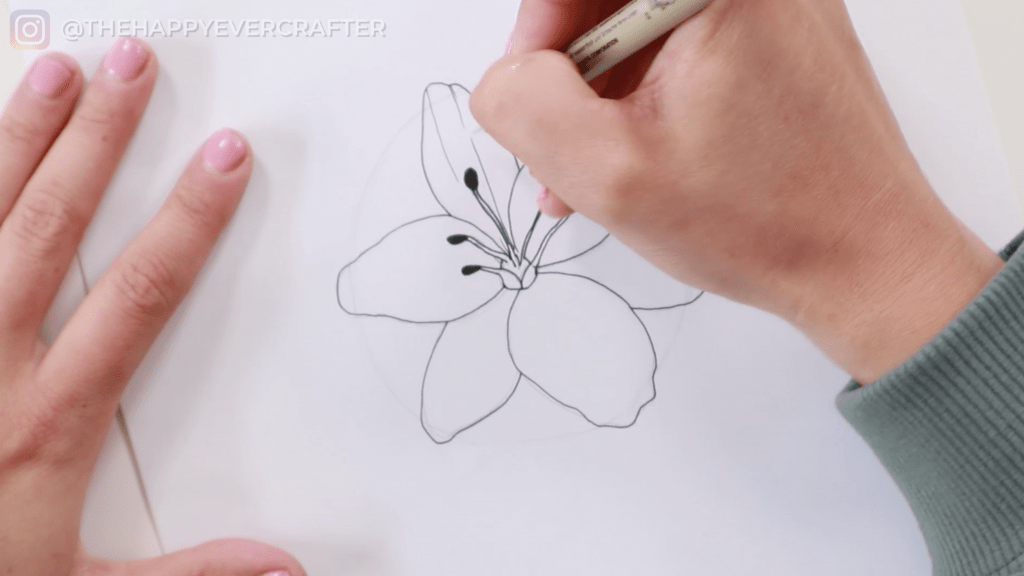
Fill in all six petals the same way.

You also want to add a lot of short lines towards the center of your flower. You want it to look darker (to add some dimension and depth), so adding more lines there helps achieve that look. You’ll add more darkness later, but it really helps to add some extra lines to help as you go.

Be sure you add some extra shading lines to very center of your lily too – you don’t want it to be completely white.
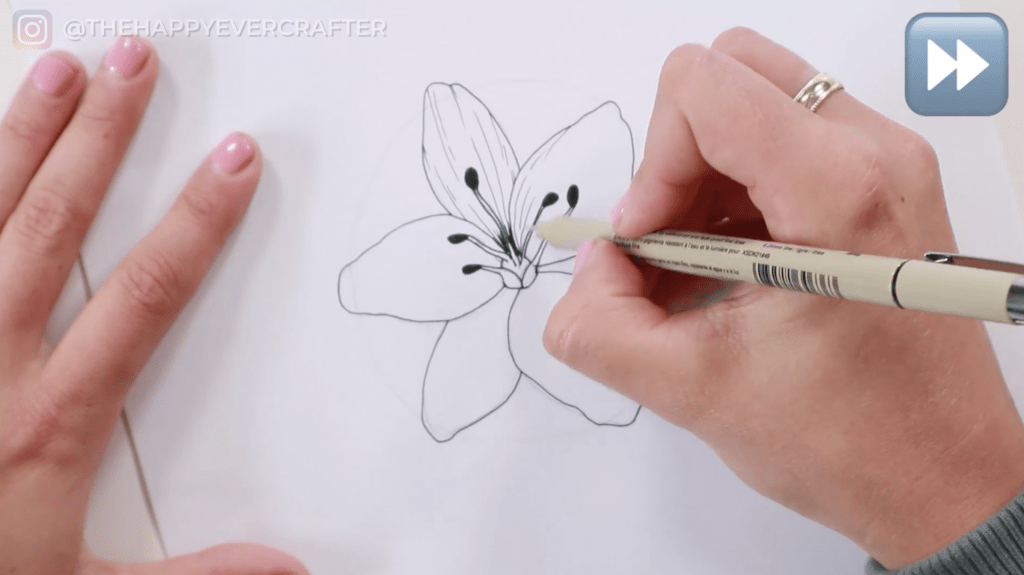
Step 6: Erase your guidelines

Once you have those fine details completed, go ahead and erase all of your pencil guidelines. They should have been drawn really lightly, so erasing shouldn’t be difficult.
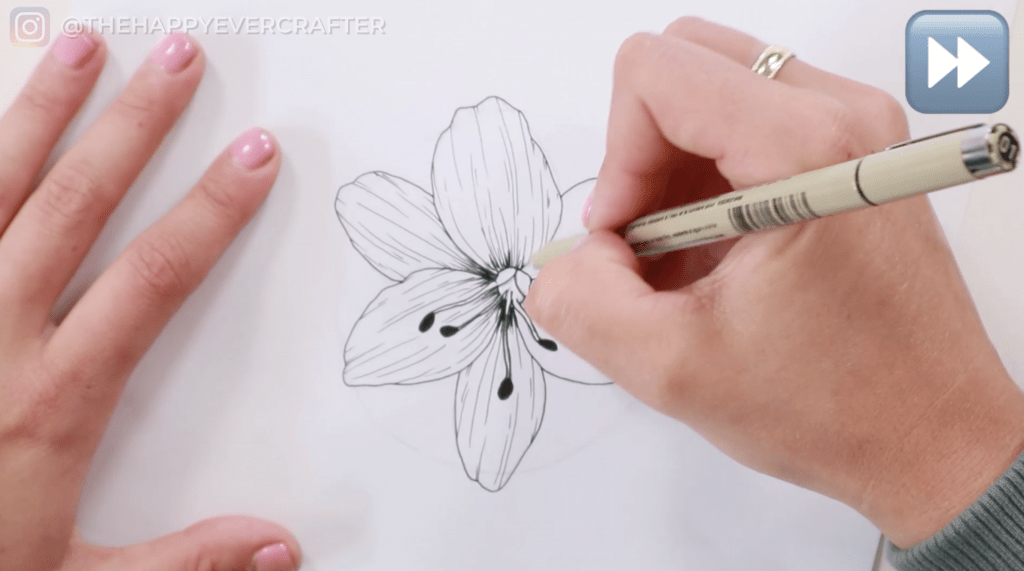
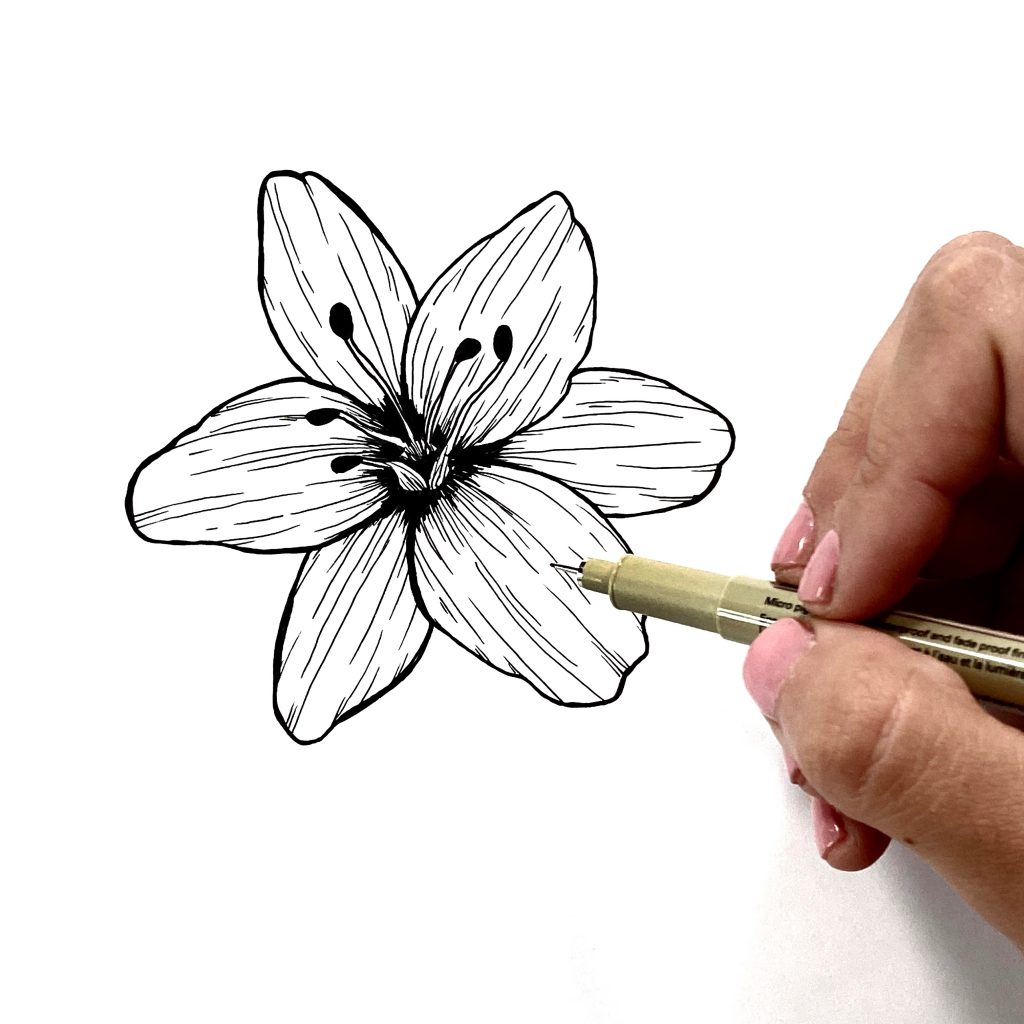
Step 7: Add contrast
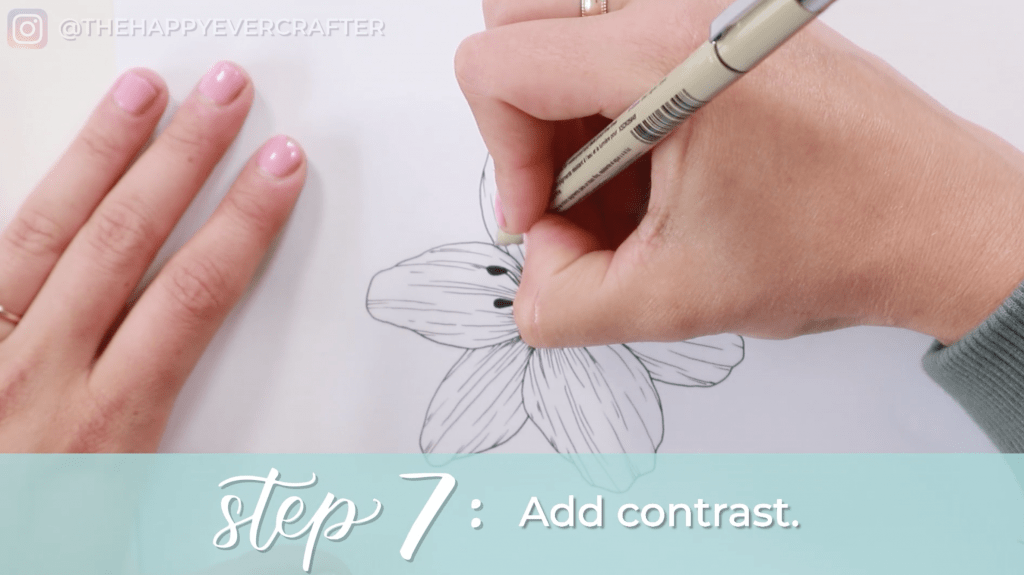
Next grab a thicker pen (I used my Micron 05, which is the thickest pen I used for this drawing), and start adding contrast.
Trace over the outside petal edges. (The reason we didn’t start with the thicker pen for the petal lines is give you the option to add the contrast or not once you get to this step. Sometimes we just want lighter, finer lines, ya know?)

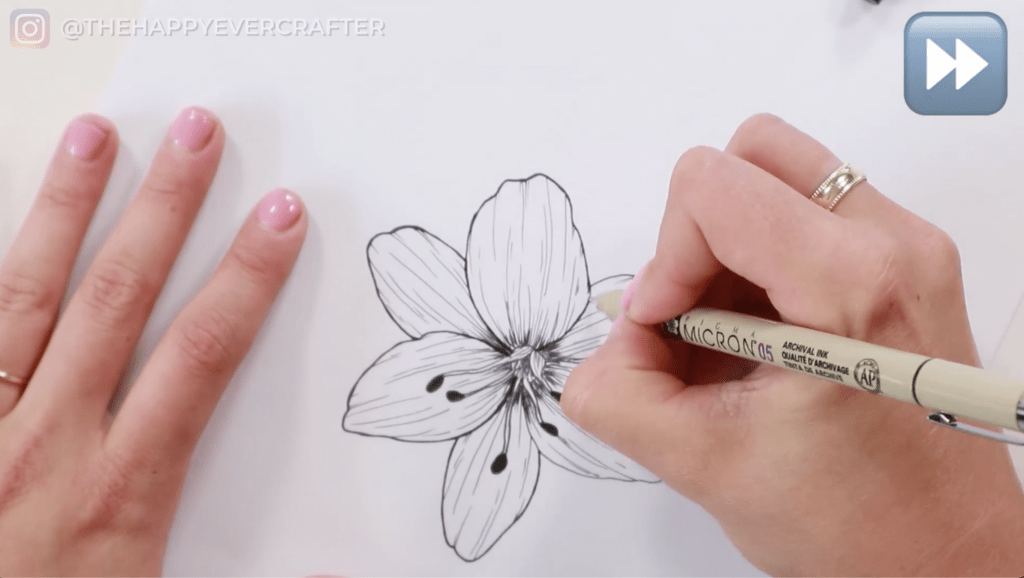
You want to make sure you thicken all of the petal edges (not just some of them). I also recommend making the lines even thicker where the petals overlap.
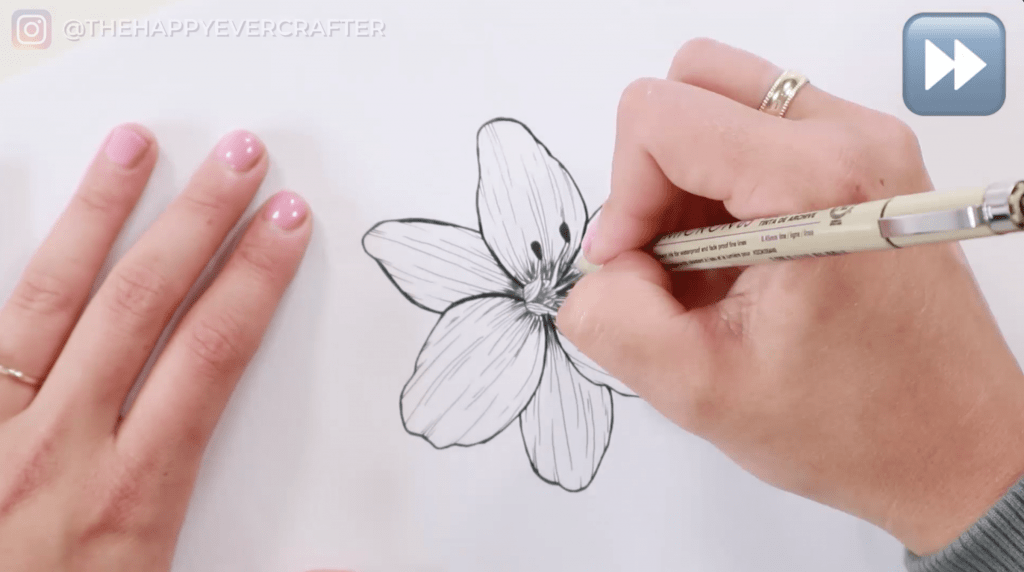
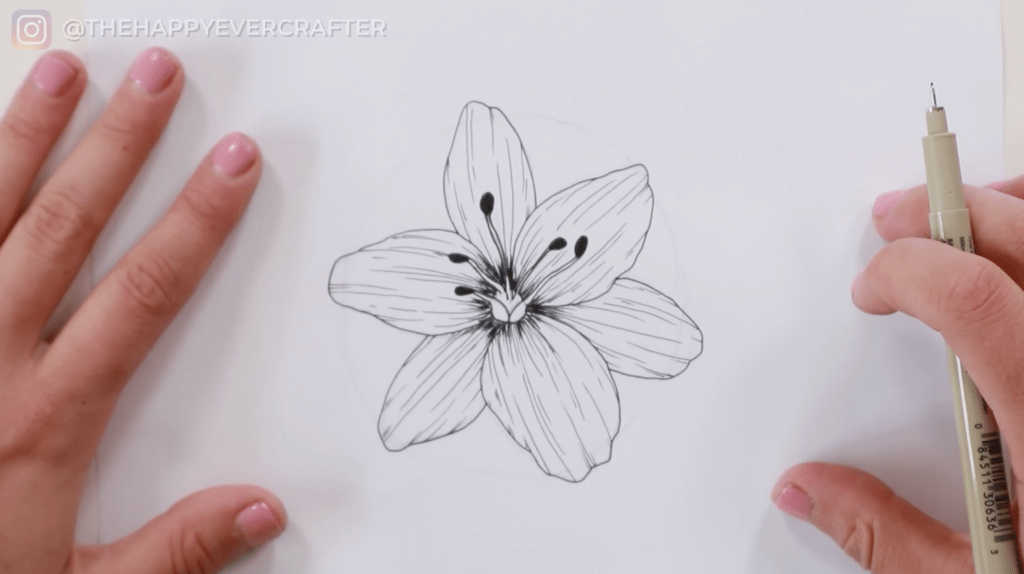
Next fill in some really dark spots as the petals approach the center of the lily. It’s almost as if you’re colouring in those areas in black. This step really makes your drawing pop and gives it some great dimension.

And that’s a wrap!
And there you have it! Your completed lily.
You can add as much dimension and shading as you want, but this is the stopping point I typically prefer.
I hope you loved it! Be sure to download your worksheets below.
If you’re interested in step-by-step sunflower tutorial, I’ve got you covered here. 🙂
Download your FREE floral doodles workbook here!
And finally, your dad joke…
What do you call a woman with a frog on her head?
Lily!


Honestly, I regret it a lot, do you know what I regret after knowing about you? I regretted that why the hell, I didn’t know about her before ?. I’m totally in love with your work, nature, behaviour, workshops and dad jokes too ❤. It’s been 2 years since I watched your first ever YouTube video accidentally after that I fell in love with your calligraphy skills. There isn’t a single I didn’t watch of yours on YouTube I even recommended my friends to learn calligraphy from you.
I’m so grateful that I found you, I got to learn so many things from you. Last but not least THANK YOU SOOOOOO MUUUCCHHHH ❤
Great instruction! Steps are very precise snd this is very helpful for those of us that lack spatial perception and drawing skills. Thank You!
Love the Lilly tutorial can you do a tutorial on daffodils or gladiolus thank you
Oh I love your tutorials! They are super helpful. Thank you for sharing your ideas with us!!!
Love the lily tutorial and the sunflower – I would love one on irises ! (Bearded if possible ? ) thanks for your teaching. Leaning so much .
Hi Becca,
I wish I could Show you my full 9×12 drawing I did of Sunflowers. Between you and Shayda Campbell I learned so much I tried my hand with my third drawing (other 2 were 1/2 pages of the 9×12 paper).
I entered it into the County Fair and I Won FIRST PLACE !!! I was and still am ecstatic.
Thank you sooo much.
Jayelynn Weinel
Really love that floral tutorials and thank you so much for sharing it. It was really helpful.
Thank you very much!
I love having you come by. It always makes me smile when I see
The Happy Crafter” in my mailbox. You are so cheering and always have a nice surprise for me.
I am wading through my magiscules…some are HARD! The lily and the flowers are a nice break.
Hope you are having a nice vacay! Wonder where you are?
I am doing a book binding course, so I have bound all my calligraphy pages – drills, miniscules, magiscules, water color and flowers. It adds a nice touch. Keep them coming.s
You are so generous. I could not believe when I saw that you are giving a 20+ floral workbook for free to your students. Keep glowing and growing Becca! 🙂
Thank you so much for sharing this. Lilies are one of my favourite flowers. The steps are easy to follow too.
You can’t imagine how much this free floral worksheet has helped me. I have used all these pretty flowers in my journal, my sketches, my doodles and MUCH MORE. Honestly, I wait for your weekly recaps (and dad jokes, ofc!) like anything every Friday. I have taken your free modern calligraphy course (Show Me Your Drills) and learnt modern calligraphy. It has helped a lot as well. I could even learn faux calligraphy just because of you. It’s very generous of you to make all those helpful YouTube videos and free worksheets for all your students out there. THANKS A LOT, BECCA!
Love from India 🙂
You are so generous. I love every single video you shared. I love your ShowMeYourDrill class. I usually try to stay away from social media but not you. You are very positive and so genuinely sincere. You are an inspiration for me to learn calligraphy and I realized that now I can also draw flowers thanks for your clear and precise instructions. Thank you Sooooo Much for everything you do to teach us.