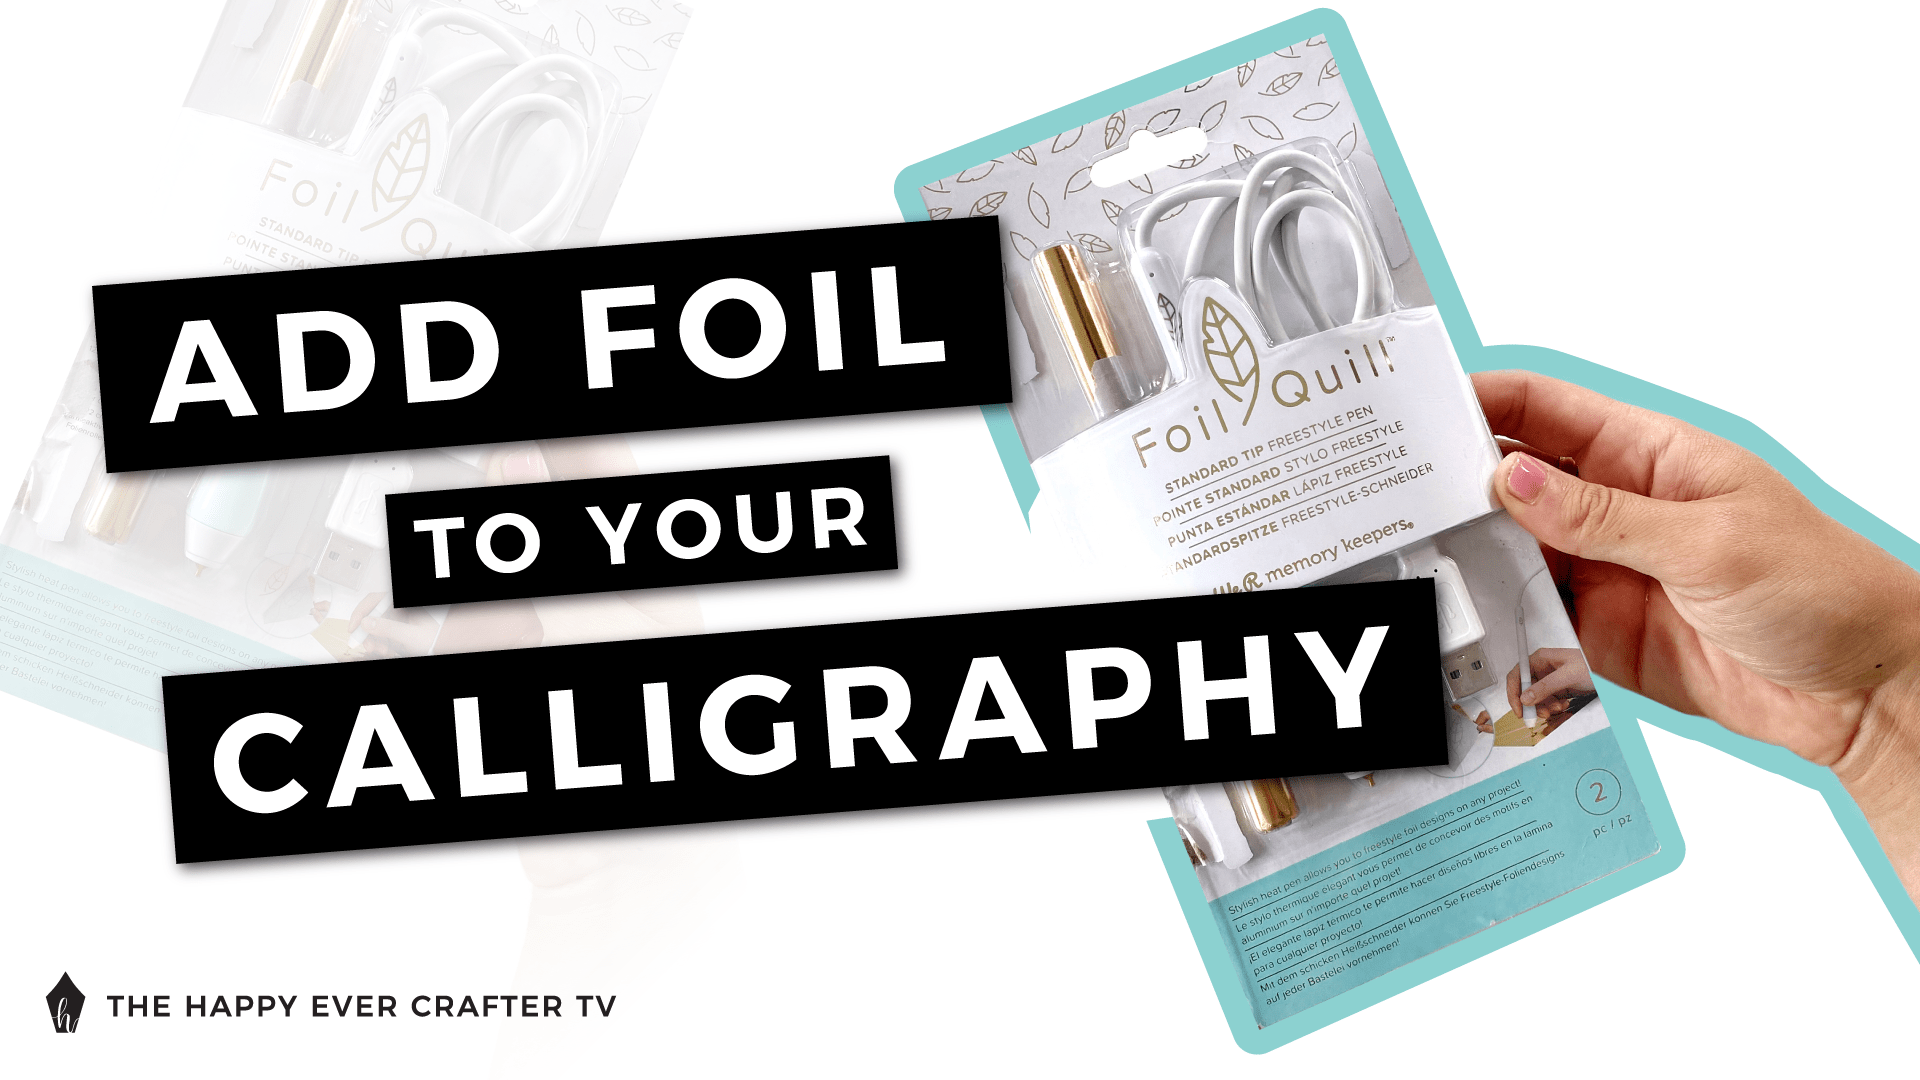
As I search for the perfect gold metallic pen, I’m trying out this foil quill pen!

Honestly, I have reaaaaally high hopes for this thing because it can be seriously hard to find the perfect shiny metallic gold pen. I’ve tried like 34509735 gold paint pens and gel pens and other pens, and they just never seem shiny enough!
Have you experienced this too?! It’s like the perfect shininess in a gold pen just doesn’t exist.
I’ve also done gold embossing, aaand gold foiling with a Minc machine, but both are just so much work!
All I want is to be able to freehand write in shiny gold (with ink or foil) and not have it take a million years to do. That’s all I want from this freehand foil quill pen.
IS THAT TOO MUCH TO ASK?
I just want it to be easy. Hopefully it’s not too much to ask for… Let’s find out.
First Things First…
The links below may be affiliate links where appropriate. This means that your purchase through these links may result in a few cents in payment to me, to support creating further resources like this one! That being said, I will never suggest supplies that I do not personally use and fully recommend.
Supplies Used/Mentioned
- Foil Quill
- Washi Tape
- Cardstock
Rather watch than read? No problem! You can watch me test this foil quill in real-time by clicking the video below!
Let’s Get Started!
So I used the Foil Quill – Standard Tip Freestyle Pen from We R Memory Keepers. They have different kits available (and on Amazon!). The packaging says “Stylish heat pen allows you to freestyle foil designs on any project!”
Let’s find out if it’s true!
It looks like it plugs in like a USB and transfers foil directly onto your projects.
I’m just going to test this out on cardstock. All I’m looking for here is a really good gold pen. I don’t need it to write on 100 different surfaces. Just paper really – cards, paper projects, etc. I’m only going to work on a card, but I know other people have used it on leather and all sorts of different things. My focus here is just what I need though, which is paper.
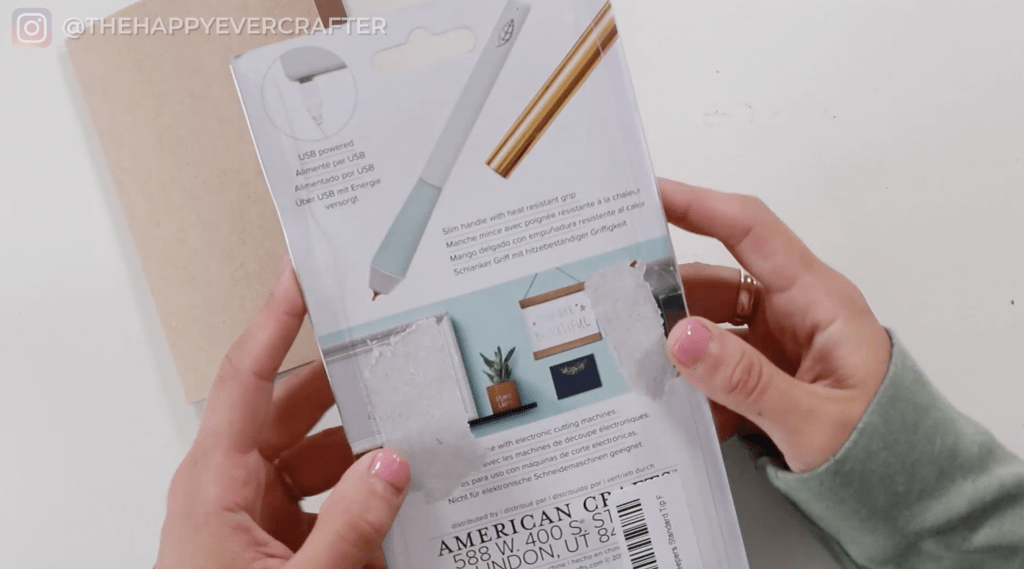
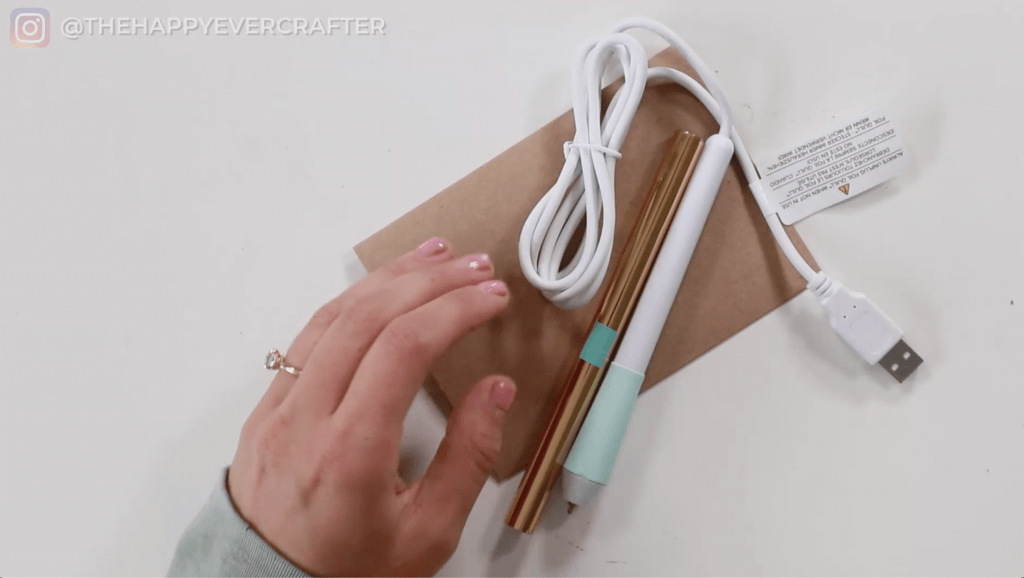
The package comes with the pen and USB adapter and a roll of gold foil (and instructions, which I should probably read).

- Plug in pen and allow to heat for five minutes.
- Place foil over project and secure using low-tack tape.
- Slowly draw or write to ensure a clean transfer.
I honestly think the USB adapter is kind of weird. I wish it was just a normal power adapter that I could plug-in. Oh well. I just plugged it into my phone charger.
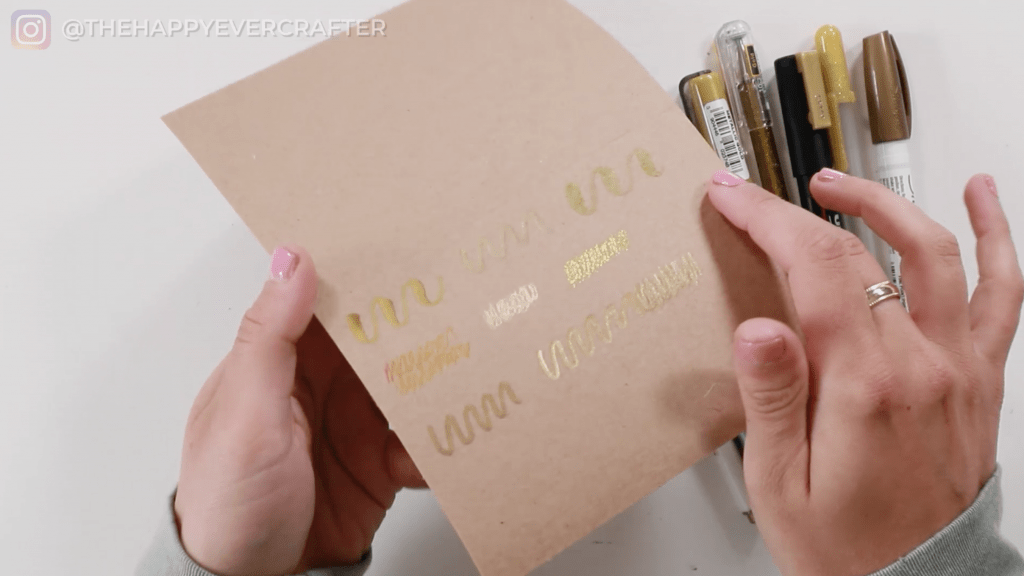
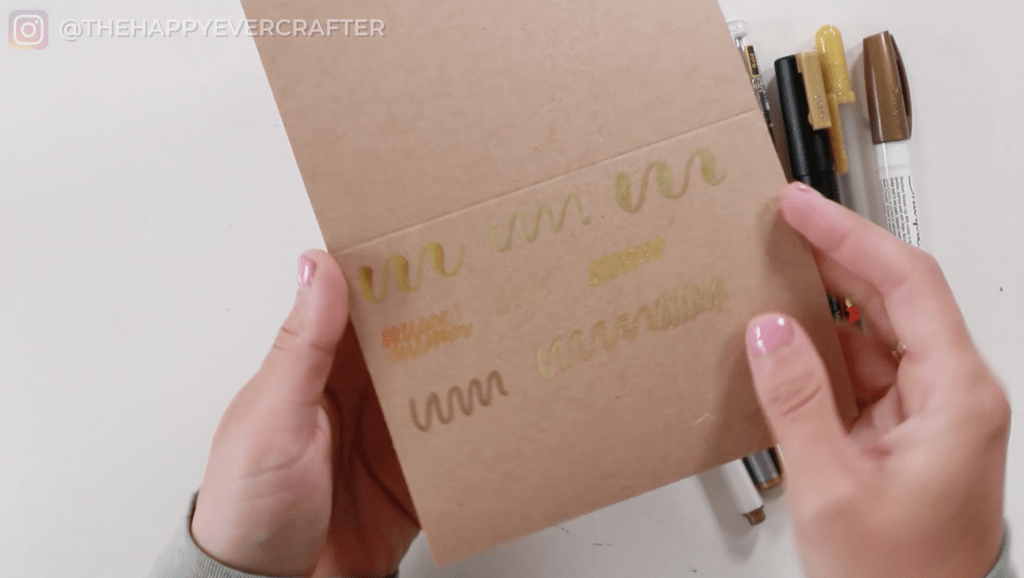
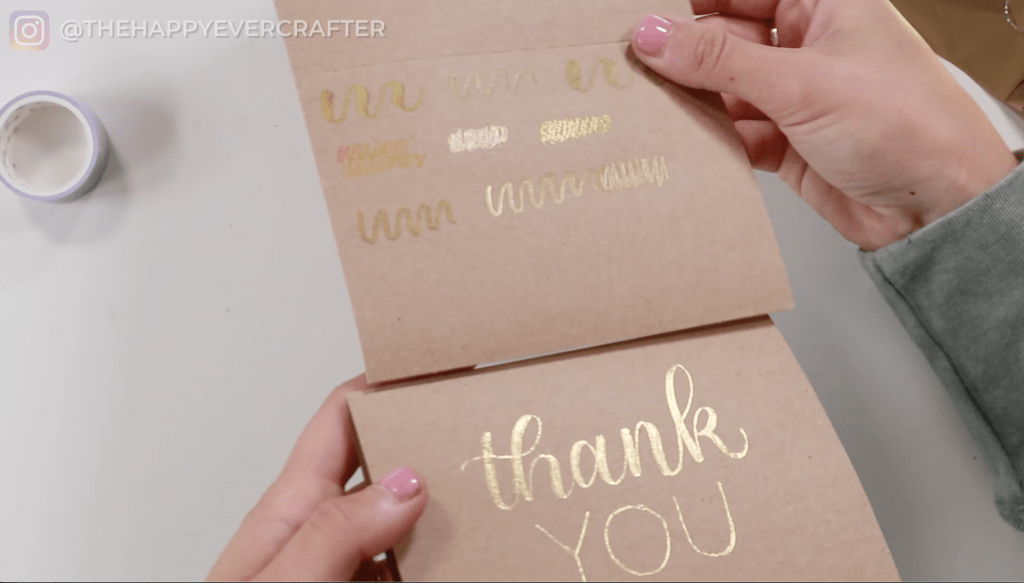
To pass the time during the five-minute wait for the pen to heat you, I want to test some of my current gold pens. Some are brush pens, some are gel pens, some are paint pens, etc. I just grabbed a bunch to test out.
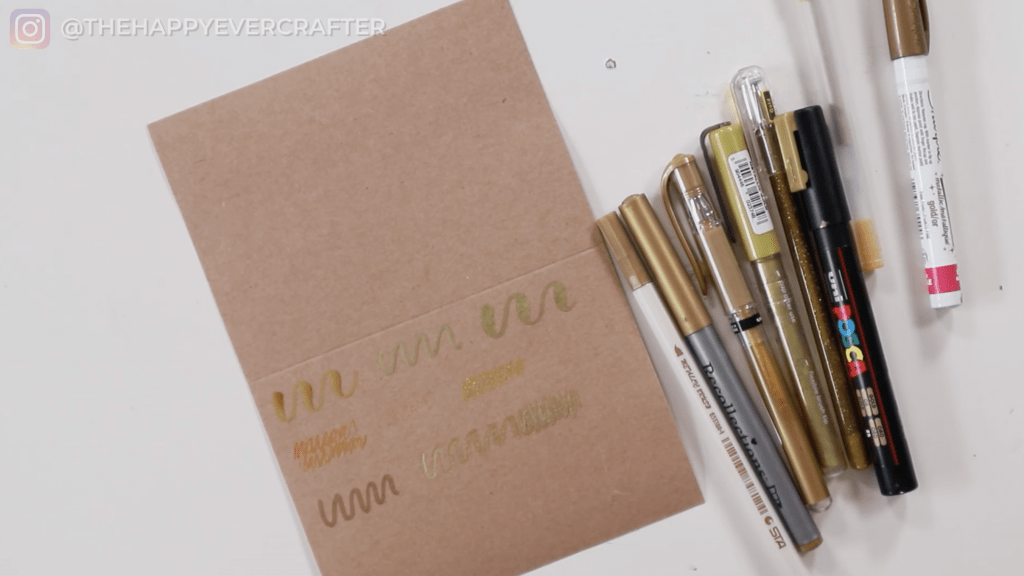
So this is what the gold options generally look like. The gel pens are fairly shiny, but the brush pens and paint pens are preeeeeetty dull. Even the shiny gel pens disappear based on the angle – one is gone completely, and the other looks like yellow ink. So there’s nothing perfect in my stack of supplies.
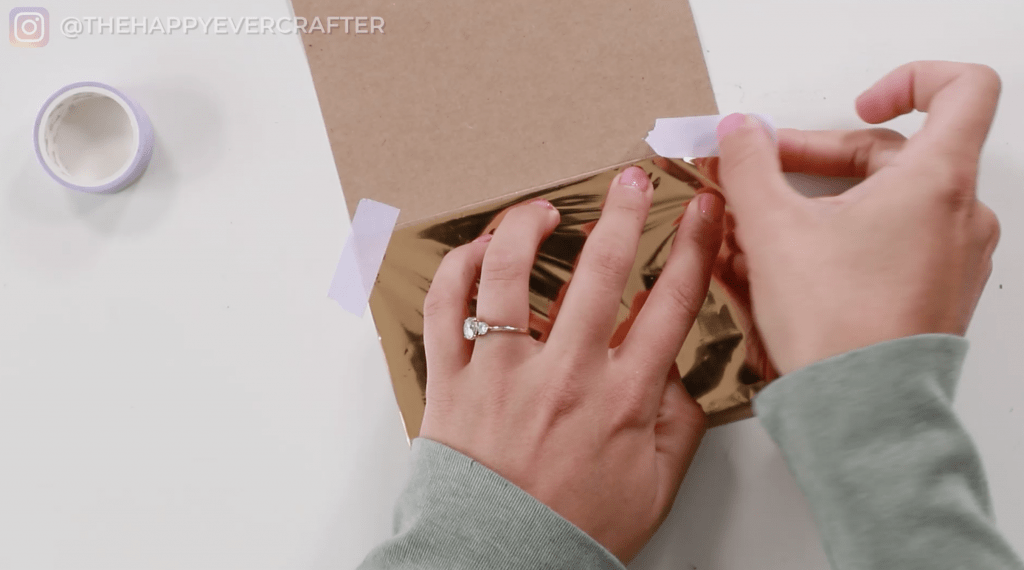
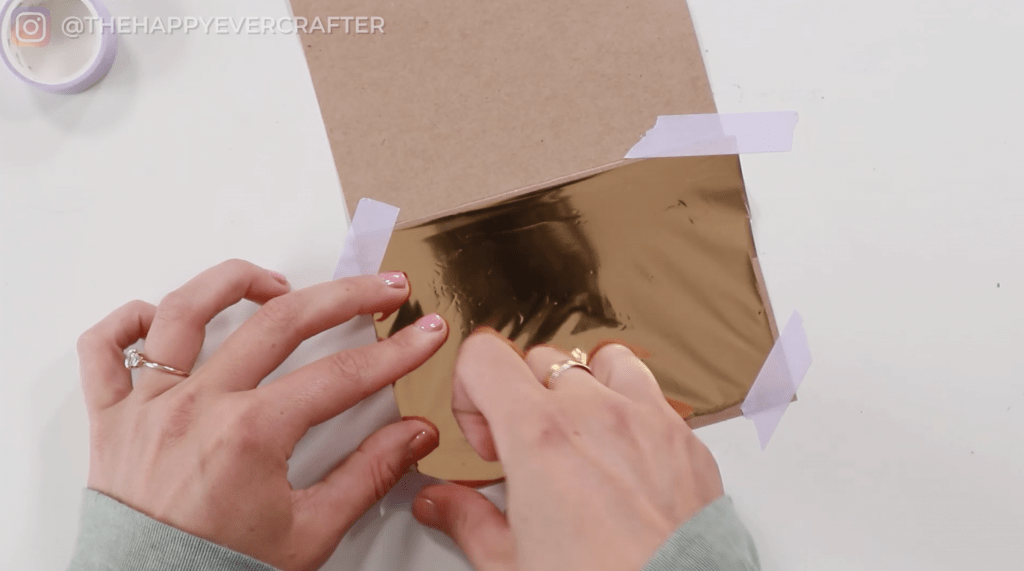
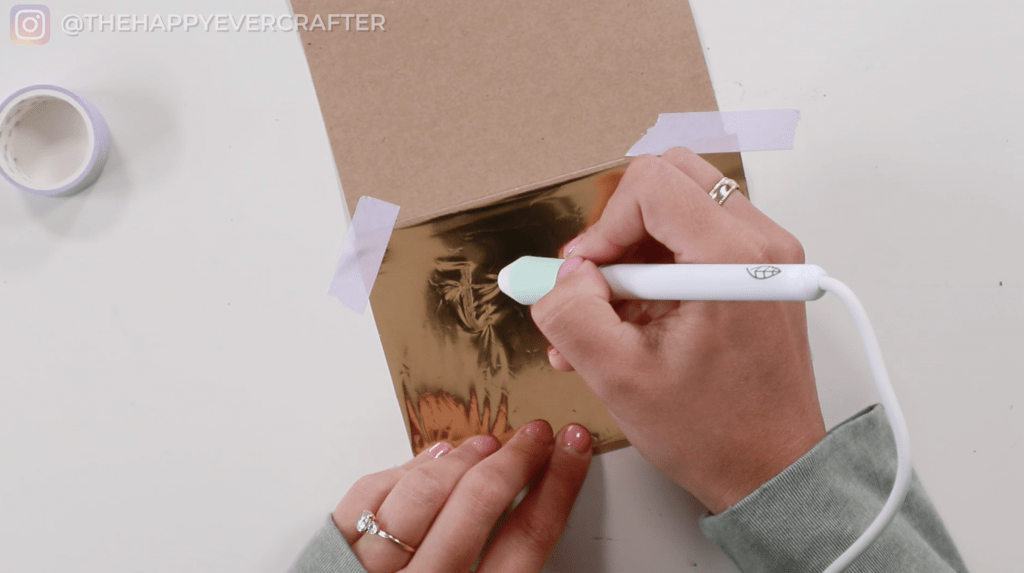
My pen is heated up. I have some basic washi tape to tape down my foil. Let’s do this.
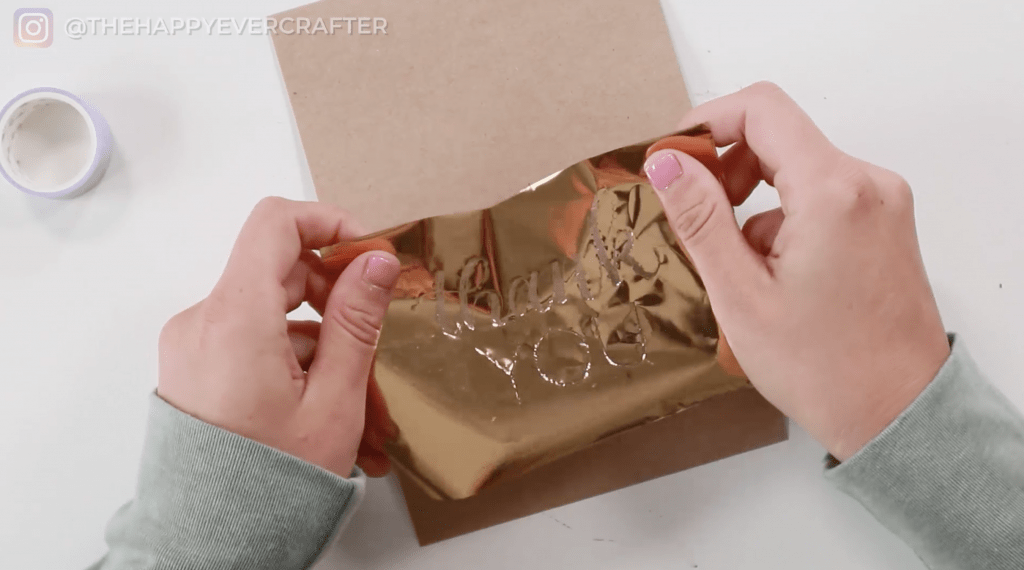
I figured I might as well make something cute while I test… just in case it DOES turn out well, and then I can actually use it. So I’m using this blank card, and I’m going to attempt to write thank you on it and make it into a thank you card!
I’m going to start by cutting some foil to fit my card. I don’t want to waste a bunch of foil, so I want it to match the size of my card. Fit and cut and good to go!
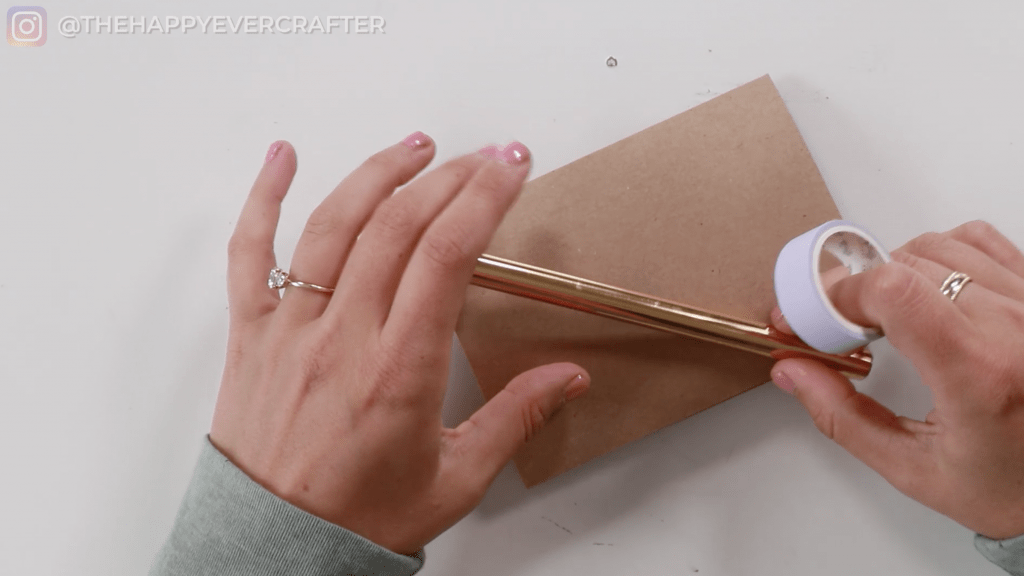
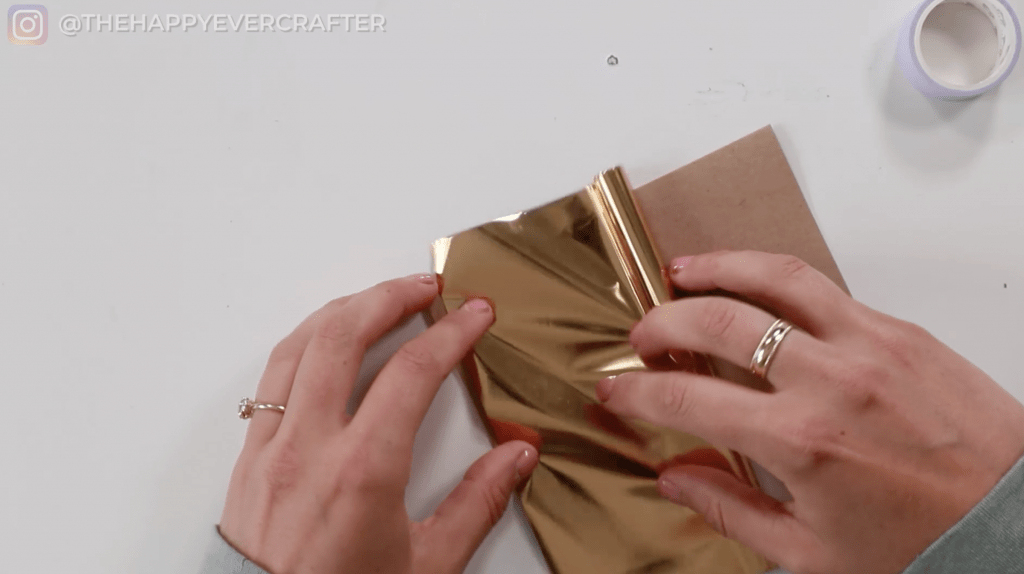
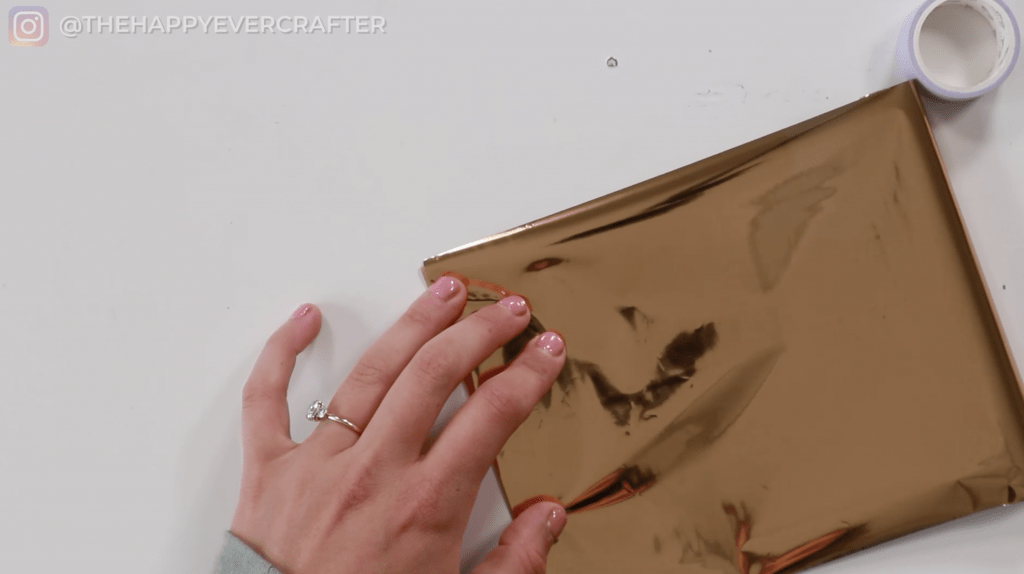
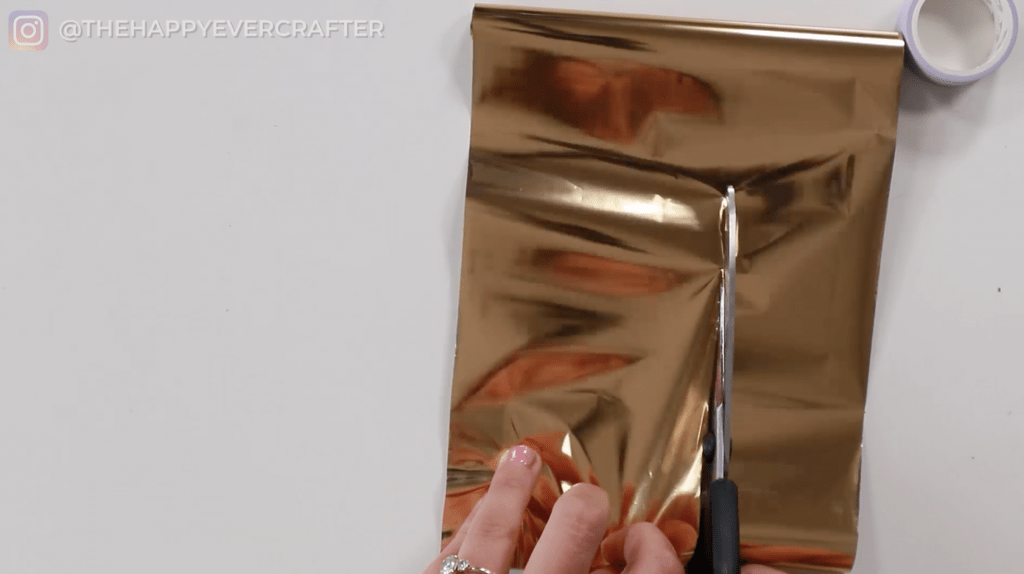
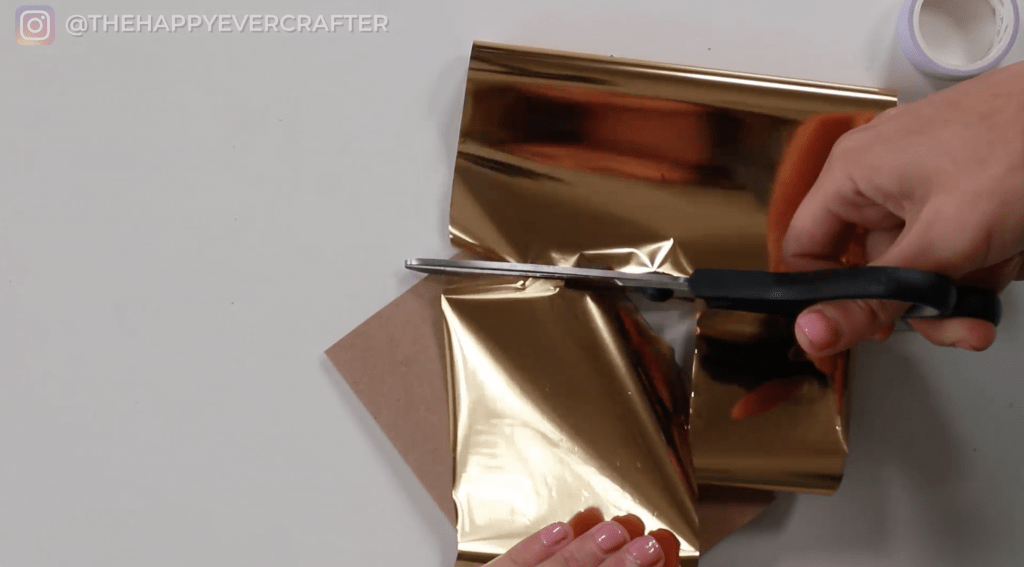
The piece of foil is bassssically the size of my card. Not perfect but good enough.
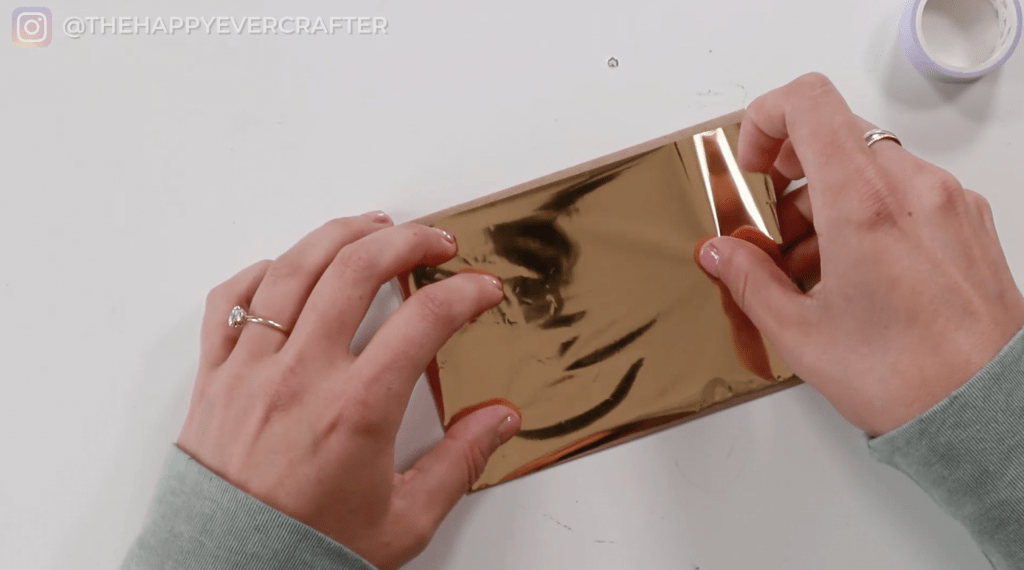
I’m actually going to tape the entire card to the table (not just the foil to the card) to prevent any unwanted sliding or movement.
I’ve got my pen (it’s warmed up, I can tell by the heat in the barrel), and it looks good to go.
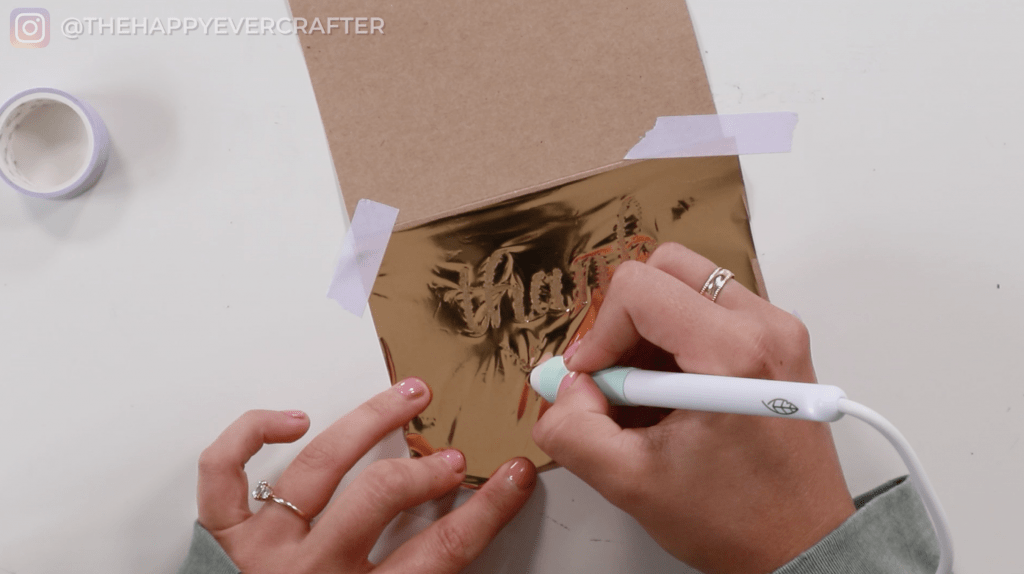
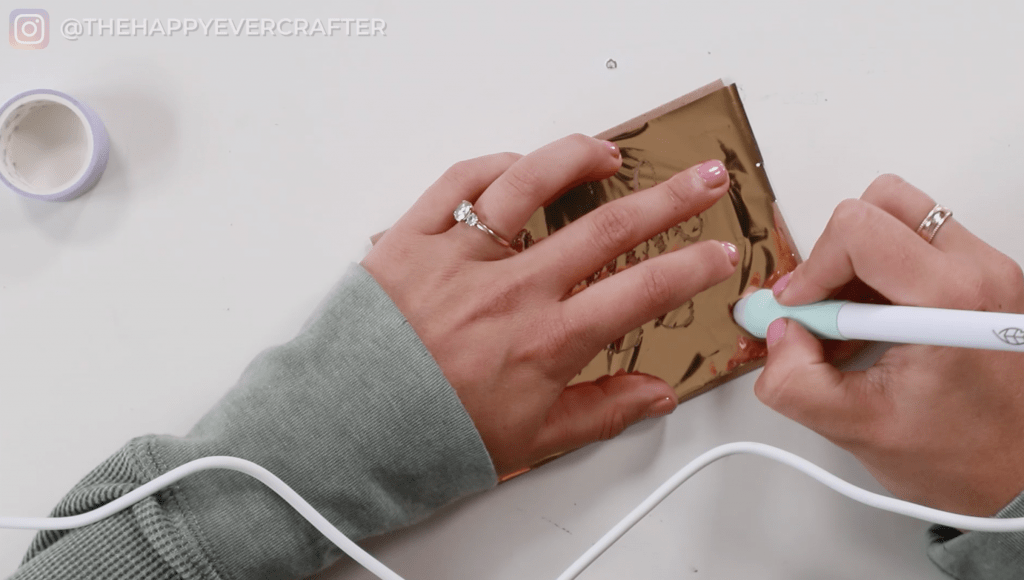
I’m just going to jump in and freehand this! I have nooooo idea what I’m doing, but here goes nothing!
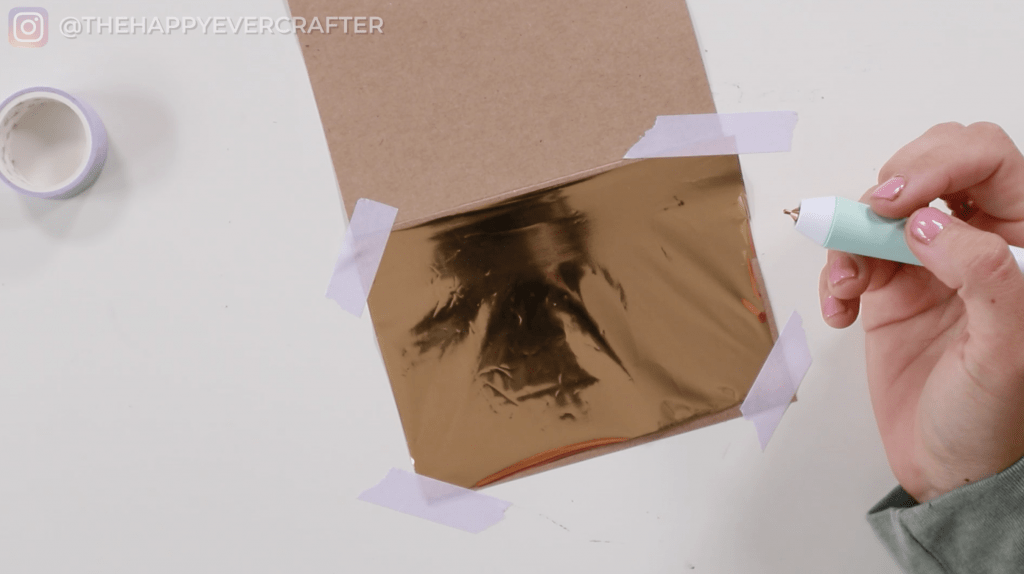
I hope it’s warm enough… It doesn’t seeeeem like it’s doing a whole lot, but I don’t know what to expect. I also don’t know how much pressure to apply.
I’m going to do some faux calligraphy and hope it turns out okay. I’m sure there will be plenty of lessons learned here.
With the faux calligraphy, I’m thickening my downstrokes as I go. I don’t want to lose my place, and it’s a little tricky to tell where I’m at. It definitely seems to be working though!

Realistically this probably won’t be my best lettering, but I’m doing my best.
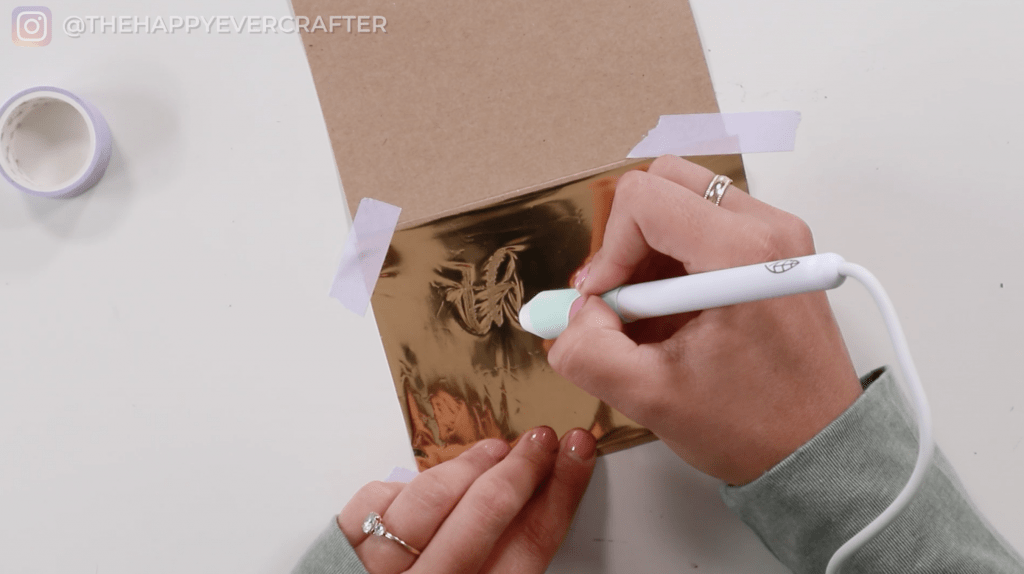
I want to know what block letters will look like (just in case the faux calligraphy looks awful), so I’m going to do YOU in block, monoline letters.
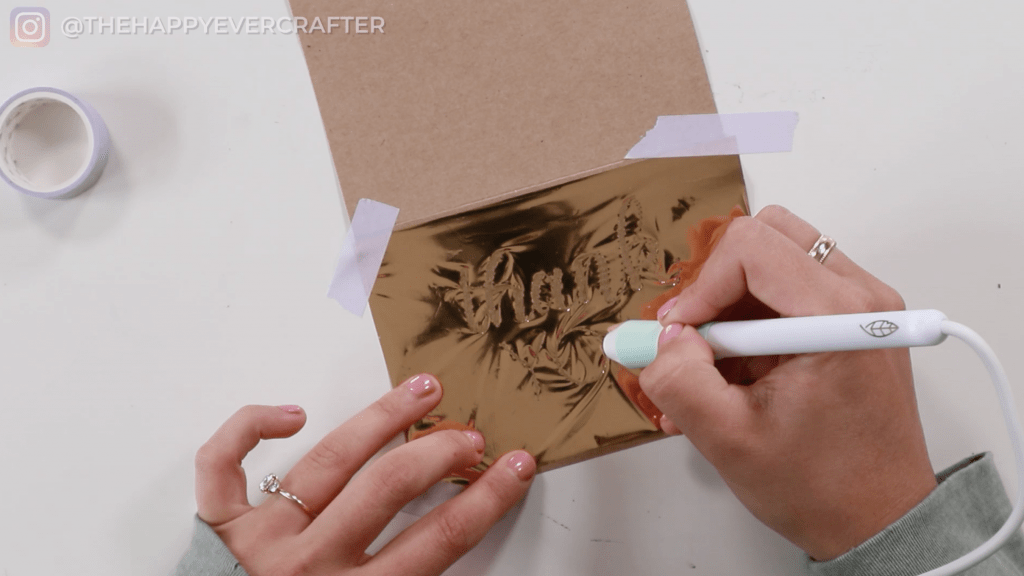
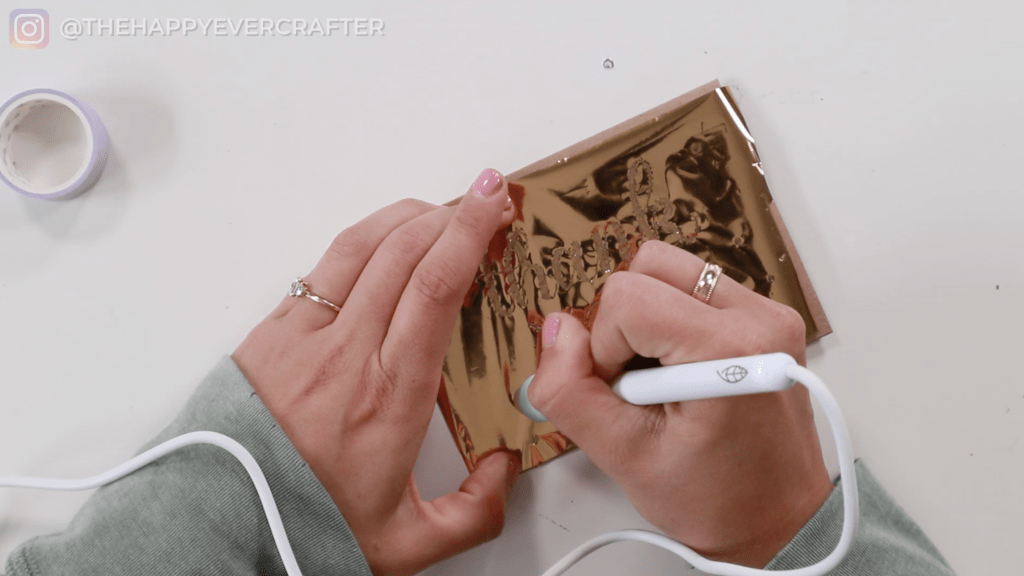
As I write the YOU, the pen seems to be working a bit better. The transferring is quicker. I wonder if it wasn’t warm enough when I started…
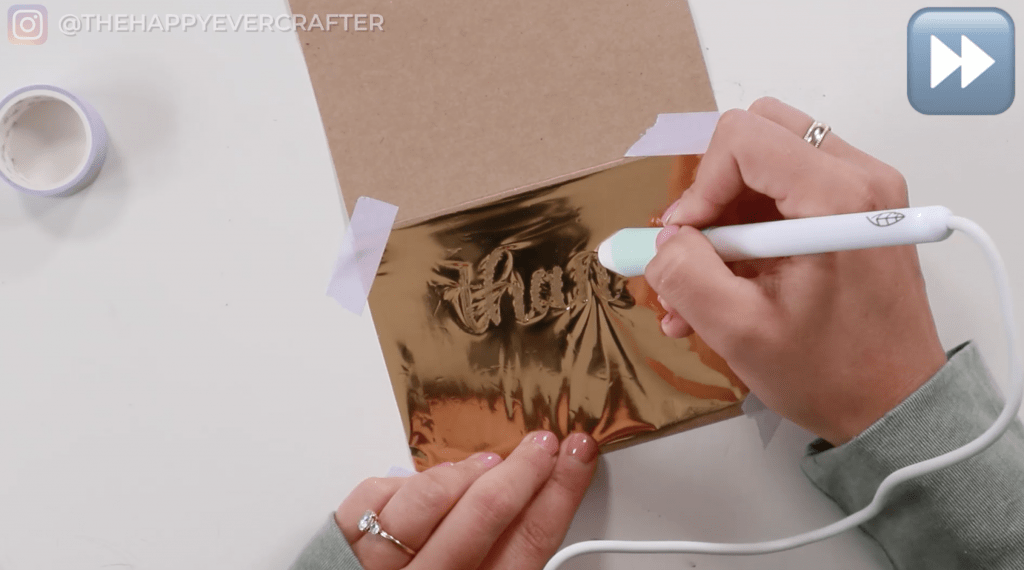
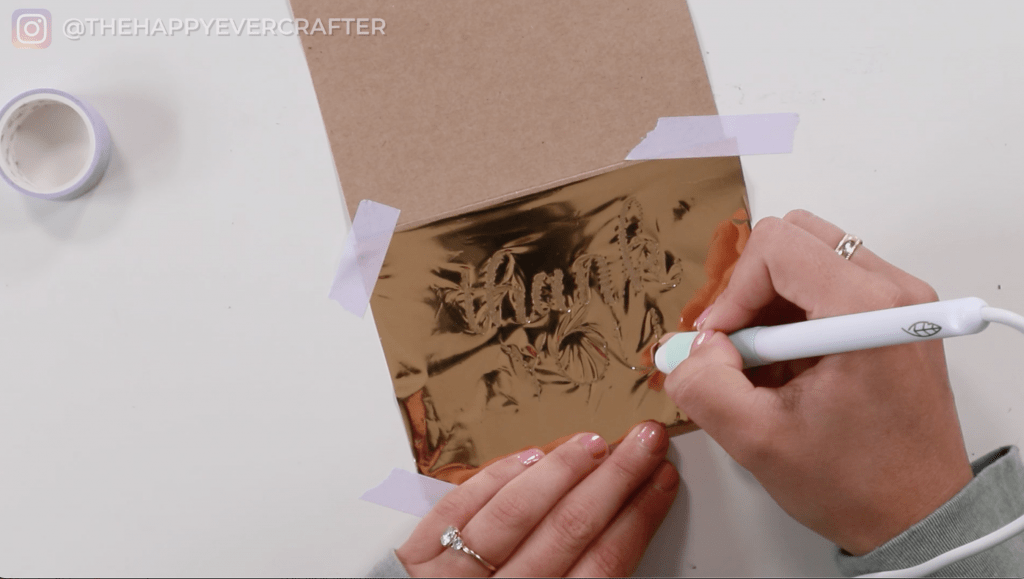
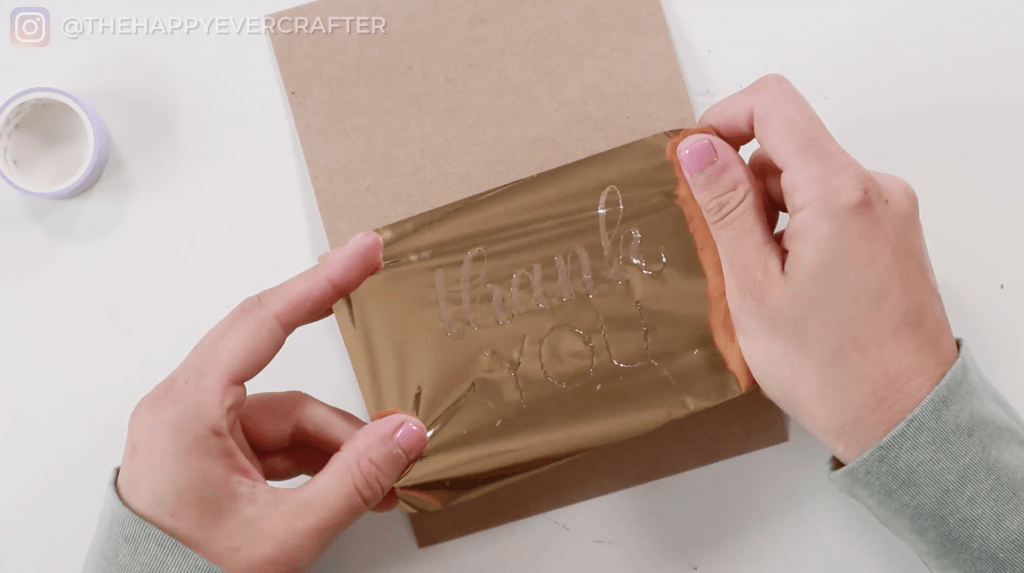
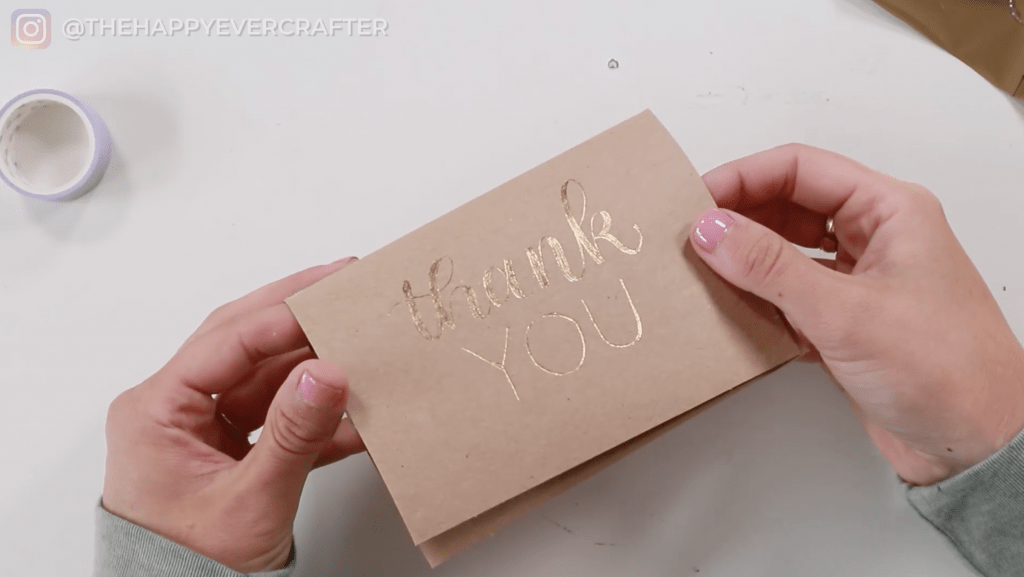
Okay. Here’s the design. Moment of truth.
Do you think this worked?
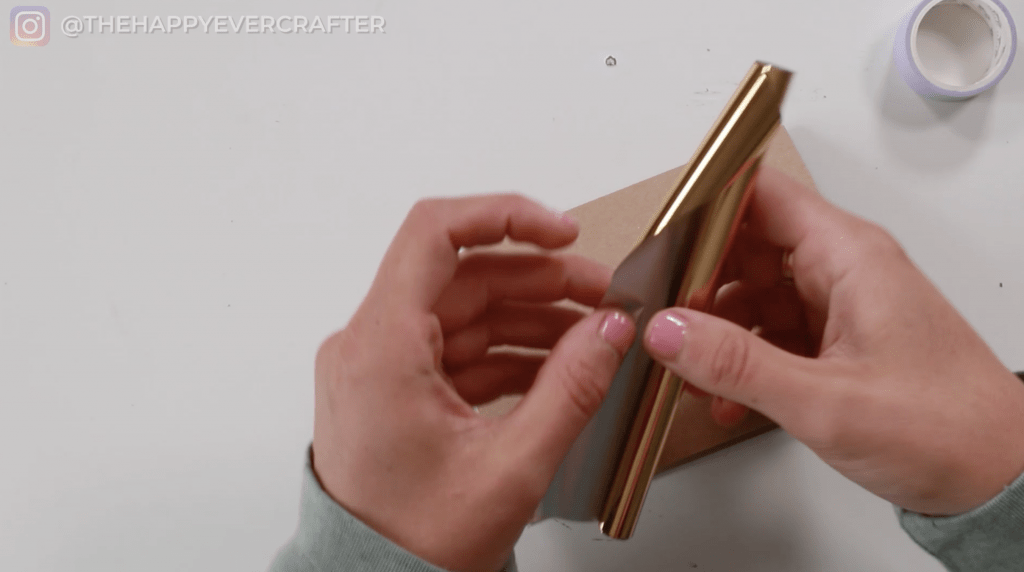
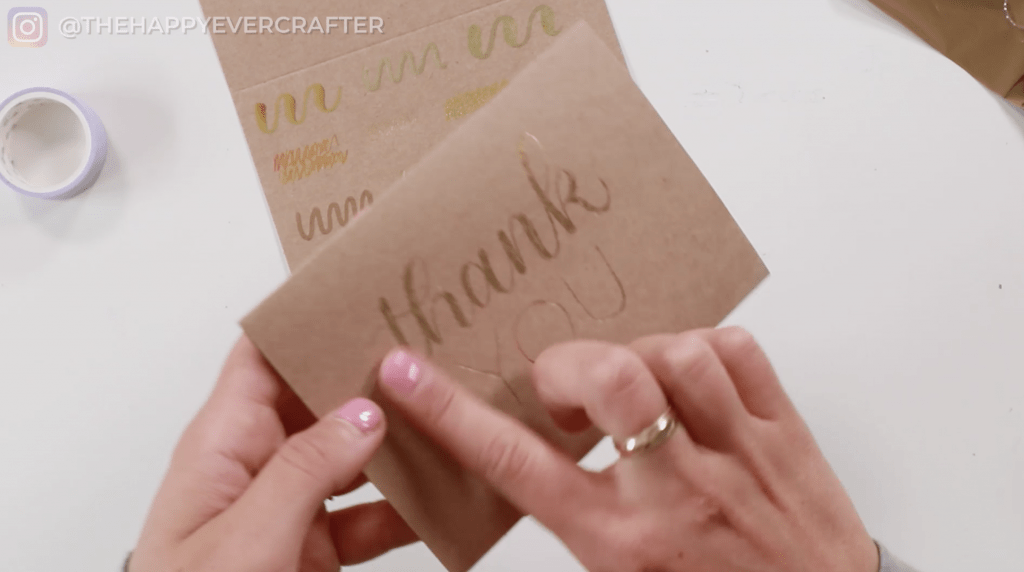
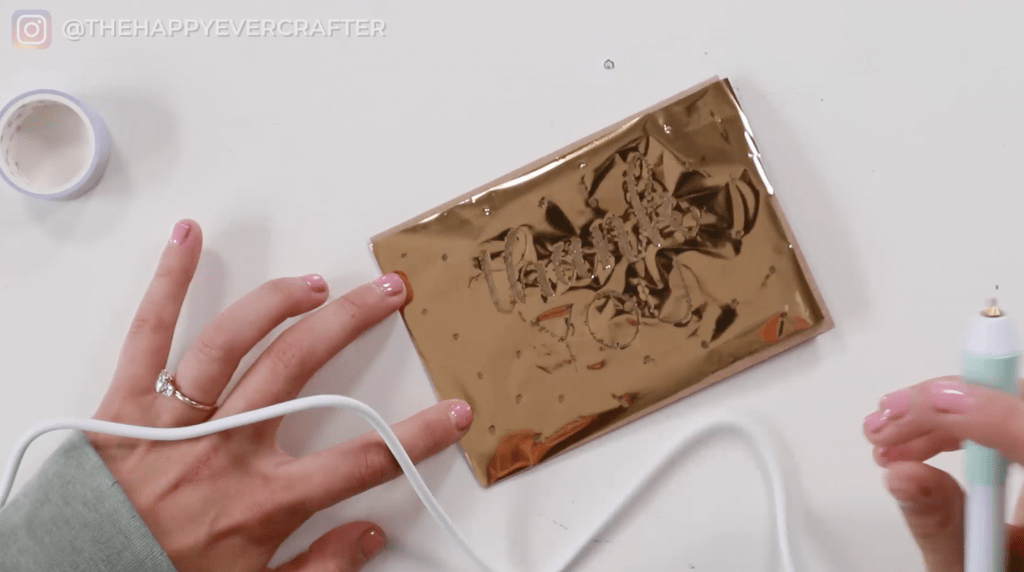
I definitely accidentally yanked the foil off my card (it got stuck to the tape. But the foil itself looks like the transfer worked!
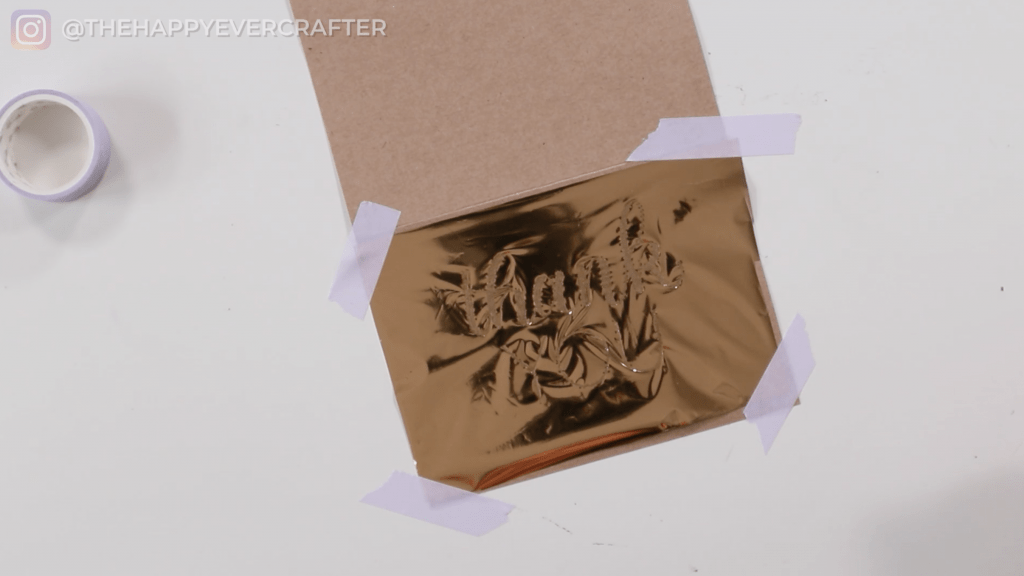
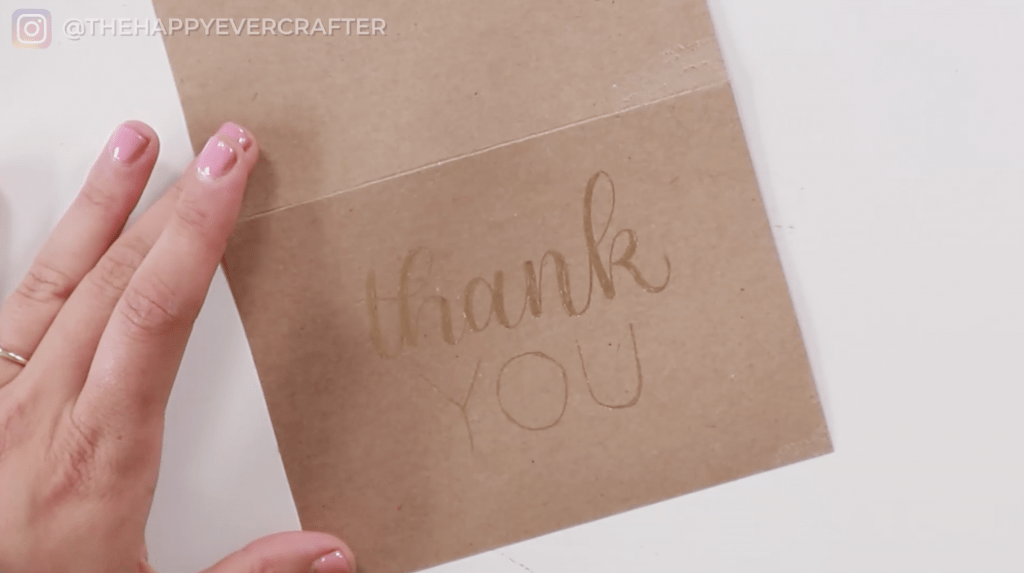
Right away you can see it’s shiny. It’s honestly shinier in real life than in the photos.
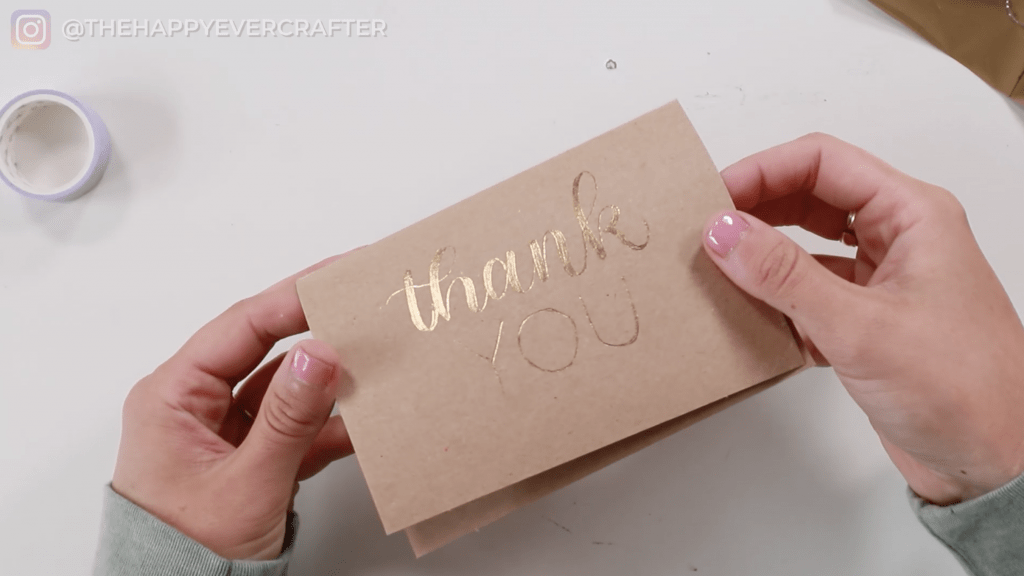
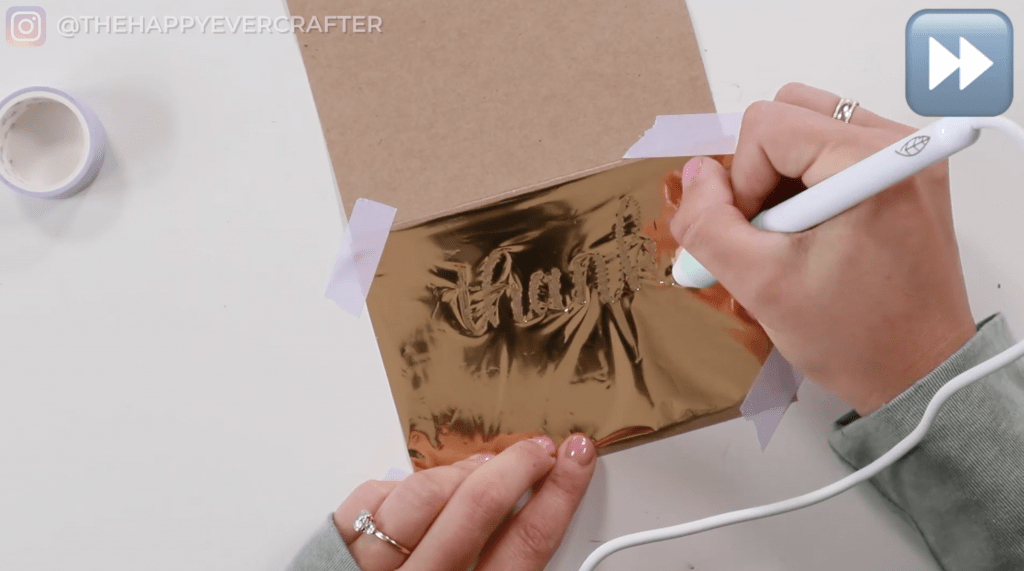
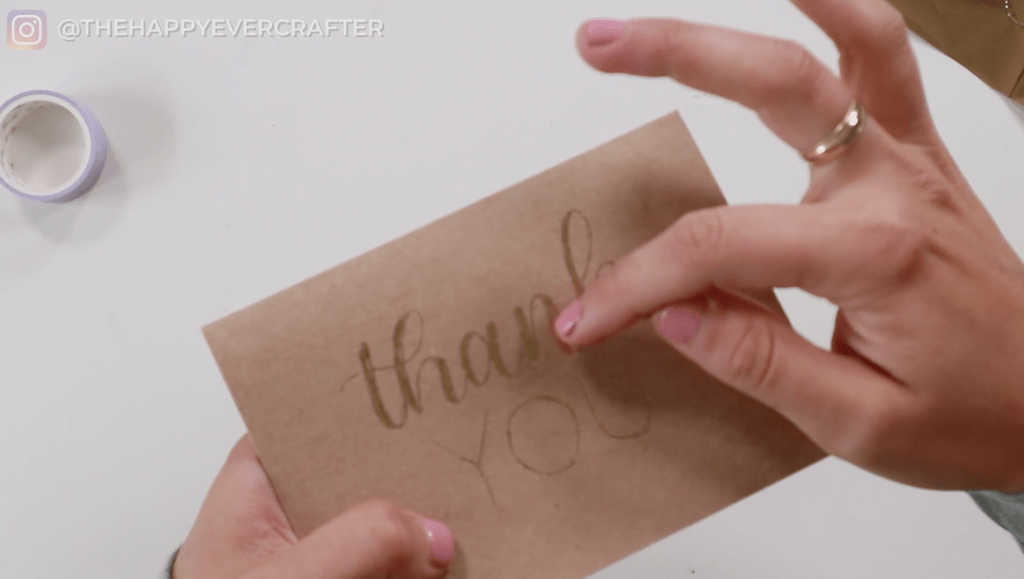
Truthfully, you can see where my faux calligraphy didn’t transfer fully. I definitely should have spent more time going over all the areas thoroughly to make sure I got everything – I didn’t spend enough time on it.
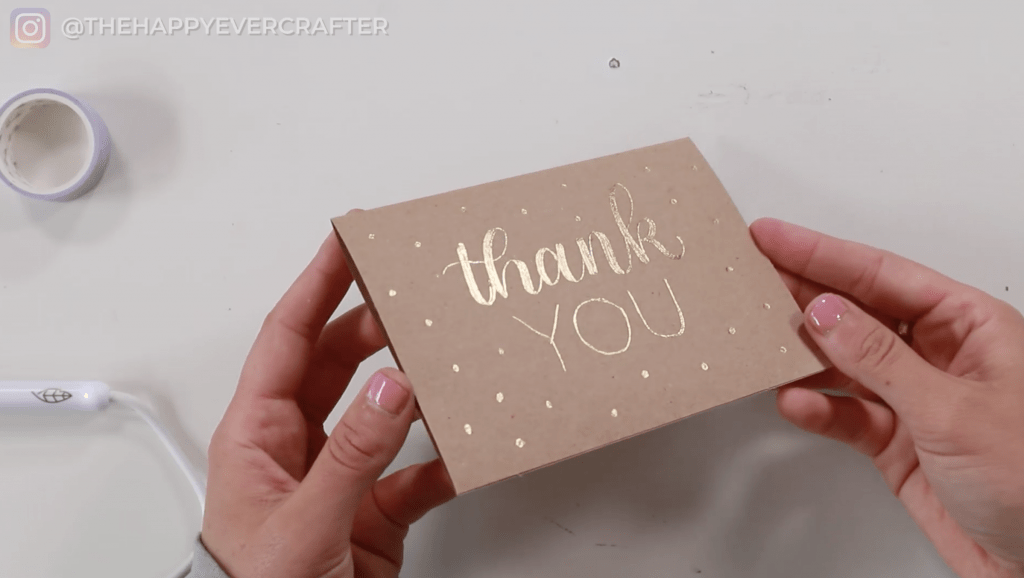
But where the foil did transfer is super nice and super shiny! I really really like it!
I mean… this comparison is pretty night and day. This is ACTUALLY metallic gold.
And you can feel the foil. It feels like a card you’d purchase from a store.
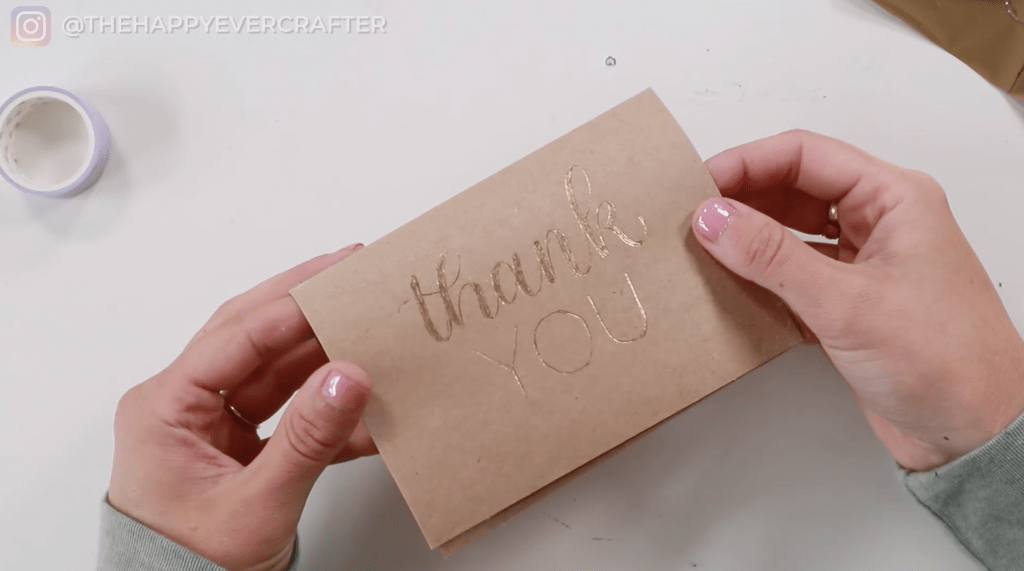
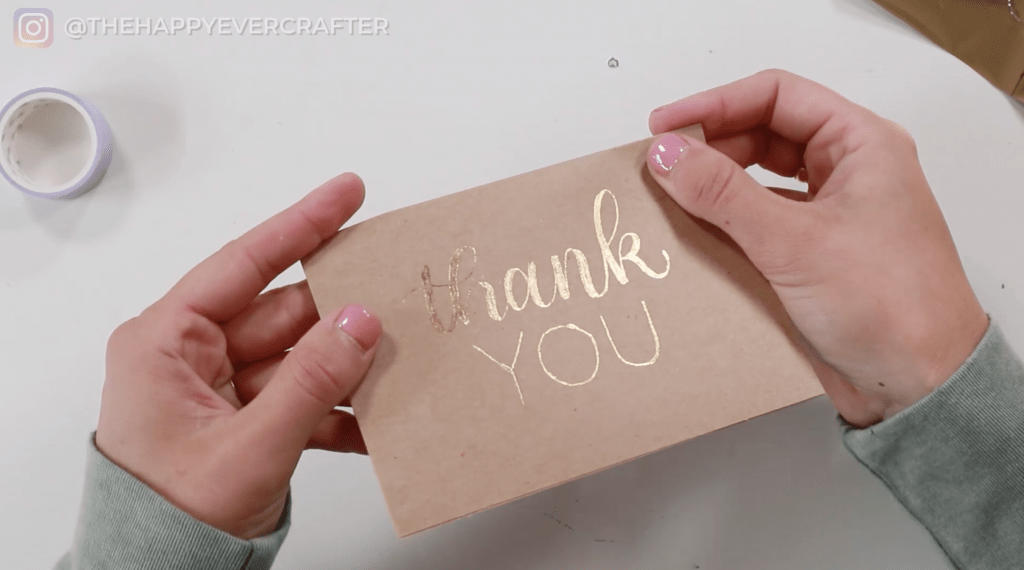
I’m going to add some pretty dots – might as well use up some of this excess foil. Overall, I’m really happy with this foil quill. I think the goal is really pretty, and I’m loving this card.
In hindsight, I should have taped down the foil before adding the dots. Oh well. Done is better than perfect, right?
There you go! Some cute little dots.

And That’s A Wrap!
Seriously though – this looks pretty freaking good.
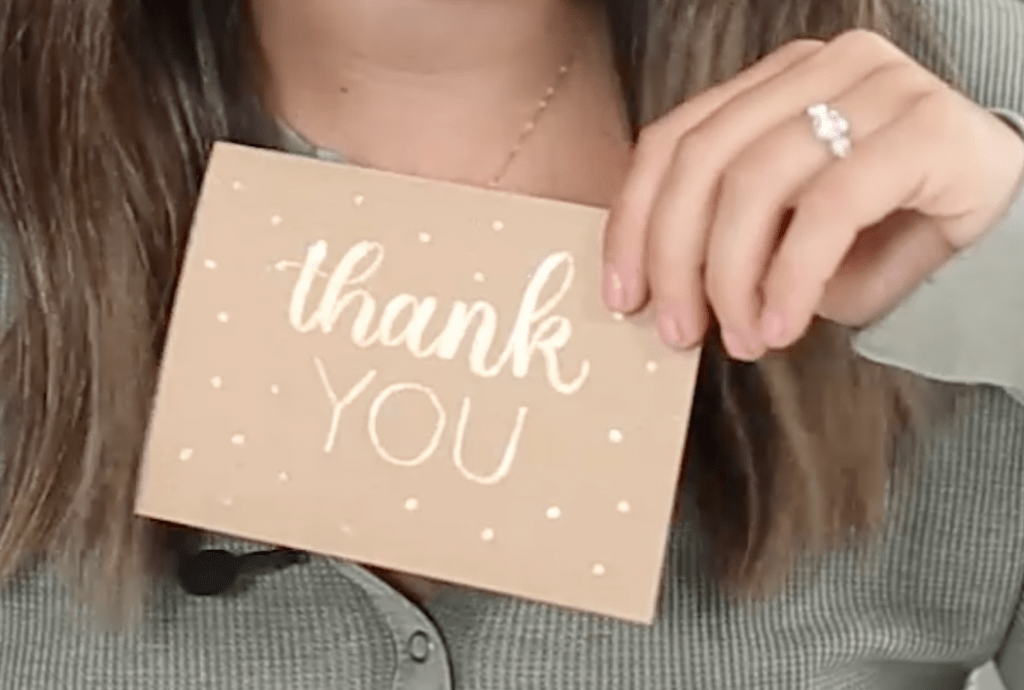
Obviously next time I’lll be a little more careful and thorough with my faux calligraphy, but I’m really happy with this. I fully plan to keep the card and use it!
The foil quill is definitely a success! Definitely better than the metallic pens I currently have for use on cardstock and paper. I will be using this tool and method lots in the future.
So that’s it for now… I’ll link to this foil quill if you wanna go find it. I’ll also link you to another cool tool post here.
And finally, your dad joke…
The miners had a get together…
…for gold times’ sake.


Thanks for this. I have bee. Wondering about it for a while.
I’m nervous about freehanding things. Do you think maybe transferring what you’re writing onto the foil using a carbon sheet would work? I feel like it would smudge, but I may try it.