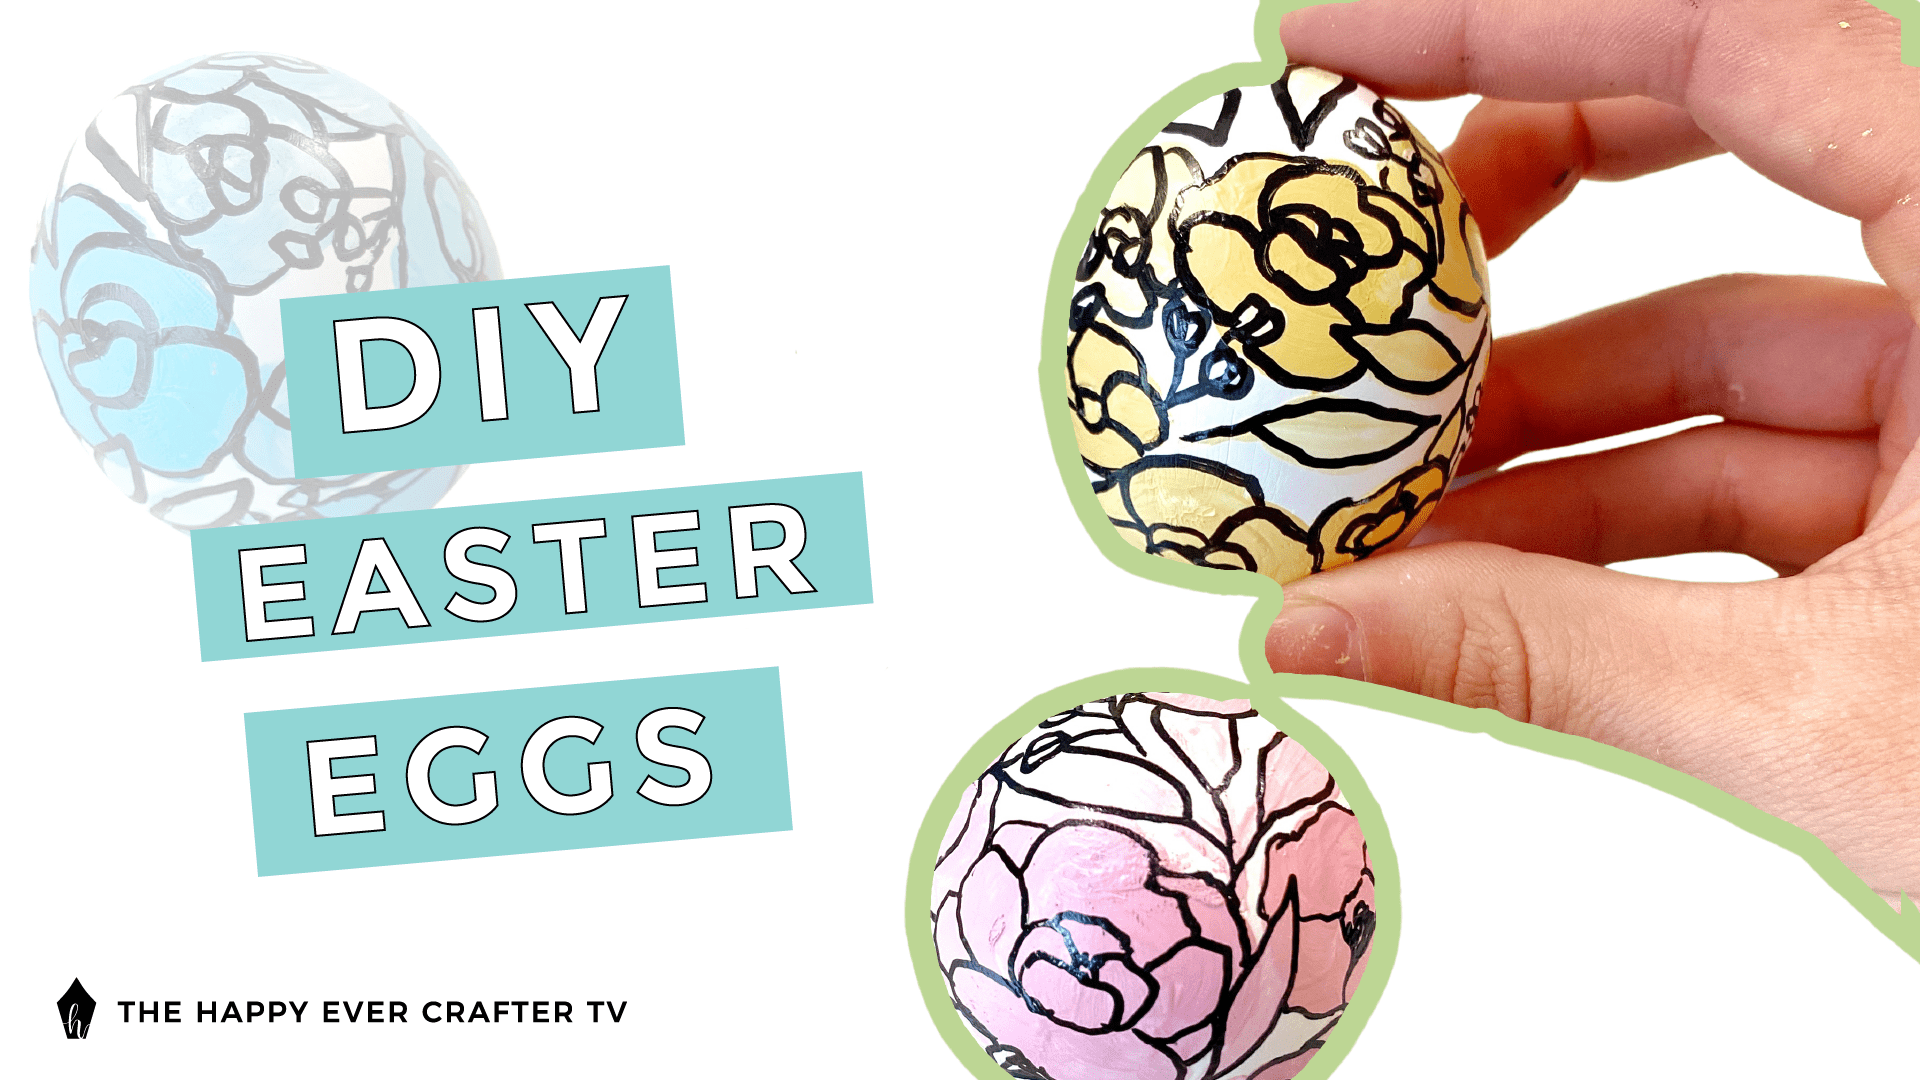
Have you ever wanted to get a bit fancy with your egg decorating? Now’s your chance! I’m going to show you exactly how I made these hand painted Easter eggs!
For this tutorial, you will draw peonies that look like these. If you’re not totally comfortable drawing your own flowers, I have a free downloadable worksheet and tutorial all for exactly how I draw mine. Go download that here then come back!
First Things First…
The links below may be affiliate links where appropriate. This means that your purchase through these links may result in a few cents in payment to me, to support creating further resources like this one! That being said, I will never suggest supplies that I do not personally use and fully recommend.
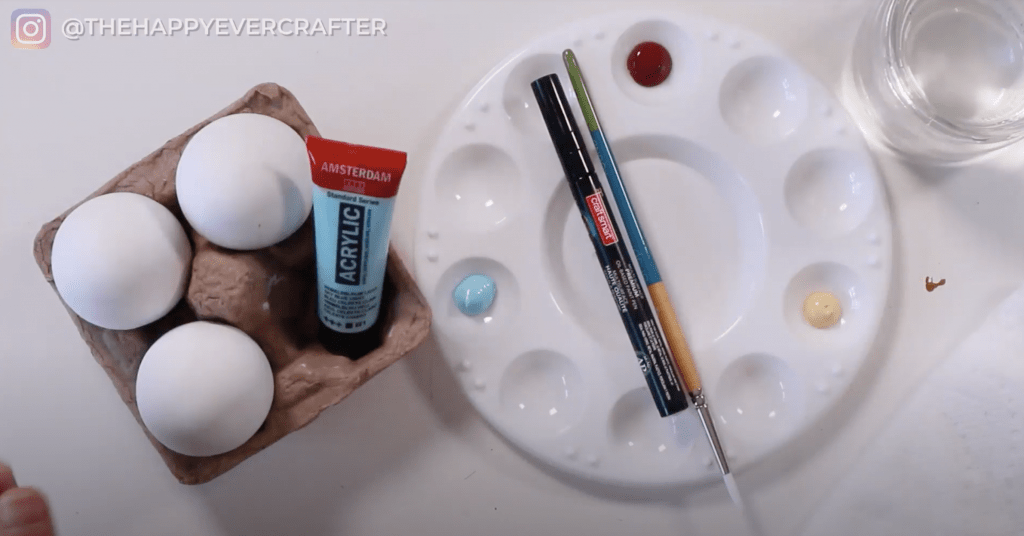
Supplies Used
- Egg – I did not use real eggs… you could definitely use real eggs if you wanted but I DO NOT trust myself with that. I also really wanted these to last! These are from Michaels, but you can definitely find these at craft stores around Easter or even at dollar stores.
- Acrylic Paint – I mixed some cute colours of acrylic paint. I used little tubes I got at Michaels it doesn’t have to be aaaanything fancy.
- Princeton Snap Brush – Any basic round paintbrush will work, but these are my favourite.
- Craft Smart Paint Pen – Any oil based paint pens will work. You could even just use a sharpie permanent marker if you like. I just like that paint pens are a bit shinier.
- Water
- Paper Towel
Rather watch than read? No problem! Feel free to follow along in real-time as I paint one of these super cute Easter eggs!
Alright so you want to make this super simple. The less perfect the better in my opinion. Don’t worry too much about perfection. Just follow the steps below, and your end result will be really cute (even if it looks kind of messy along the way).
Honestly with this technique, I find no matter what you do it’s gonna look cute.
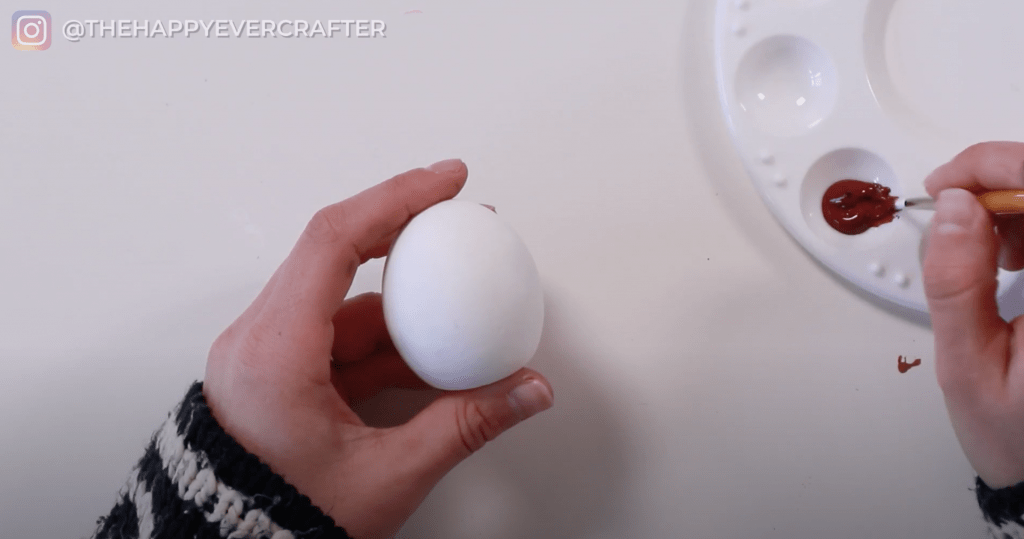
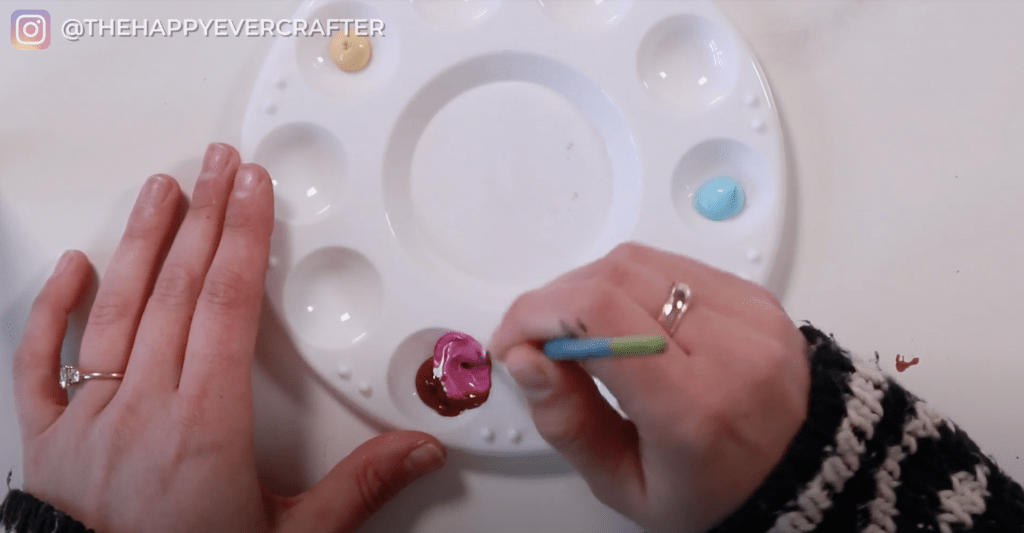
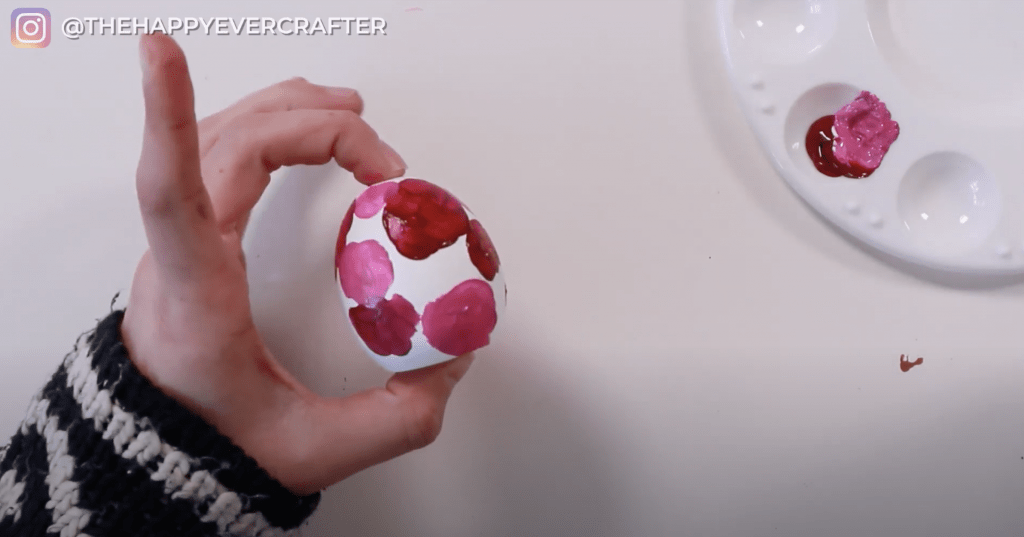
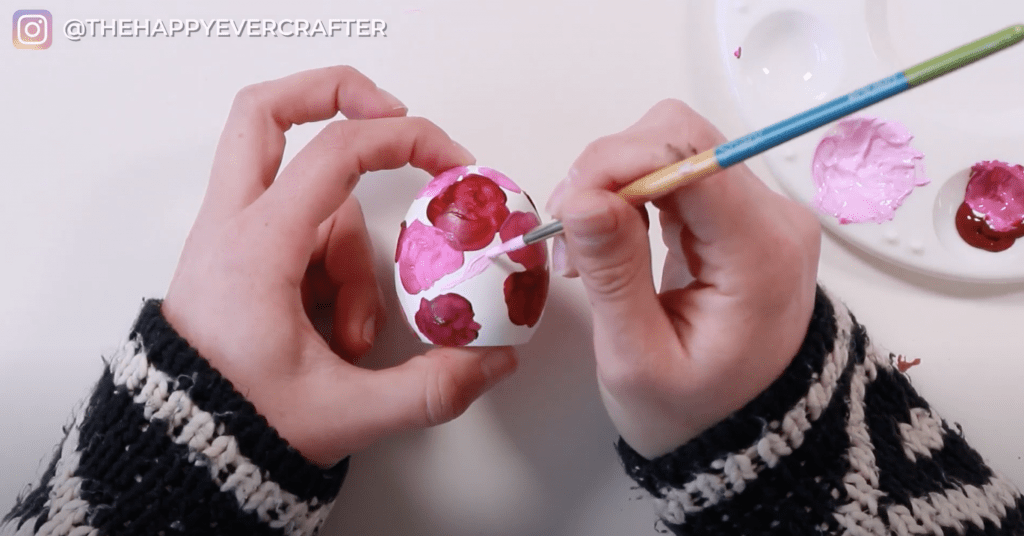
Step 1: Smoosh some paint in a rough flower shape.
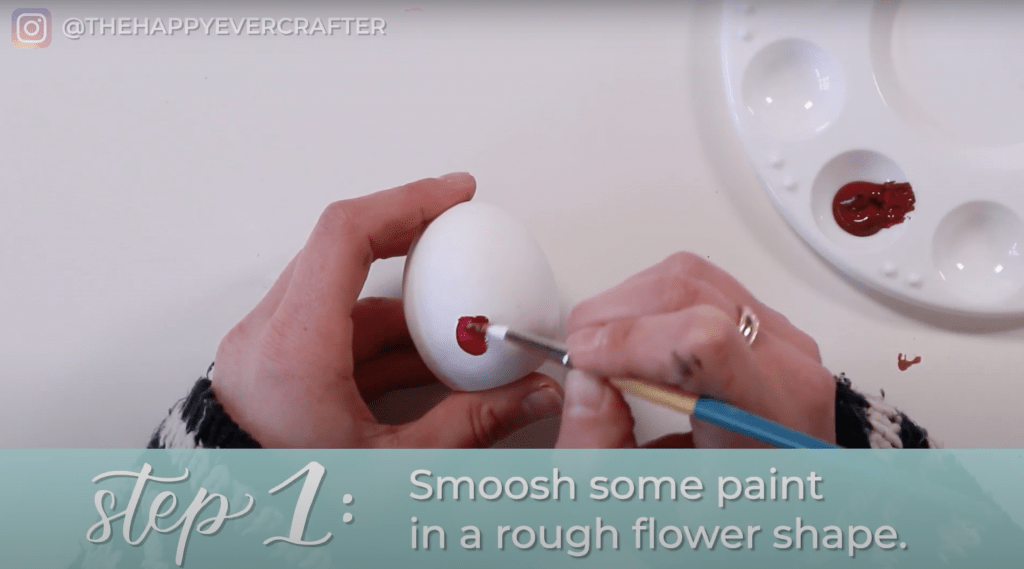
Create some imperfect round-ish shapes on your egg. They should kind of resemble a flower but not a perfect circle. Just kind of petal shapes. Imperfectly placed. Some bigger, some a bit smaller, etc. Don’t worry about it too much. It’s okay if they touch. It doesn’t have to be perfect.
Don’t fill up your egg. You’re going to add more colours soon (this is the darkest shade you’re going to use on this egg).
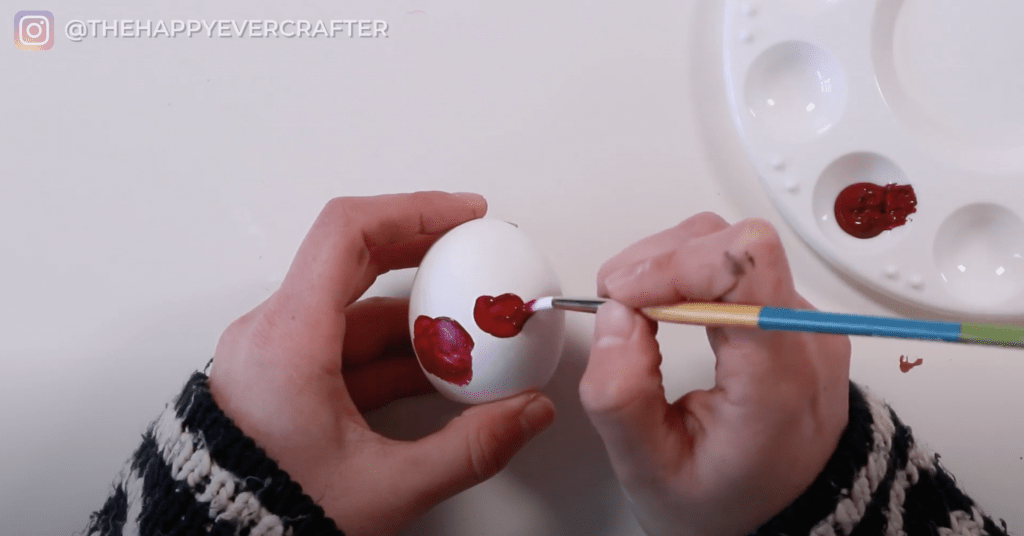
I find it easiest to hold it at the top at the bottom and rotate as I go. I try to keep the surface area under my fingers small to allow more room to paint.
I personally painted to the bottom but didn’t go under since I have a flat egg. Feel free to keep going if you have a round egg though.
Hack: Add some texture with your paint. A little extra paint goes a long way in making this effect really cute. This will look so pretty once it dries and we add our lines.
Let that dry, and then come back for step two.
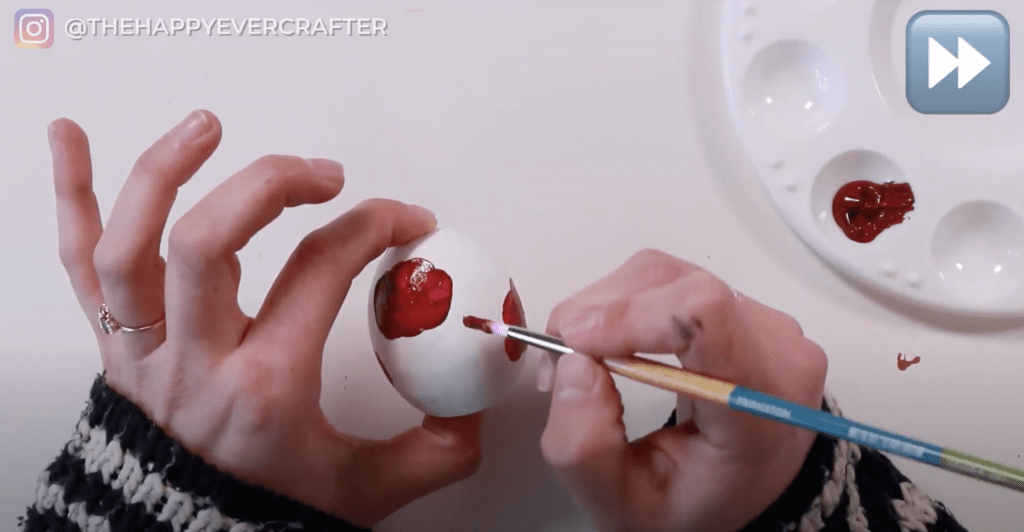
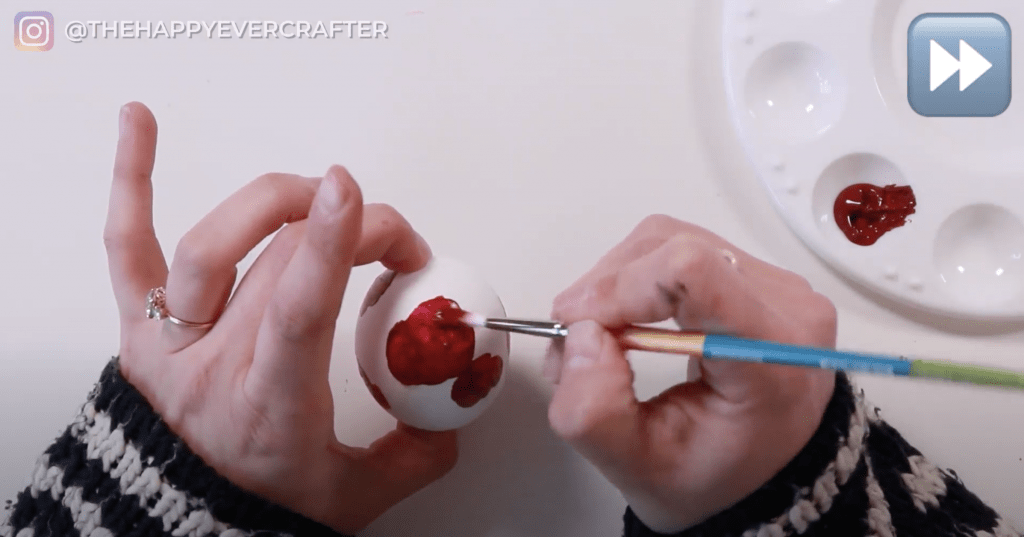
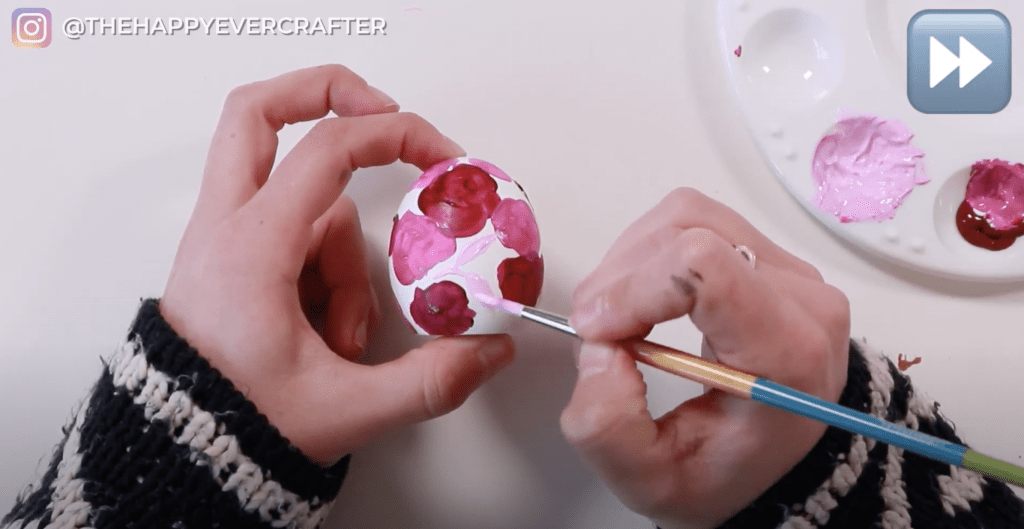
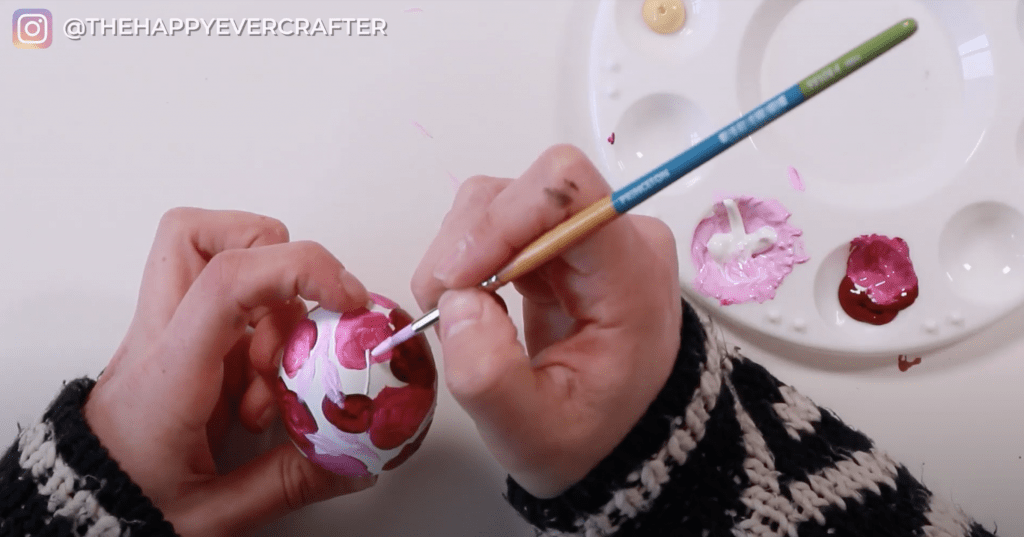
Step 2: Smoosh some more flowers in your second colour.
While you wait for your first layer to dry, mix your next colour. Add a little white to your original colour and mix.

Then you’re going to do the exact same thing– make some more imperfect round shapes Some can overlap – whatever you want really. Just adding more circles. Some bigger, some smaller. It’ll just be with a new colour this time.
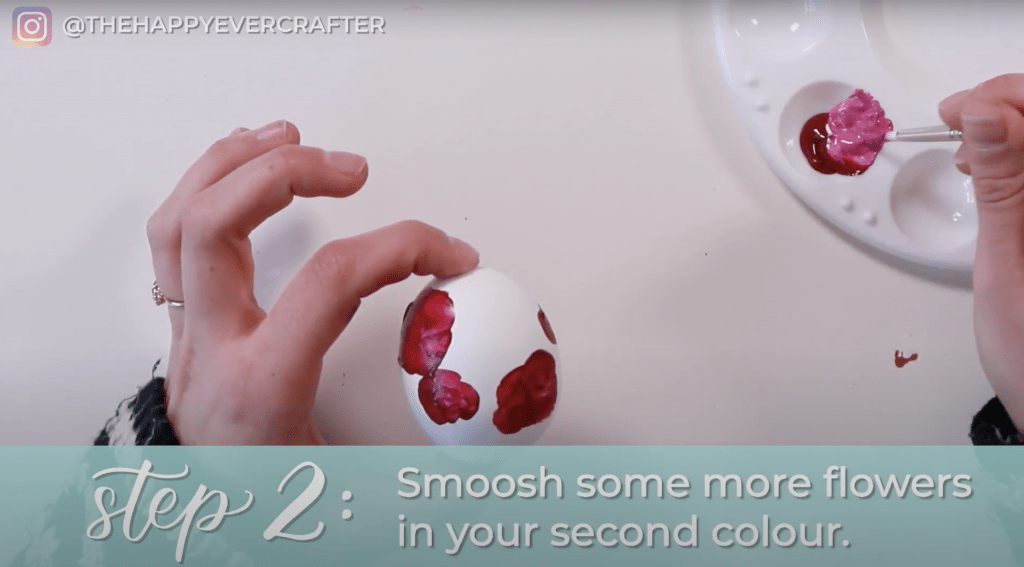
Fill in some of the gaps – you don’t want huge white spaces. You won’t be adding more blobs, so be sure to fill in the spots you see.
Now you have two colours of flower-y shapes.
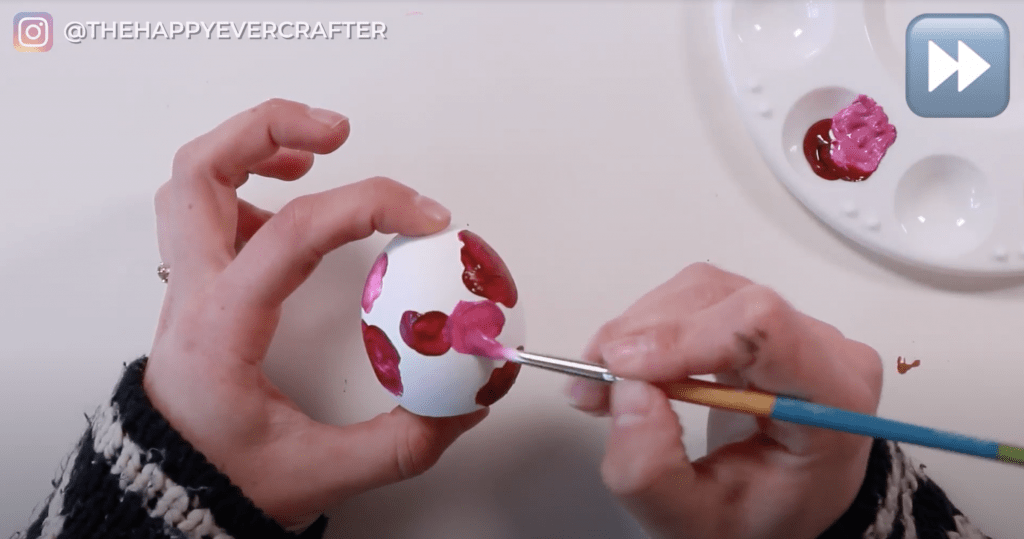
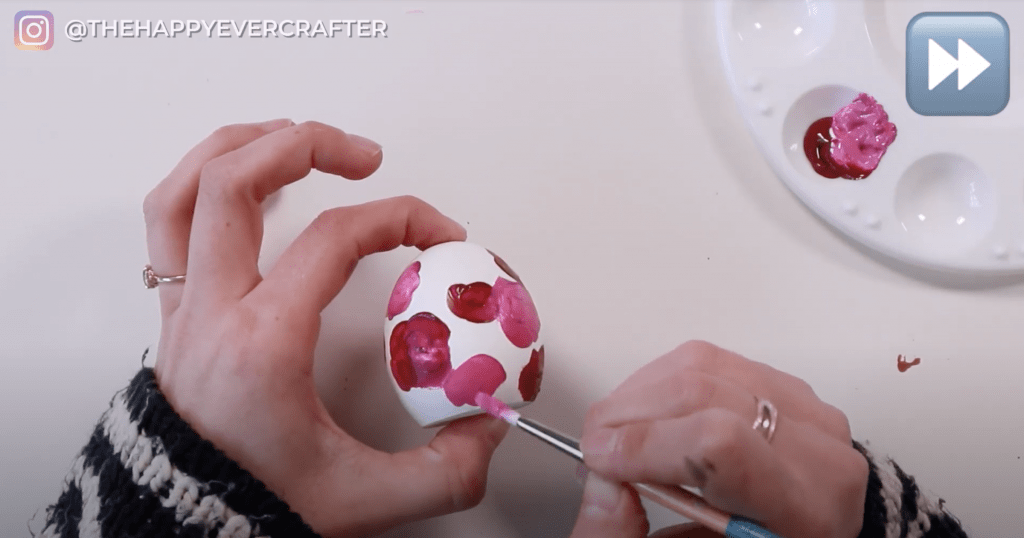
Let that dry, and then come back from step three.
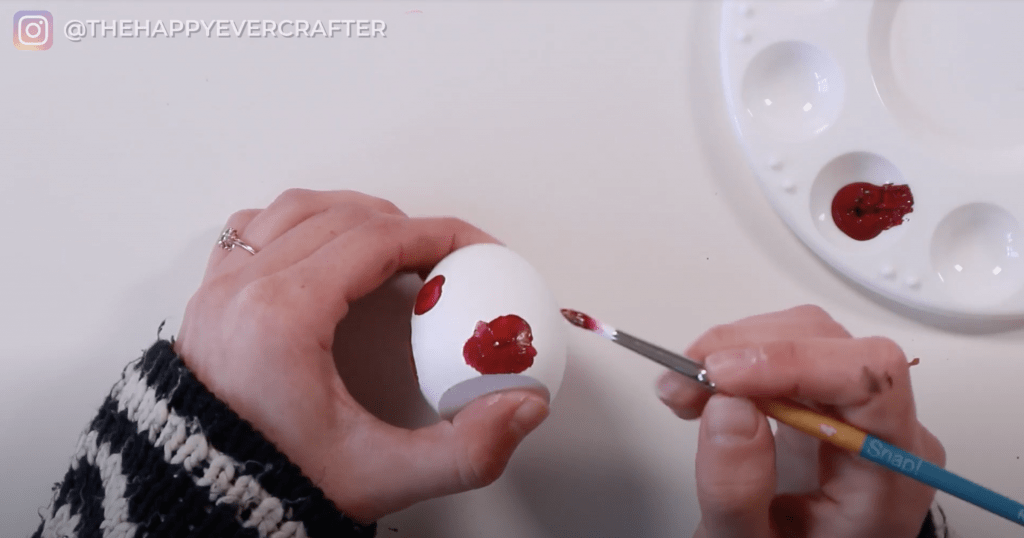
Step 3: Fill in the remaining gaps with leaves and berries.
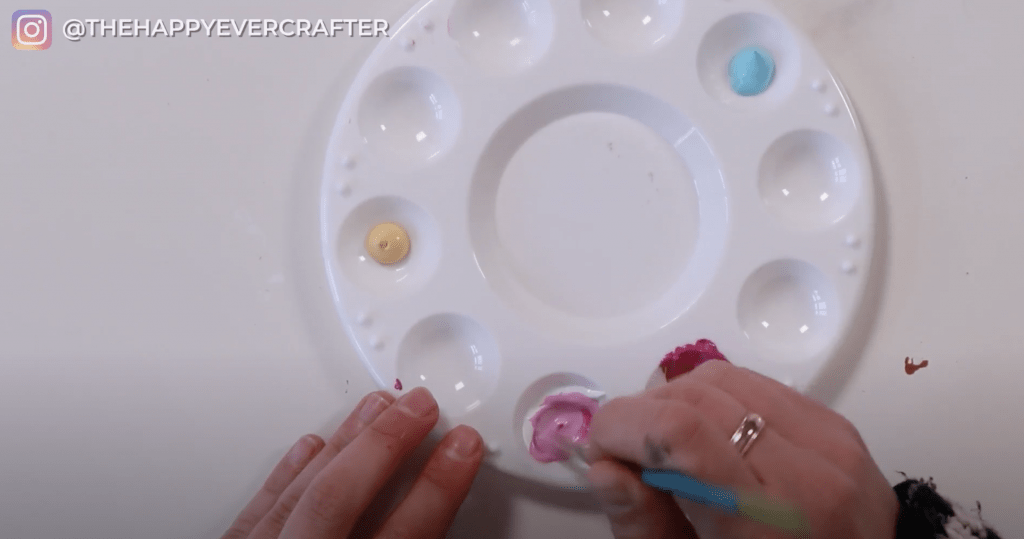

While it dries, mix your next colour. You want it even lighter, so feel free to start with white and then add a little of your colour to it. You want this one to be really light.
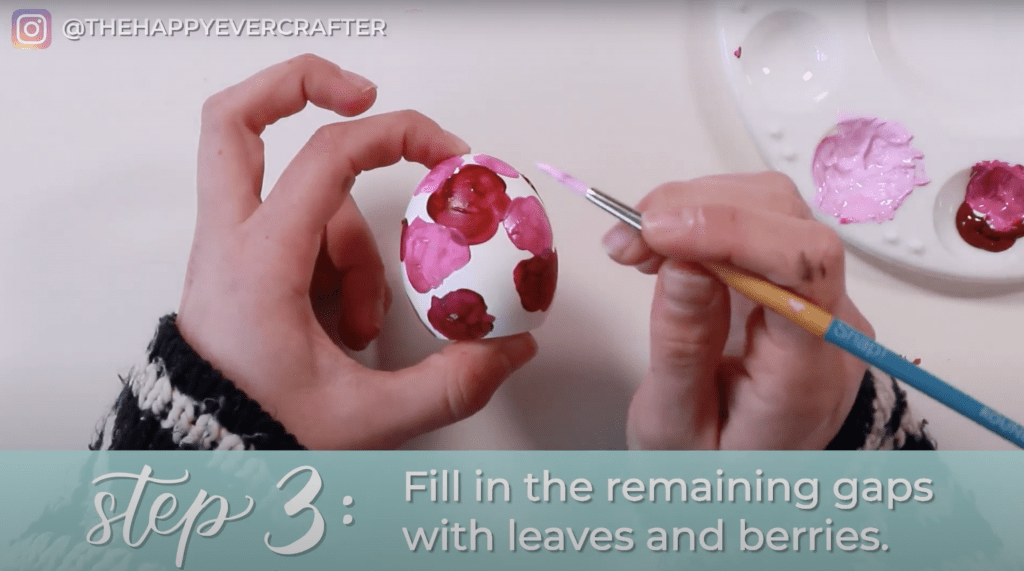
Now it’s time to draw leaves. Draw a little stem and then add a leaf. Add extra paint to get texture. You can overlap here if you want. Add more stems and more leaves. You want to use the leaves to fill in the remaining white spaces.
Repeat this around your whole egg. Again, don’t worry about perfection or it looking messy. It’ll all come together when you add the paint pen.
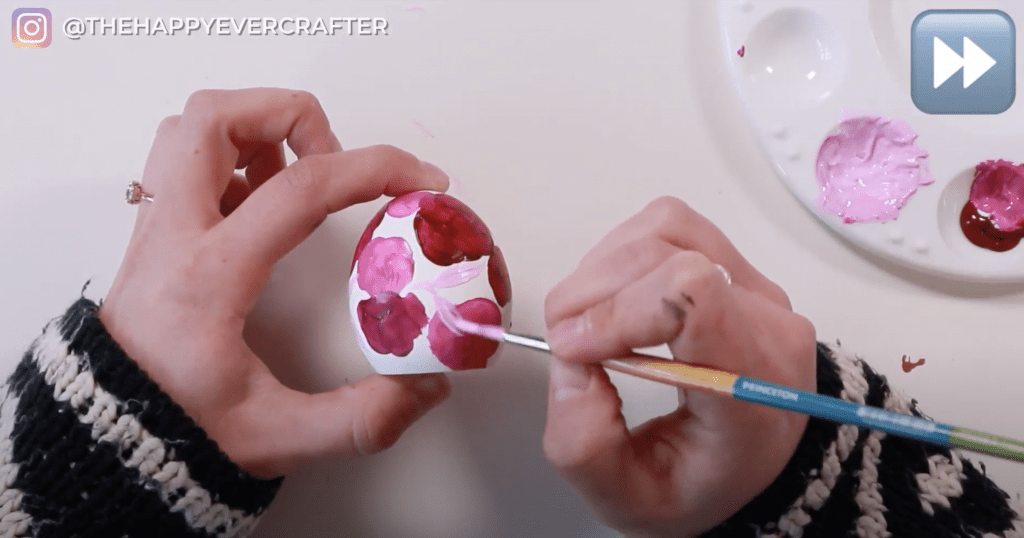
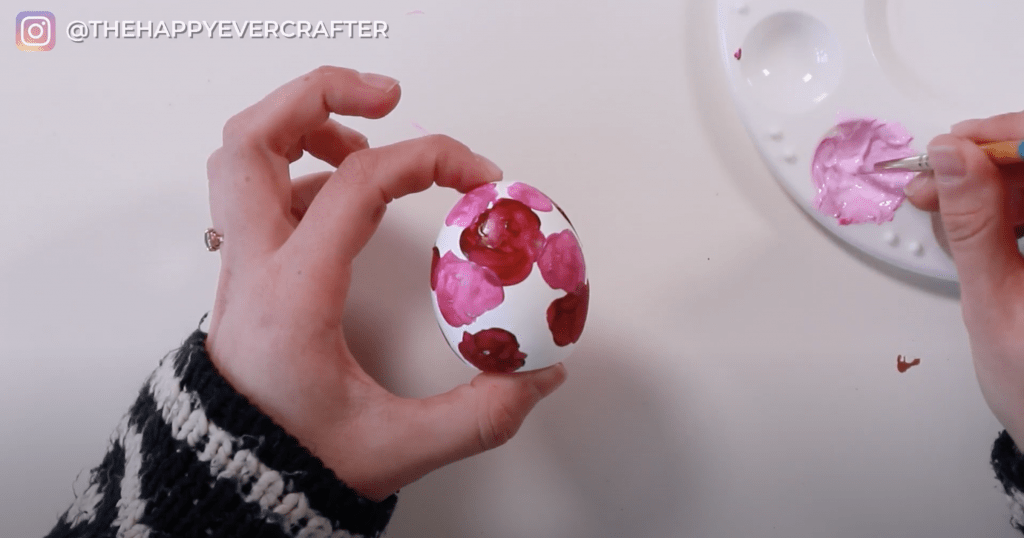
Next you’re going to add berries. I prefer to make my berries be suuuuuper light – almost white. To get this colour, you guessed it, add a tiny bit more white. Just touch the colour into it. Even if you won’t see the white colour much on your egg, you’ll see the texture!
Add little stems and berries. Overlap as much or as little as you want with your flowers and leaves. Use your berries to fill any remaining gaps.

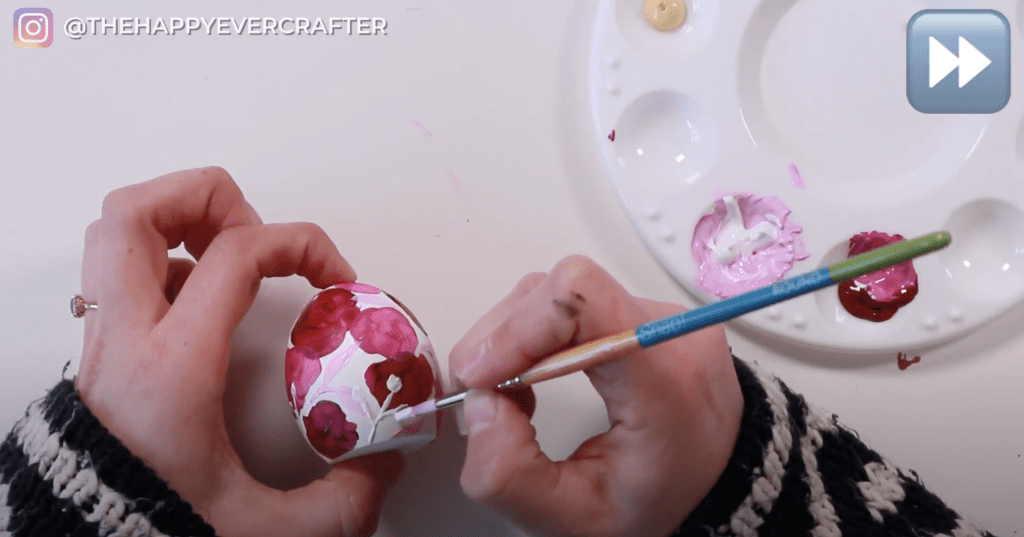
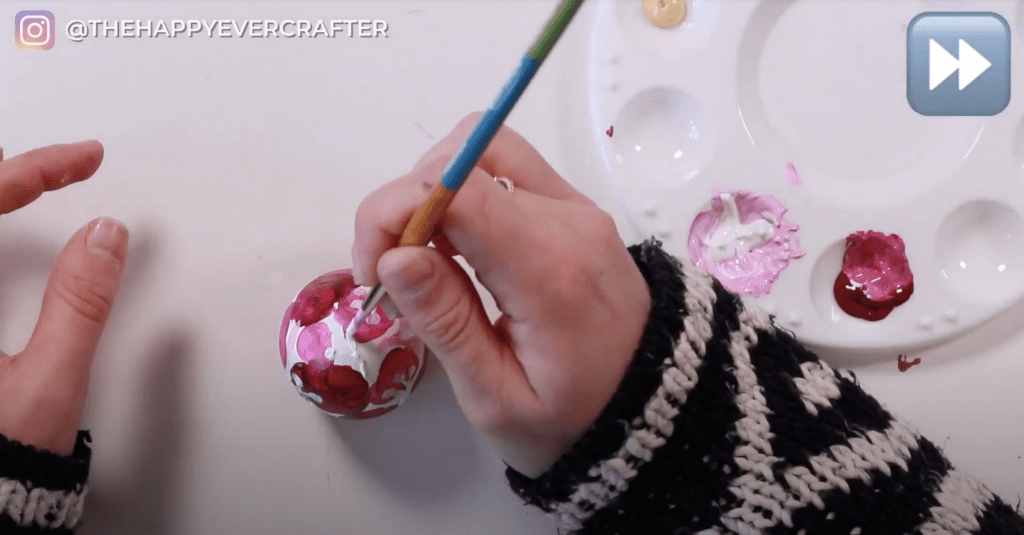
If you’re hating it right now, that’s okay. I didn’t love mine at this point either, but it will look so much better when you add the paint pen.
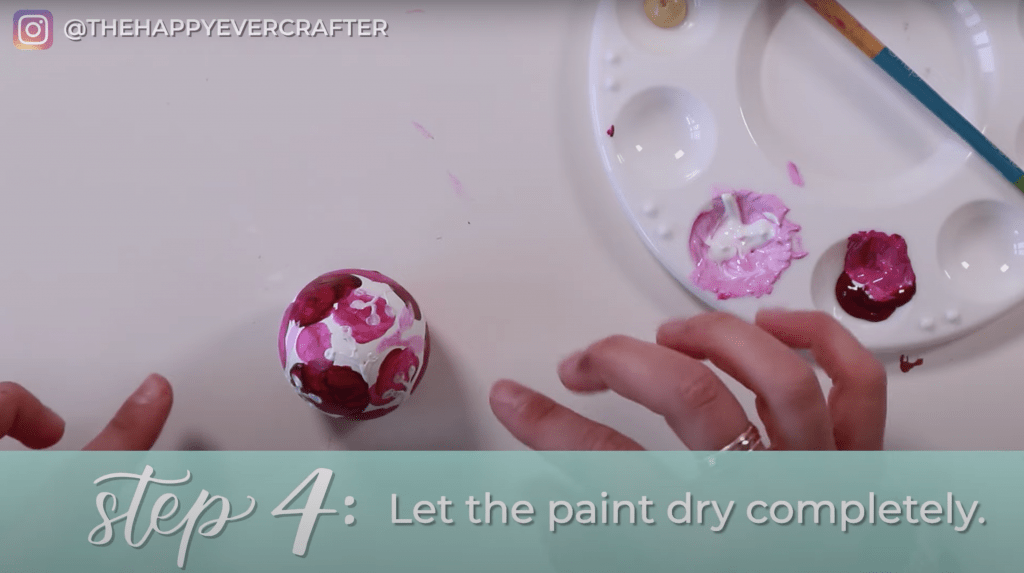
Step 4: Let the paint dry completely.
But really. It has to completely dry. If you add a paint pen to wet paint, it will be awful. Just be patient with your egg. If you’re in a rush, use a blow dryer. Give it a lot of time to cure.
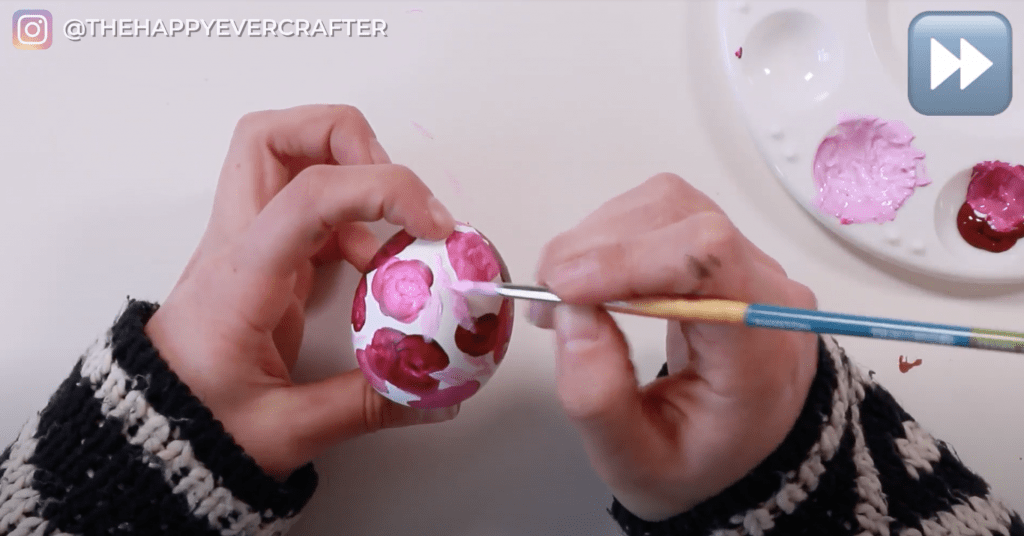
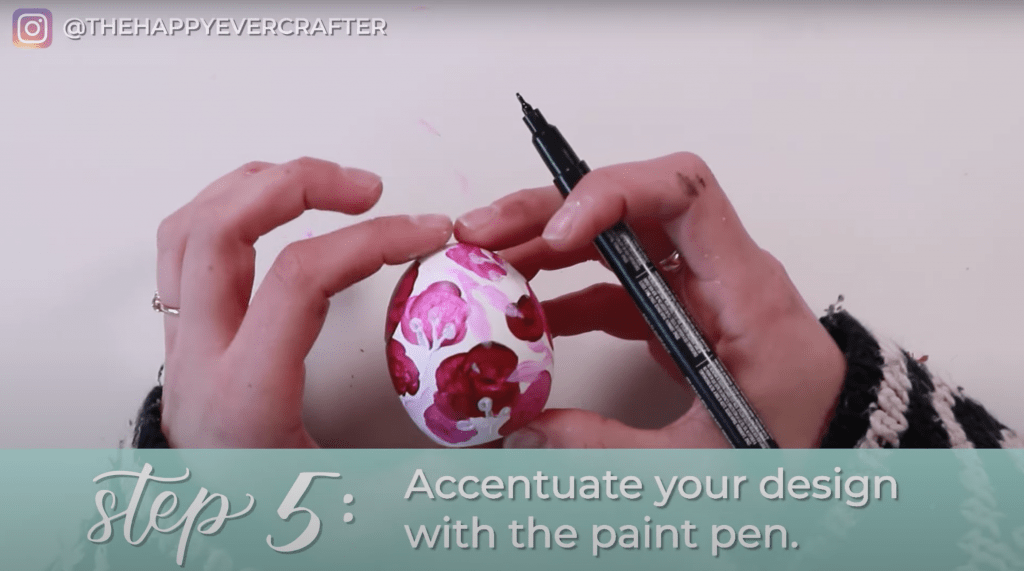
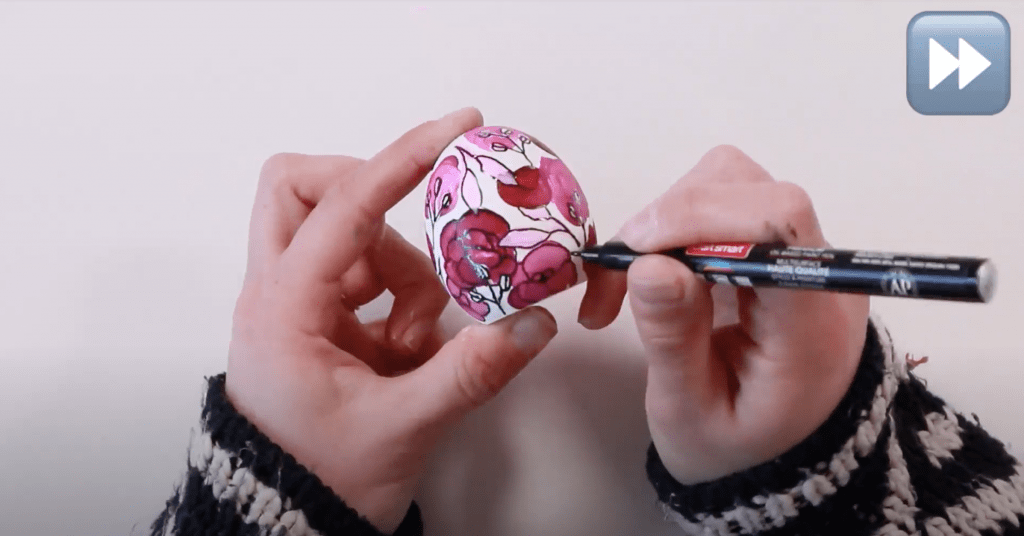
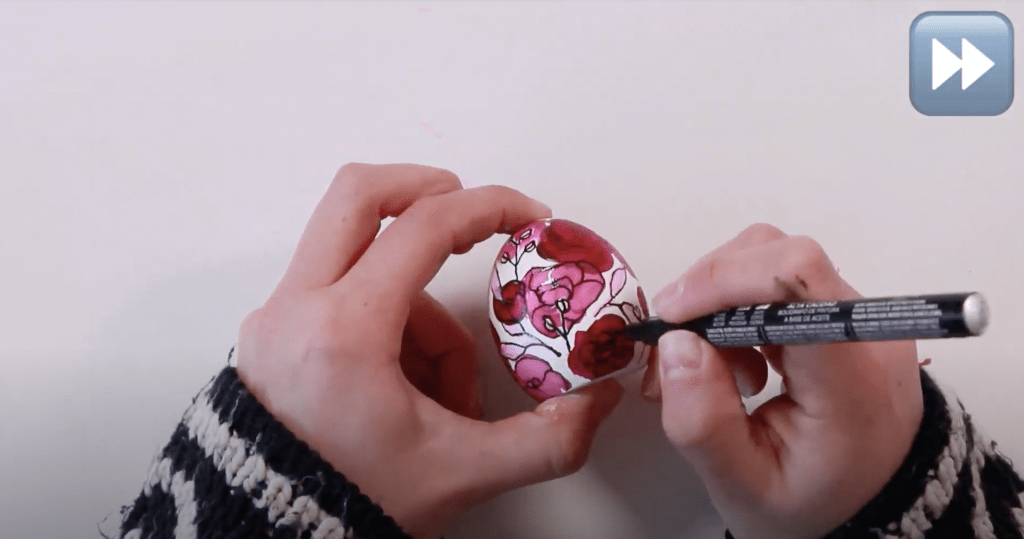
Step 5: Accentuate your design with the paint pen.
Time to grab your paint pen and start drawing leaves and berries. They overlap the flowers, so you want to do these first. Whatever is at the front should be outlined first.
Go over what you’ve already painted. Trace your stem and then add your berries. They should all be a little different – loops and uneven hearts. Do all the berries first and go over what you already painted. It doesn’t have to be perfect! That’s what makes this so easy.
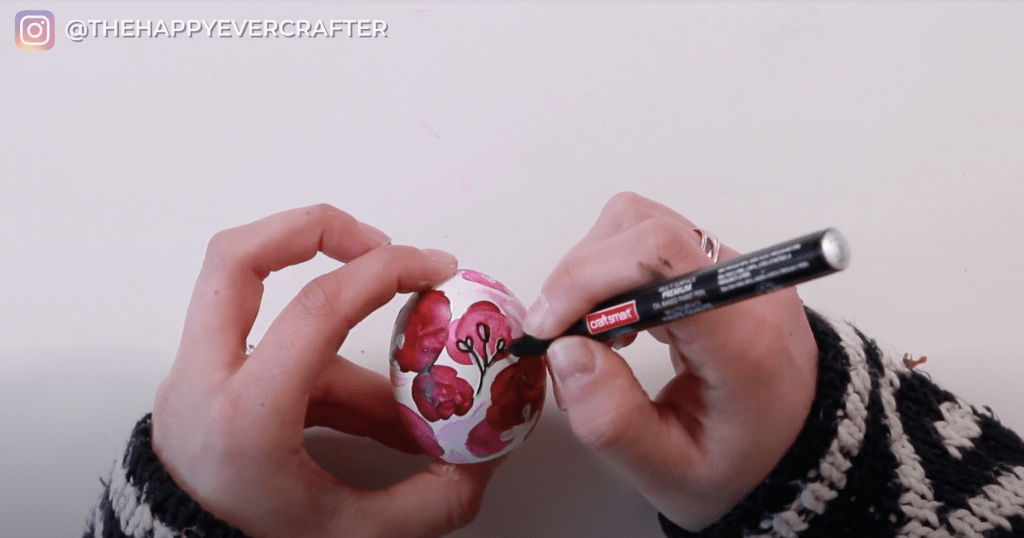
Next the leaves. Trace your stems and follow your brushstrokes to kind of outline the leaves. Feel free to have some go over your flowers and some go behind. It’s up to you how perfect or imperfect you want the leaves to be.
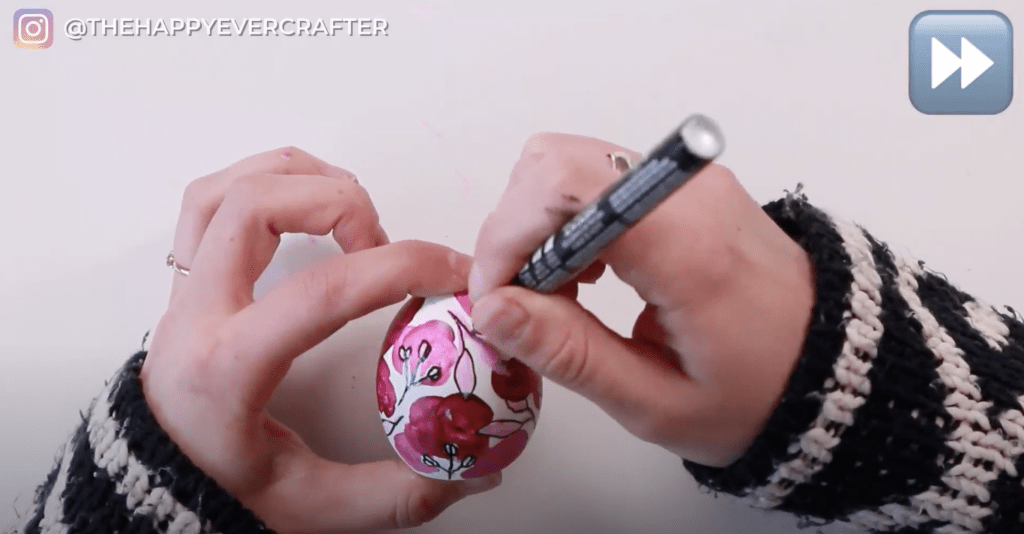
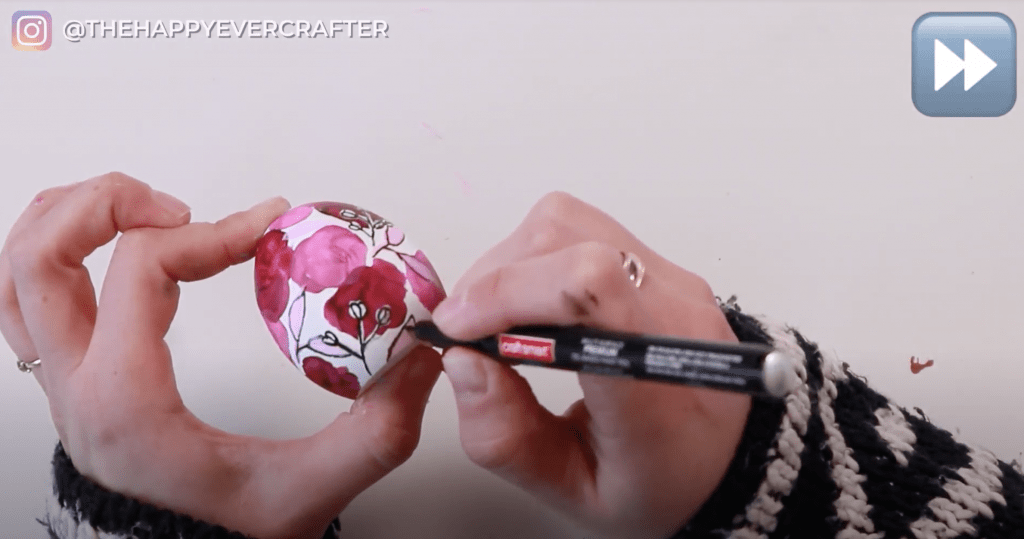

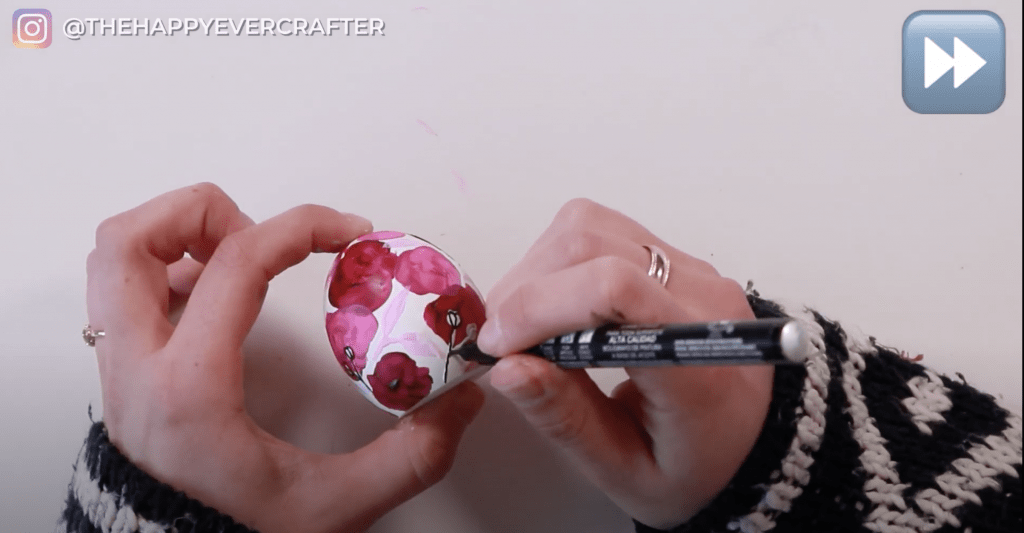
Now it’s time for the flowers. Again, if you haven’t downloaded the floral worksheets, do that before moving on to drawing your flowers on your egg.
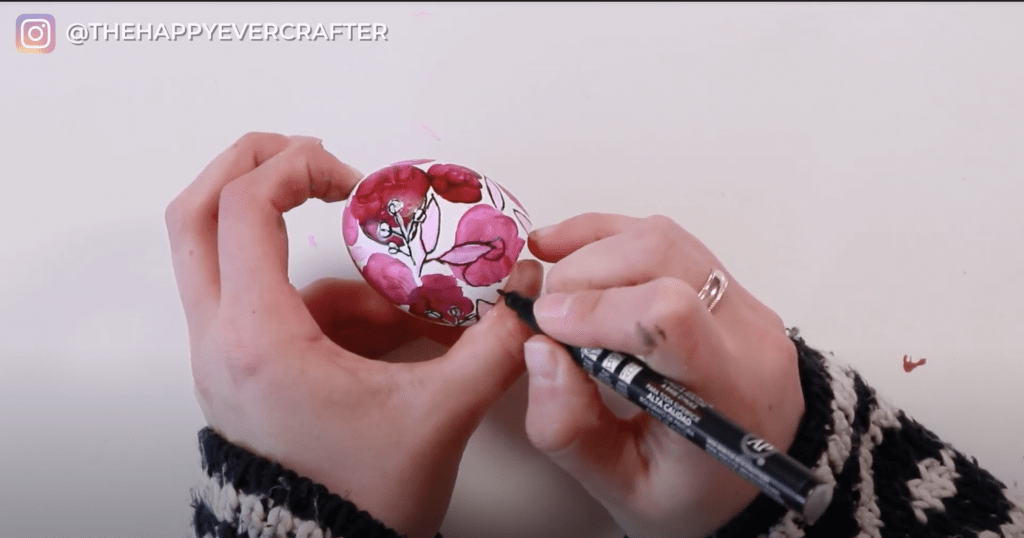
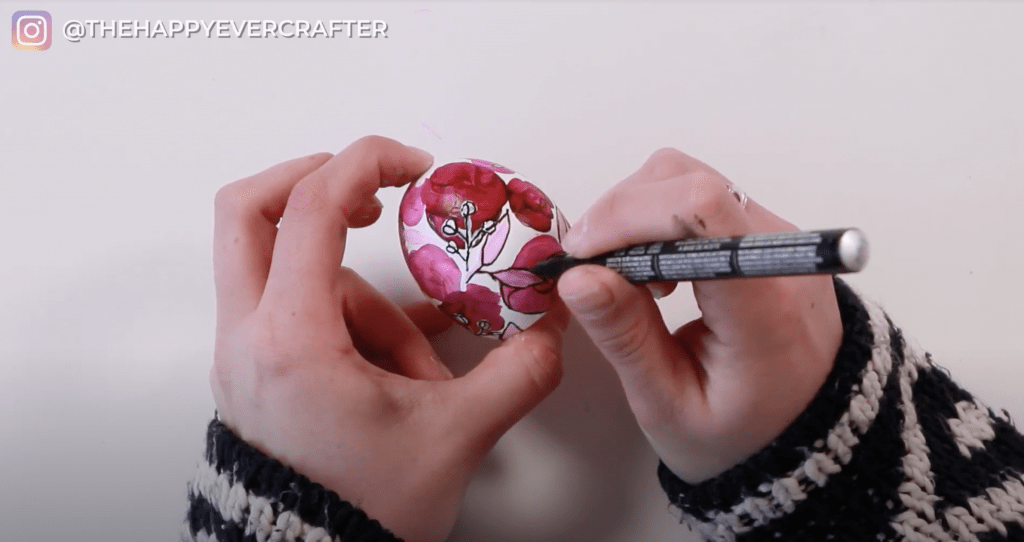
Work around the brushstrokes of your flowers. Let those brushstrokes and your knowledge of drawing peonies guide the direction of the flowers. You don’t want them all going the same direction. You want some variety.
You can even make some of the smaller ones be peony buds instead of full peonies.
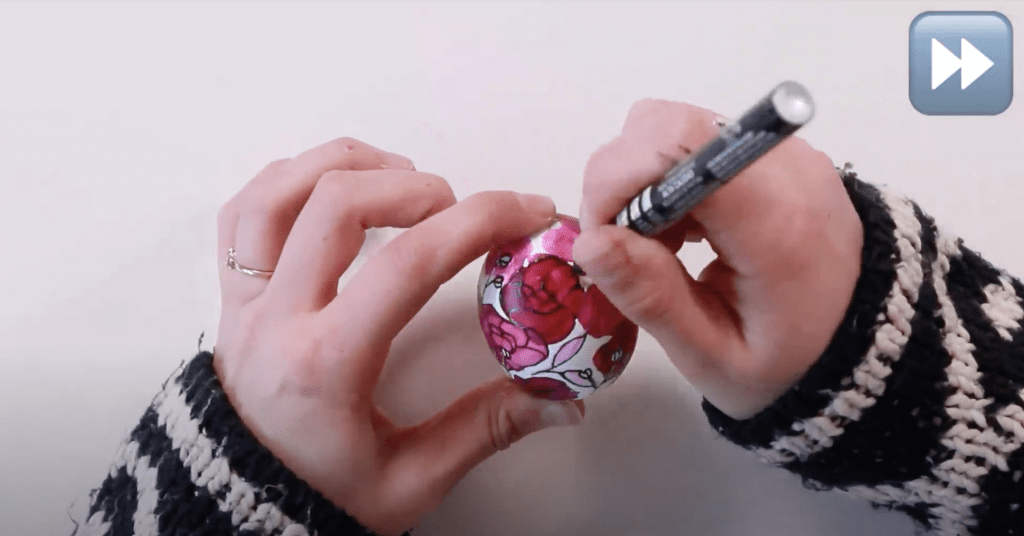
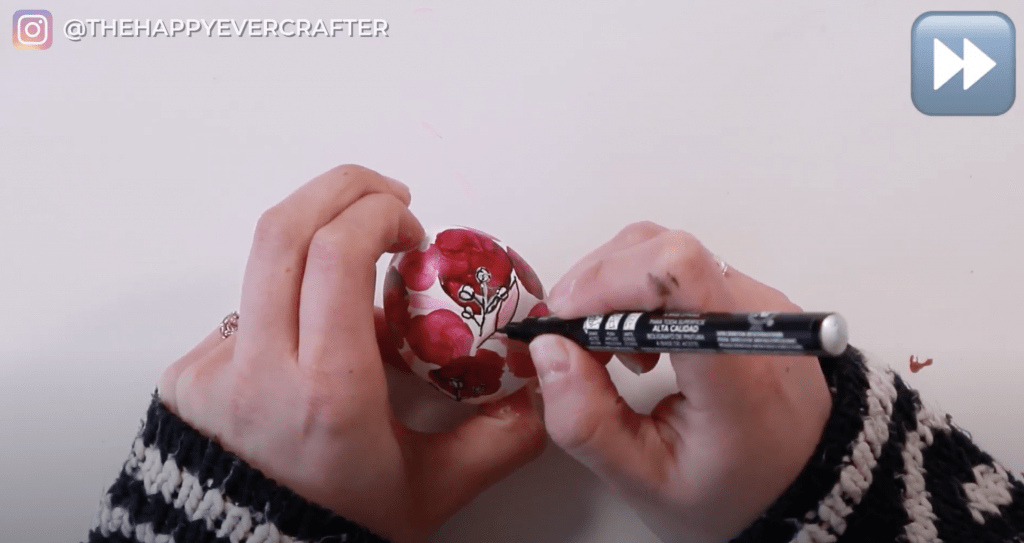
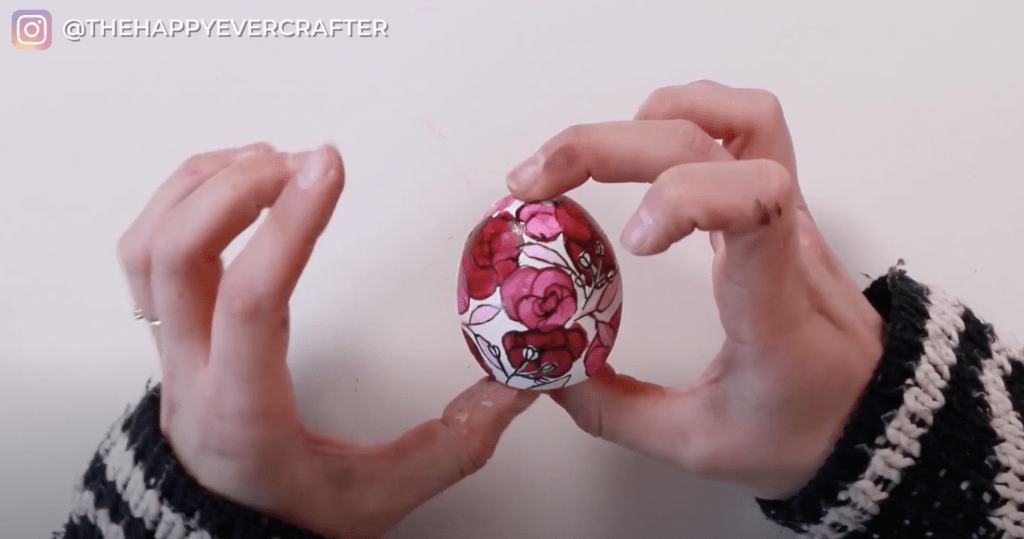
Once I went over all of the berries and leaves and flowers, I loved it! I hope you do too!
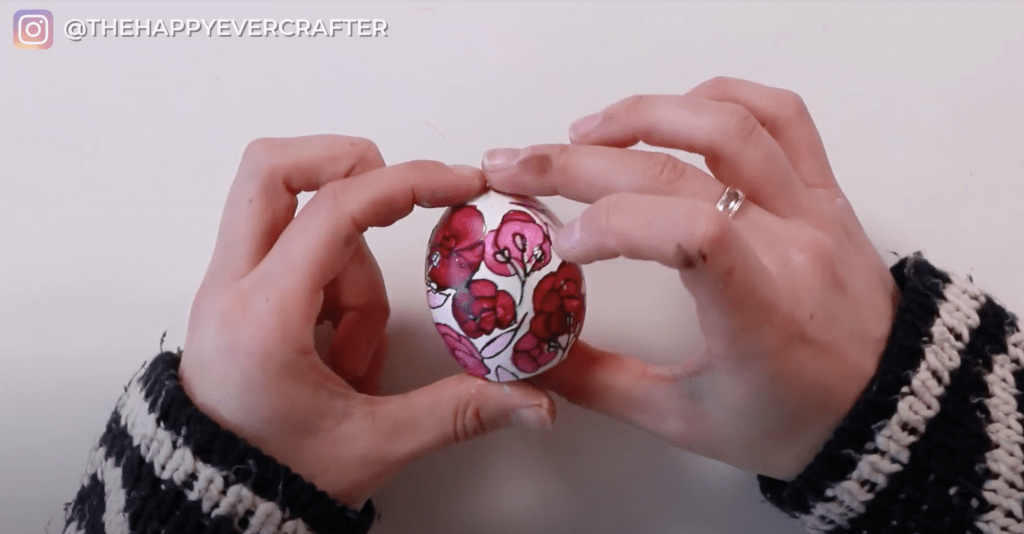

And that’s a wrap!
Even if you don’t have a ton of painting experience or peony drawing experience, these can be so fun and easy. They’re super imperfect and forgiving.
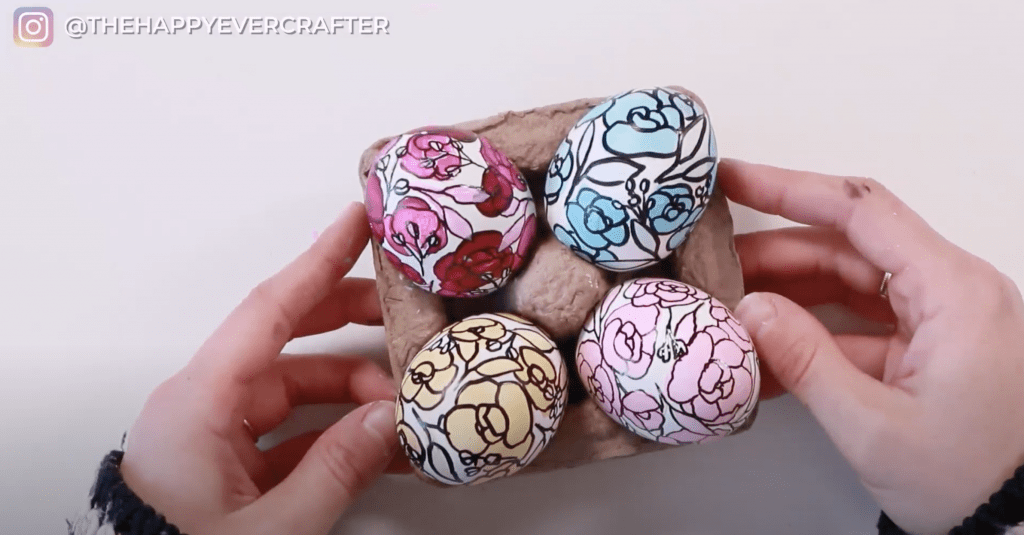
They’re a lot of fun to mix colours and styles too. These eggs can be used for table decor, place cards, office trinkets. So much fun.
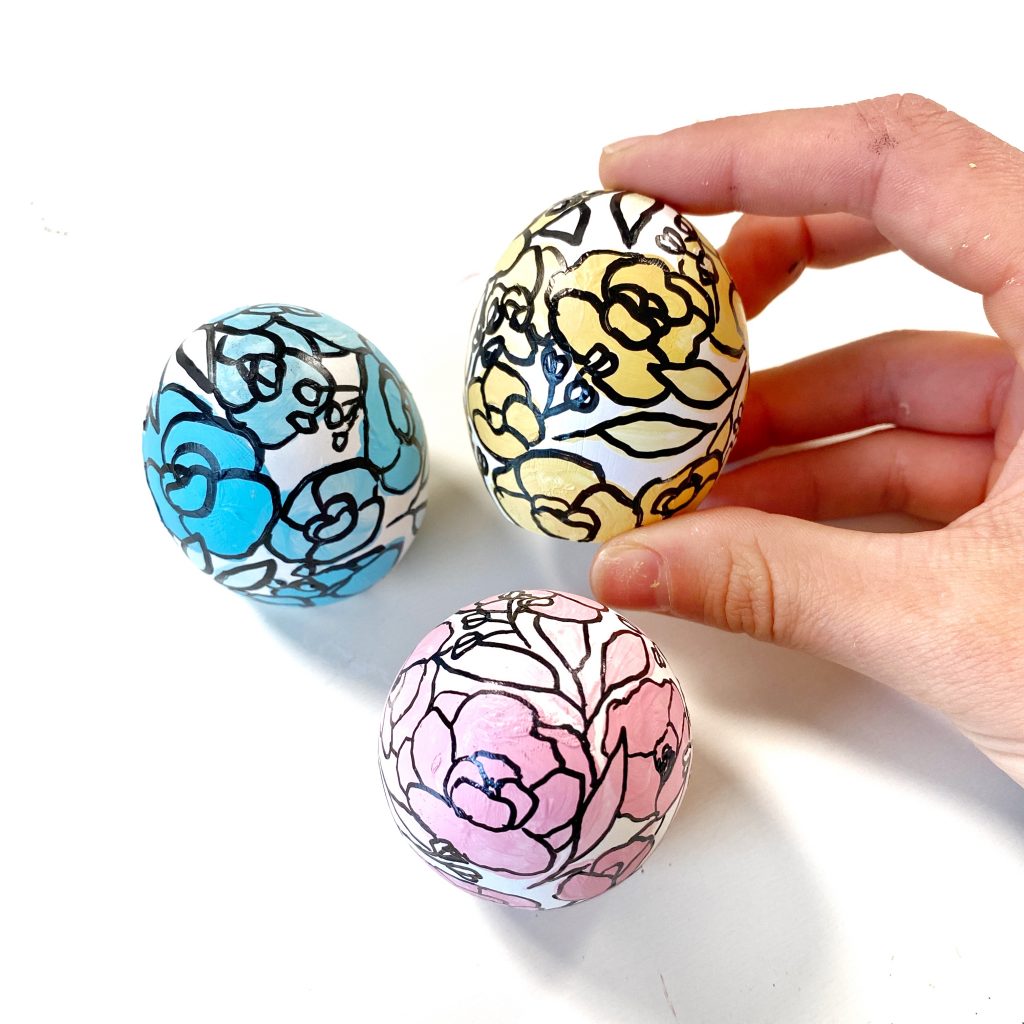
I made the yellow and blue eggs with a thicker paint pen to show you some more options too. It’s a different look and totally up to you what you want to go with. I like them both!
And that’s it! I can hardly wait to see your eggs! Be sure to tag me on Instagram.
And finally, your egggggcellent dad joke…
Why shouldn’t you tell an Easter egg a good joke?
It might crack up!


Wow, love the way they turned out.