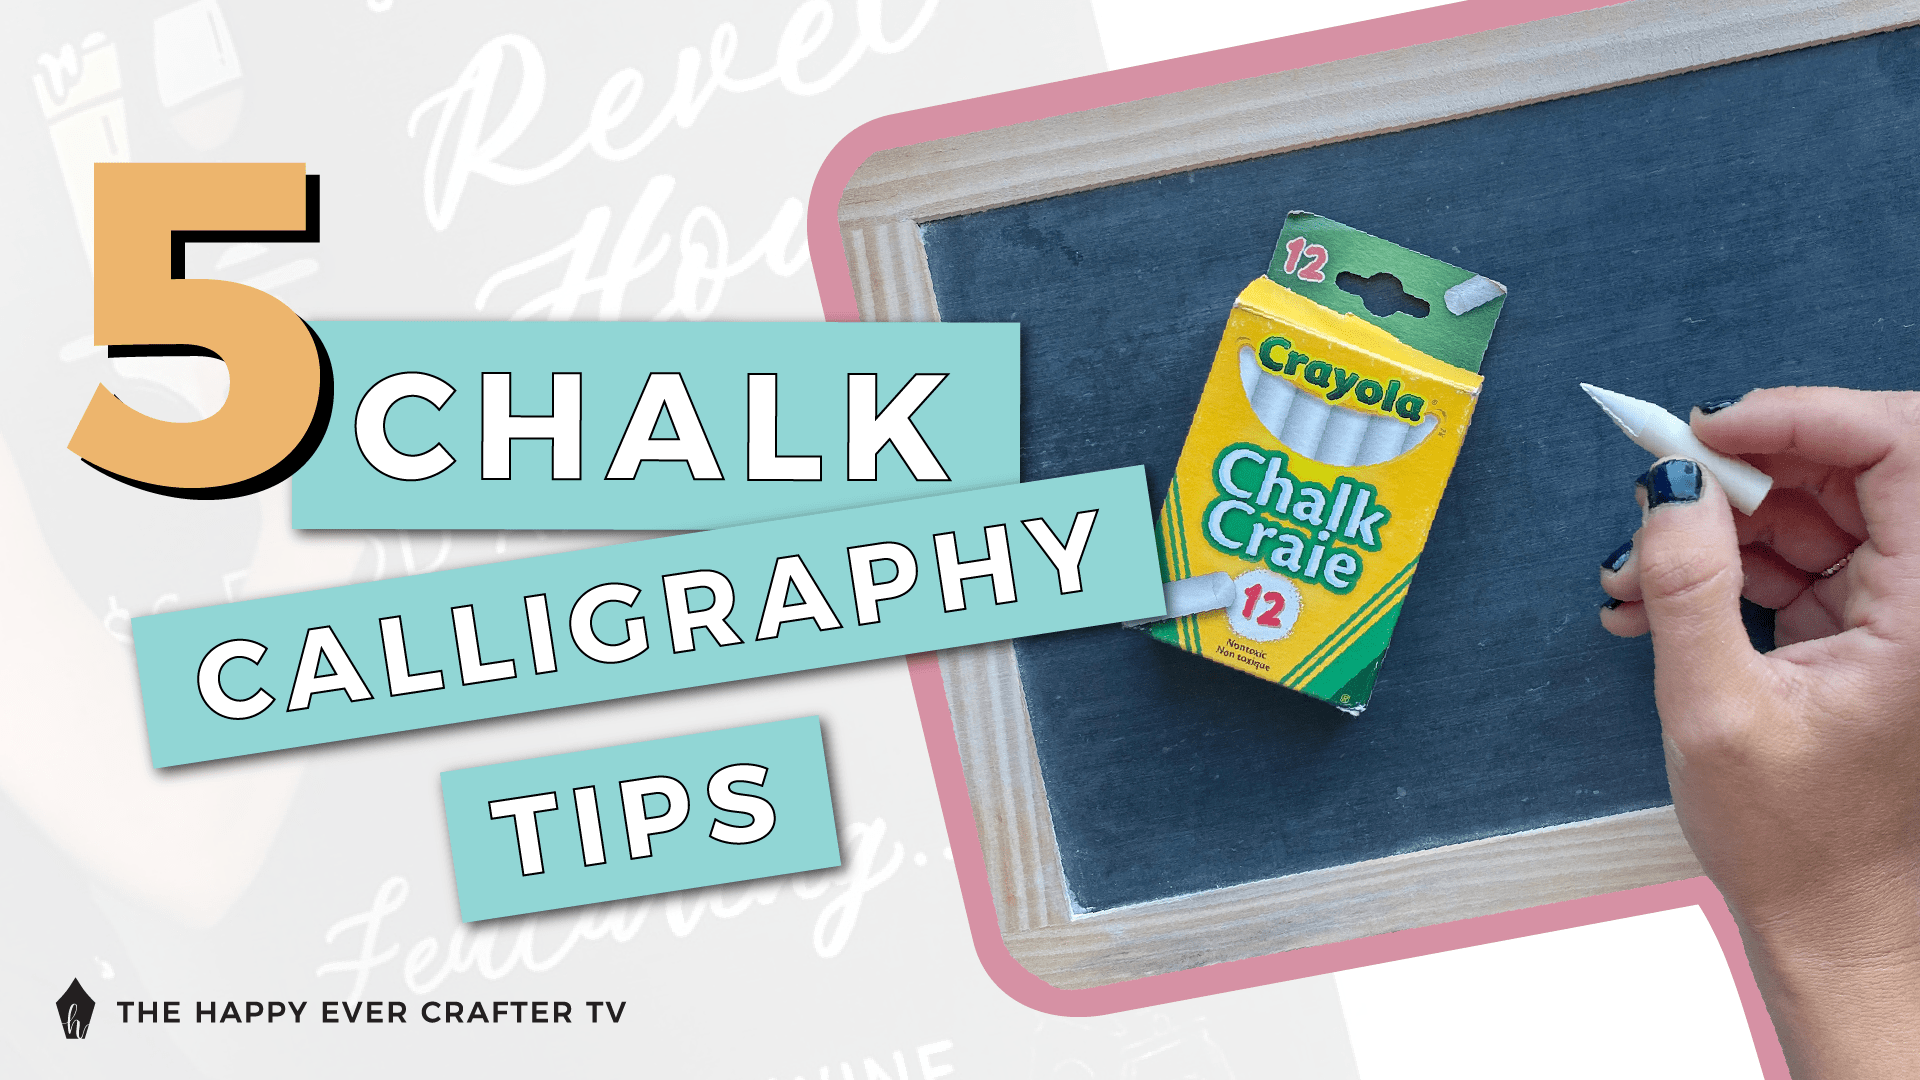
I’m going to walk you through the five things I WISH I knew before I started chalk lettering.
Below are all things I wish I’d known sooner when I started out… specifically number 5… omg, gamechanger!
First Things First…
The links below may be affiliate links where appropriate. This means that your purchase through these links may result in a few cents in payment to me, to support creating further resources like this one! That being said, I will never suggest supplies that I do not personally use and fully recommend.
Tools Mentioned
- A slate chalkboard (not the plastic kind)
- Crayola Chalk
- Paper Towel
- Pencil with an eraser
- Faber Castell Pitt Pastel Pencil
- Bohin Chalk Pencil
Prefer watching over reading? Feel free to skip right to the video and see these in real-time! ??
Tip #1: Season your board
This is a crucial step for multiple reasons – one, so that your chalk doesn’t “ghost” or damage the board. To “season” your board, take your chalk and rub it all over the surface, then wipe it off.
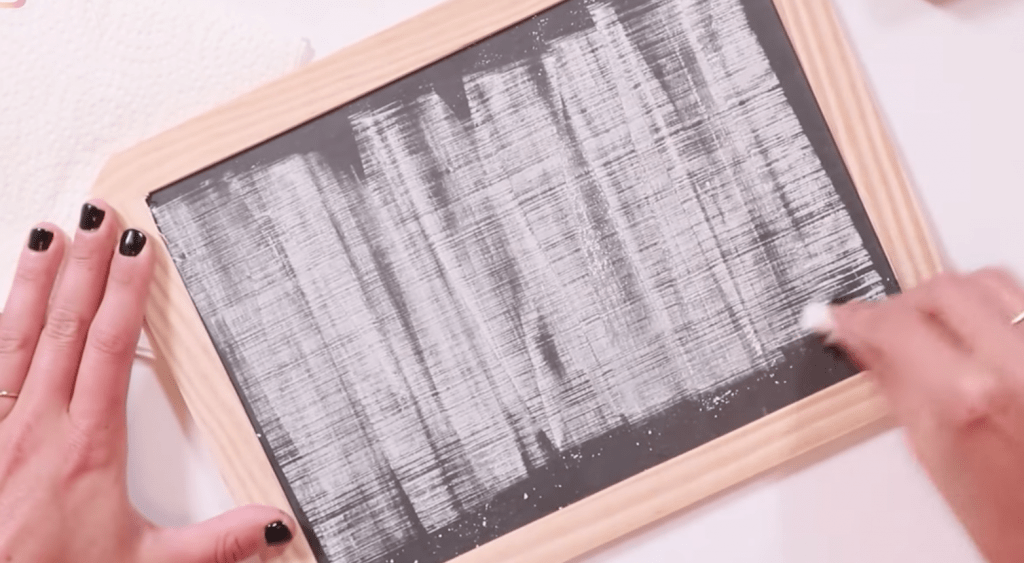

Once you’ve done this, you can do really cool embellishments in the dust (you want to leave some of it on), which I will explain, shortly!
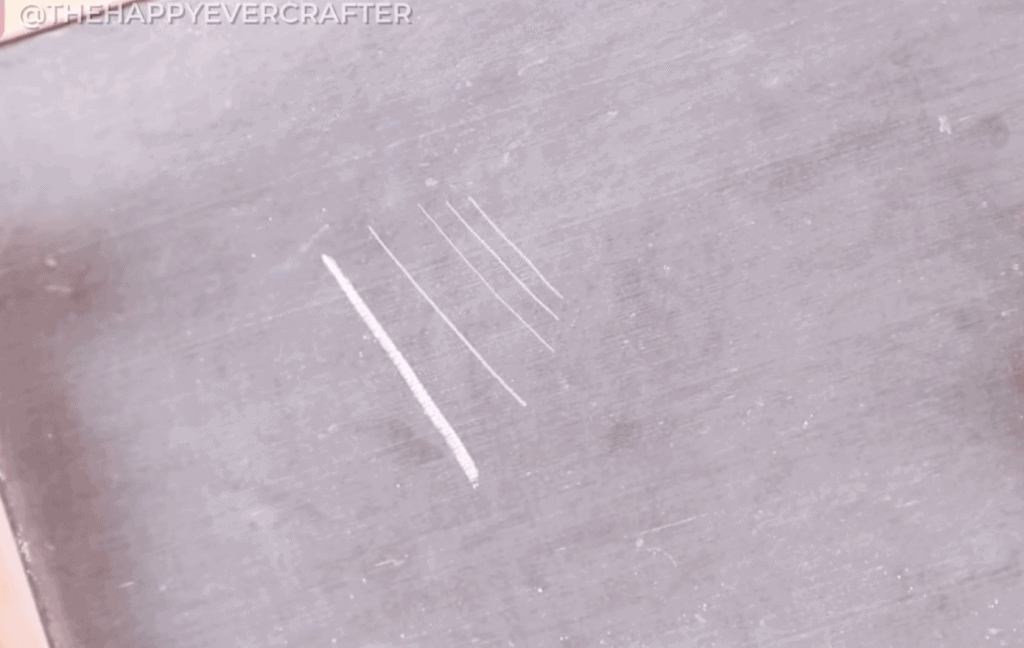
Tip #2: Sharpen your chalk (and save the dust!)
I legit NEVER knew about this until way after I started chalk lettering, and it changed the gaaaaame for me!
Just use the bigger side of a pencil sharpener, and sharpen your chalk so that it’s pointy at the end. It’s soooooo much easier to letter with this way!

And tip 2.5, you could say, is to save the dust it makes! This is super helpful if you ever have to erase or wash something off completely, and it screws up your “seasoning” for shadows. You can just add more dust from your pile!
Tip #3: Have an eraser handy
Using the eraser end of a pencil (it can be any eraser, I just like the size of the one on a pencil) you can make shadows. Since your board is seasoned, you can use the dust to your advantage for super easily adding shadows to your lettering!
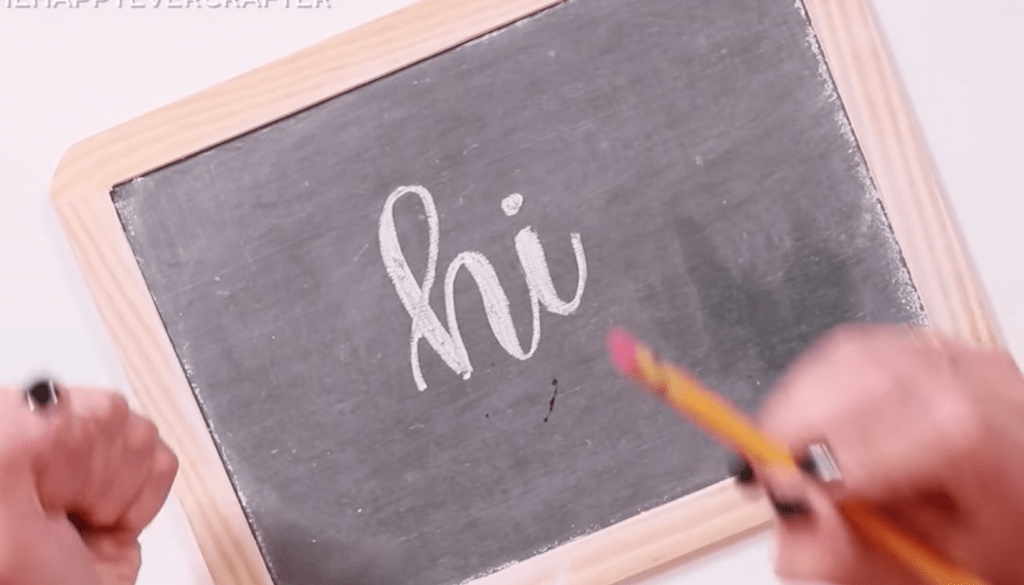
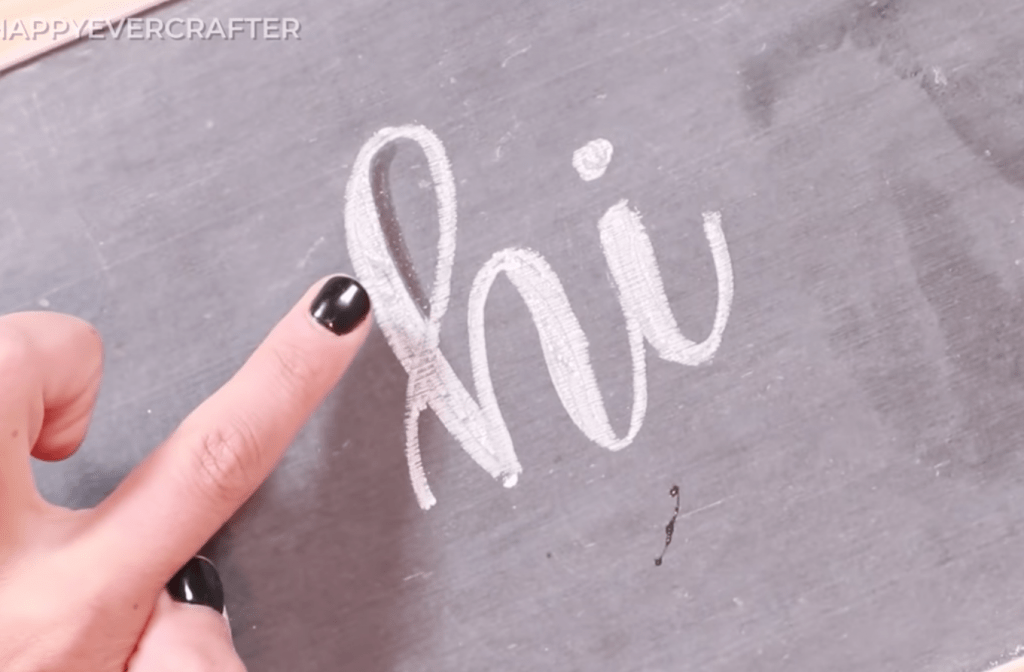
I’ve seen some people just use their finger or even a wet Q-tip, but I find the eraser is so much bolder. It completely erases the dust from the seasoning and makes the spot darker than the rest, giving it a seriously cool shadow look.
Tip #4: Use a chalk, pastel, or charcoal pencil for finer details
If you’re writing on a really small chalkboard or if you’re doing some reeeeally fine details, even the sharpened end of your chalk will be too bulky.
That’s why tip #4 is to have a chalk PENCIL handy, too! I didn’t even know these existed at first, but I’ve used them soooo many times now!
I will say, though, that these tend to be harder to get off the board and they can tend to “ghost” a little more. So if you’re using these, just press a little lighter than you do with the chalk.
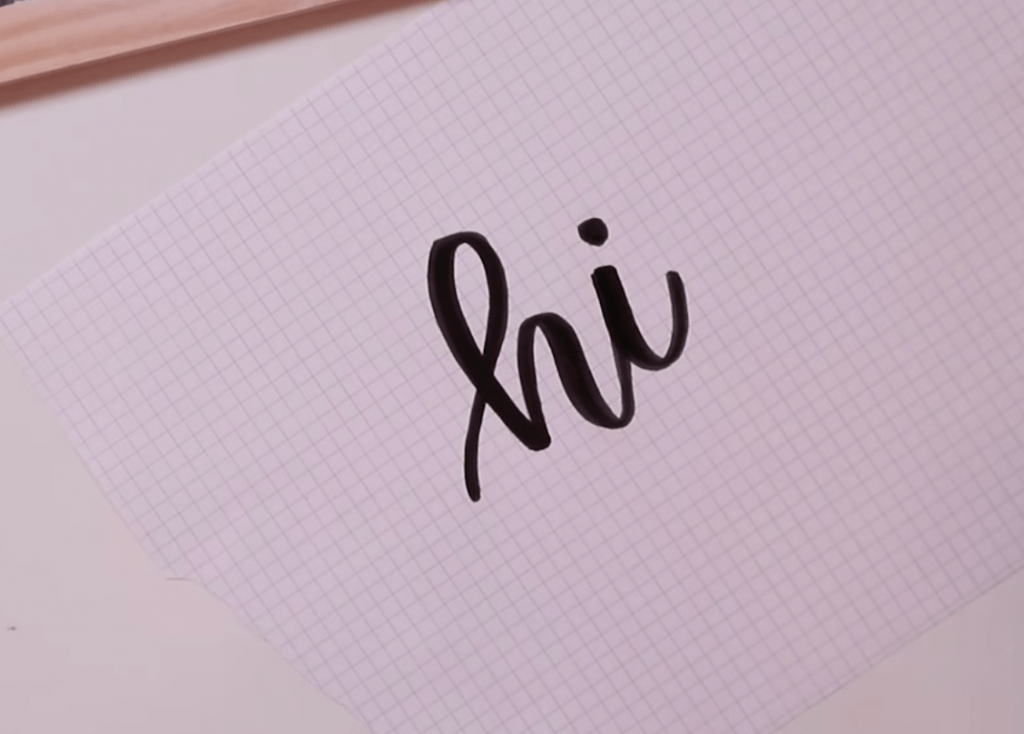
Tip #5: Do a chalk transfer
And lastly… my hands down favourite tip ever. It’s so good that it feels like it’s cheating….
DO YOUR WHOLE DESIGN ALL ON PAPER FIRST! You can easily erase things and touch them up until they’re perfect, and then do a chalk TRANSFER!
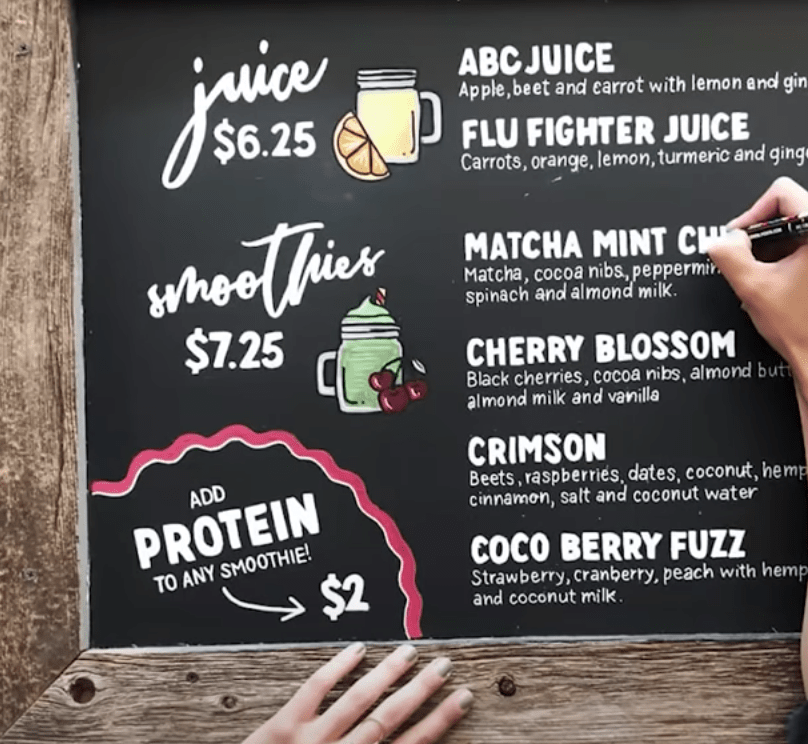
This means you don’t have to ever draw ANY guidelines on your board… all you’re doing is transferring your design and tracing over it! It’s GENIUS. It’s also soooo handy if you’re doing intricate logos, or things like that, that are hard to replicate.
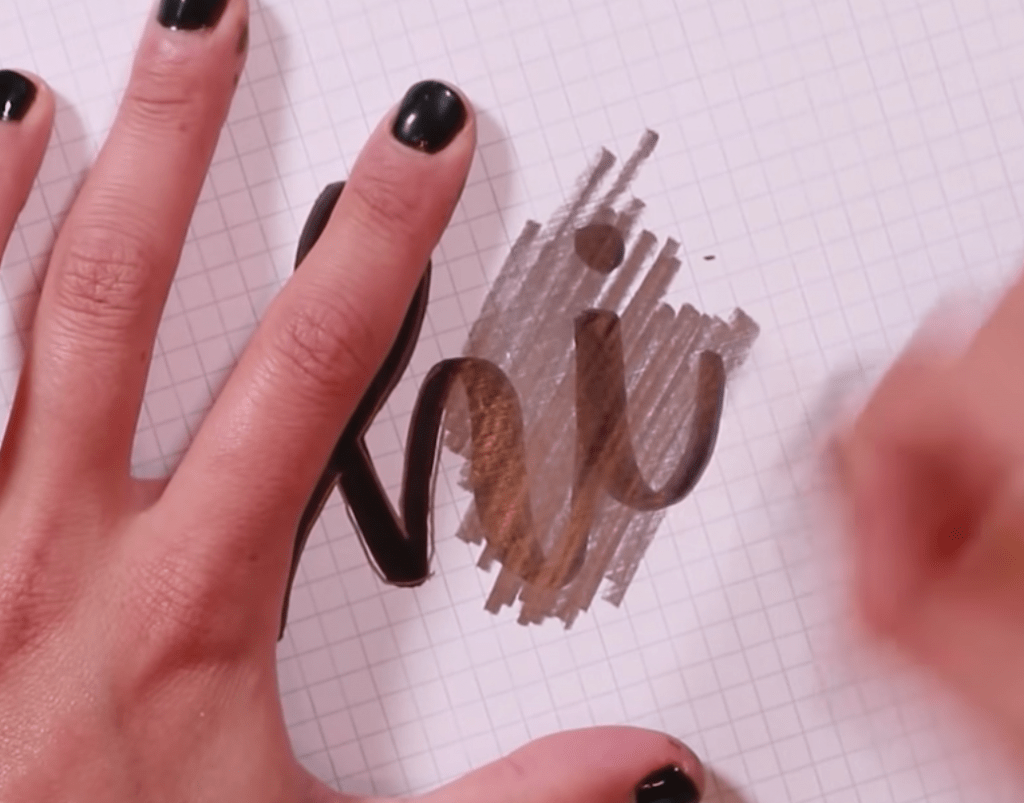
In my super simple example here, I’m going to write the word “hi” on paper in my brush pen. Then, I just flip the paper on the other side, and trace over the design in chalk on the back.
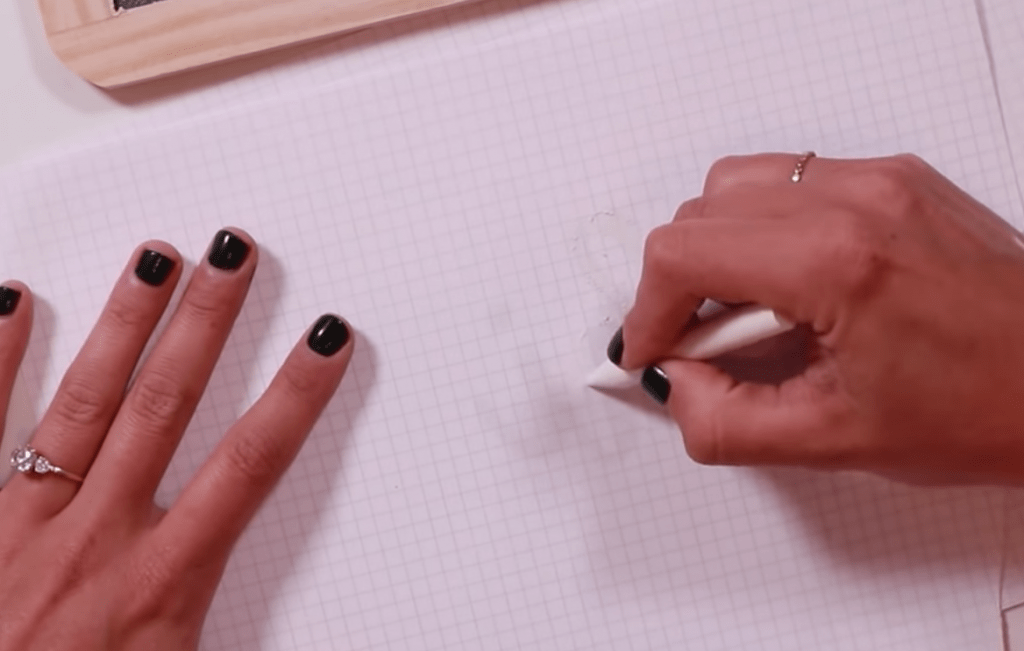

Finally, place your design where you want it on the board, and apply pressure with a pencil to the design to transfer it over.
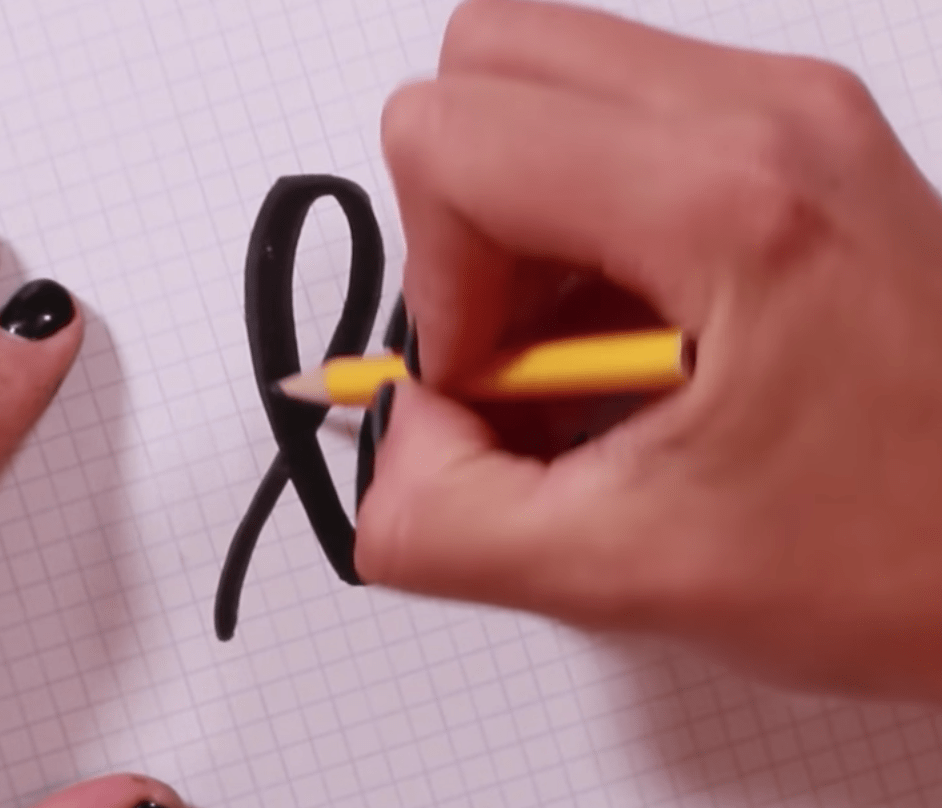
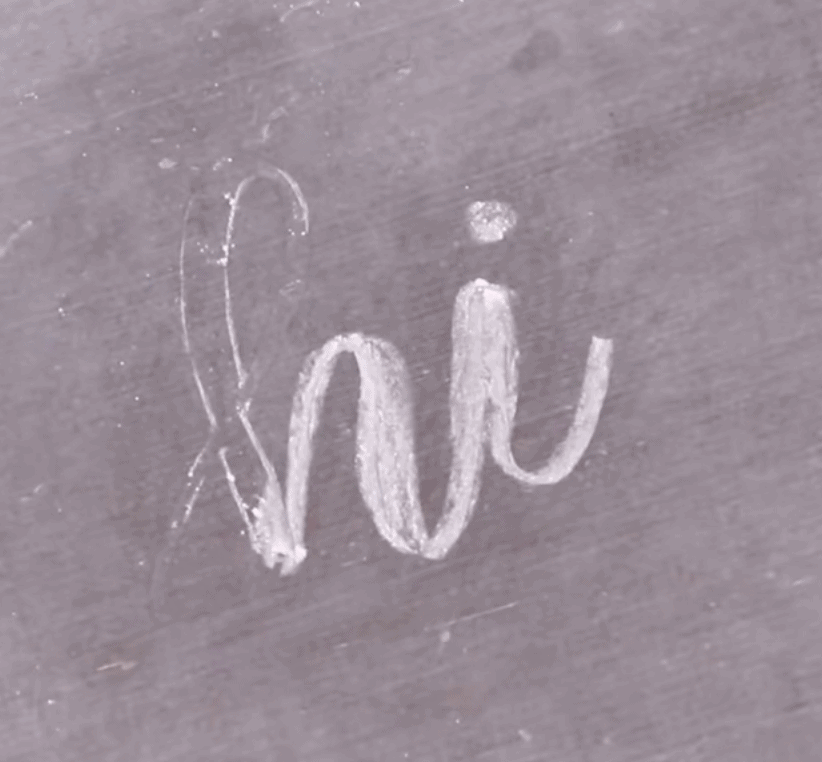
I’ve used this technique on GIANT, really intricate menu boards at restaurants and it saves me a TONNNNNNN of time and screwups!!!!
Quick question for you before you go: Which of these tips did you NOT know about? Seriously – tell me in the comments… I’m so curious because I honestly feel like I went way too long without knowing some of these! ?
And that’s a wrap!
I hope this was helpful! If you want more content like this make sure to hit subscribe on my video because I put out two new ones every single week, and I’ll see ya in the next one!


You’re the best and thank you for all that you do to make this community! It is filled with cool people!!!!
really….loved it! I love to watch all of your videos – but this was awesome ! Keep up the great work. Actually I had never used the transfer of the design from paper to chalkboard and the smaller instruments being used to assume the detail work! Thank you for donating to the Ukraine Humantarian Appeal fund.
The dust!