Did you know colouring hacks were a thing?!
Maggie Enterrios of Little Patterns just came out with a new colouring book. She shared three colouring book hacks that BLEW my mind! I didn’t even know colouring book hacks were a thing. I just always thought you filled in the blanks and that’s that. But these techniques are truly next level.
Even if you never got into colouring much, you will after this. It’s THAT good.
And there’s a chance to win a copy of Maggie’s colouring book. Keep reading to find out out!
First Things First… Meet Maggie
Maggie is a commercial illustrator who works a lot with botanicals. You can find her across the internet as @littlepatterns. Her new colouring book, Flowerscape, is available now! To see some of the amazing pages from the colouring book, keep reading! Maggie showed us three incredible techniques and used her own colouring book for each one.
When I talked to Maggie, I confessed that I never really got into the whole “adult colouring book thing” a few years ago. Neither did she! As creatives, it can be hard to find time to colour when we’re busy creating other things. When Maggie started to draw the illustrations for this colouring book, she started to understand the hype a bit. Drawing was so relaxing! I definitely never got into adult colouring books years ago, but I definitely would have grabbed Maggie’s book for sure – I’m so drawn to her work! (See what I did there?)
Maggie’s colouring book is a work of art. Truly. Each page, each spread – it’s incredible. She starts her regular art as a black and white illustration, so creating her colouring book was very similar. She just drew like she normally did but then stopped before adding colour.
Maggie feels like her colouring book is really a collaborative project. She starts the project by drawing the base of the page/spread, and you finish it using whatever medium you prefer to work with. You can add ink or coloured pencils or work on your shading or even add lettering. So many options. It’s designed to be super usable! You truly can make your own scrapbook of creative ideas.
Personally I just don’t make time to do creative work – Maggie did the hard part for me. Now I can go do the fun parts I wanna do without worrying about doing the initial drawing and design. So fun!
Maggie graciously donated a copy of her colouring book, so be sure to enter! Just like the video and leave a comment (over on YouTube), and you’ll be entered to win!
First Things First…
The links below may be affiliate links where appropriate. This means that your purchase through these links may result in a few cents in payment to me, to support creating further resources like this one! That being said, I will never suggest supplies that I do not personally use and fully recommend.
Supplies Used
- Maggie’s Colouring Book – Flowerscape: A Botanical Coloring Book
- Gelly Roll Gel Pen
- Koi Watercolor Brush Markers
- Micron Pens
- Pigma Brush
- SumoGrip Eraser
Rather watch than read? No problem! I definitely recommend watching this one in real-time to see Maggie work through each technique! Aaaaaaand you can enter the giveaway for a copy of Maggie’s colouring book!
Let’s Get Started!
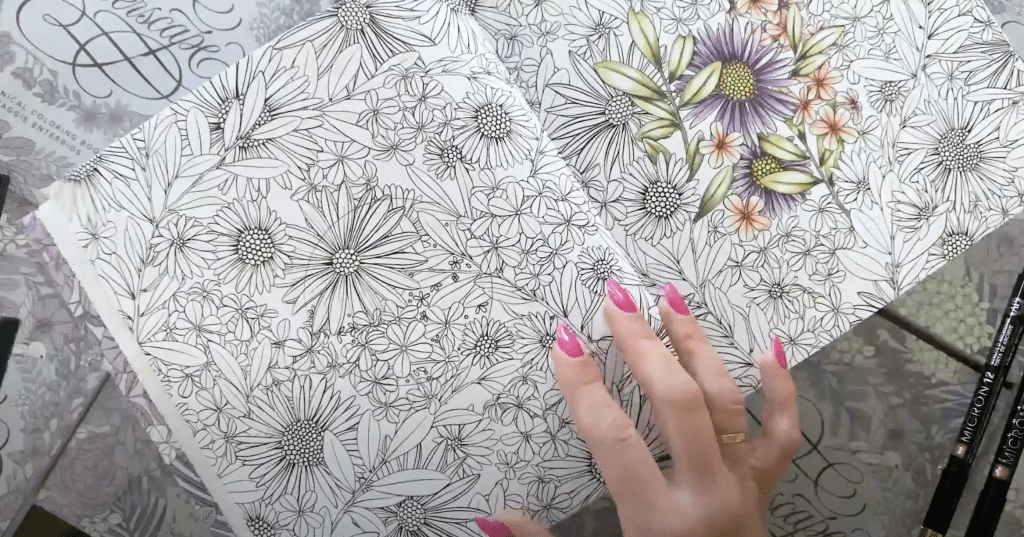
Maggie’s colouring book is a creative playground. She wanted you to be able to use different creative mediums to experiment and really customize it.
There are two page spreads, geomatics backgrounds, smaller more approachable vignettes perfect for single day colouring projects… so many options!
Maggie wanted to share three unexpected colouring techniques you can use in her colouring book. These can be applied in other colouring books too!
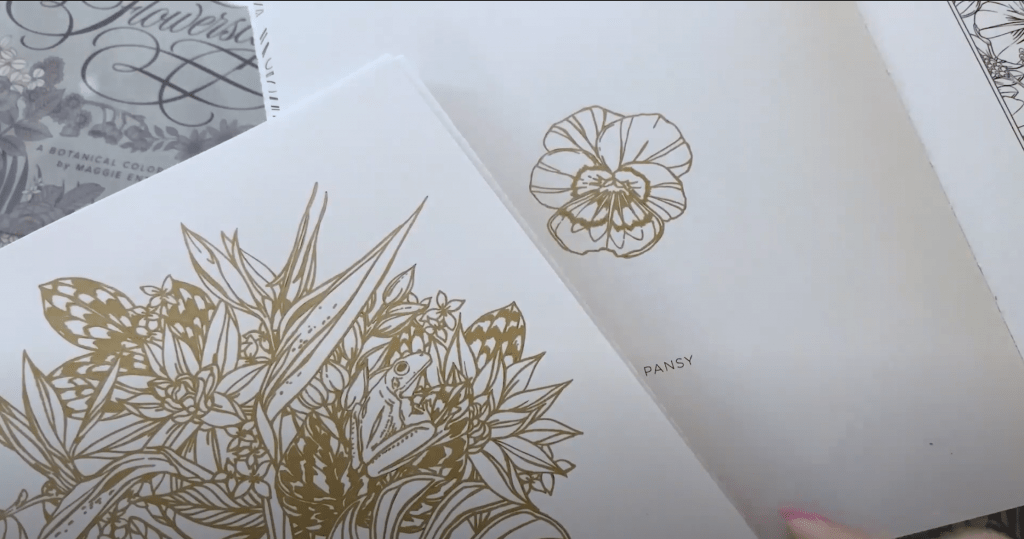
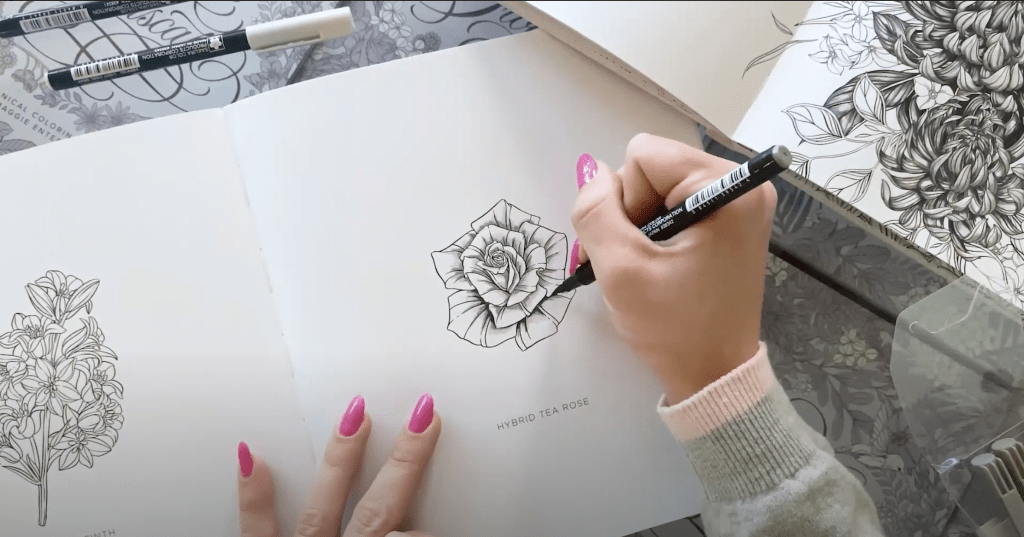
Technique #1: Gilding
The finished product looks like it’s done with gold foil, but it’s actually done by hand with a single gel pen. ?
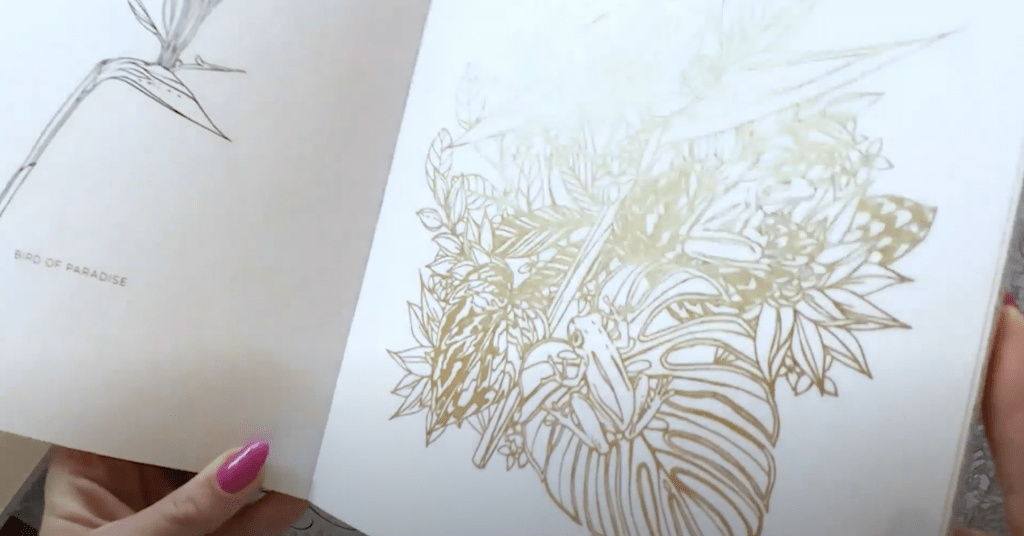

Maggie’s gel pen preference: Gelly Roll Gel Pens. They have super full coverage. You can use any gel pen that’s metallic. Metallic gel pens have the highest level of opacity, so they’re great for these projects.
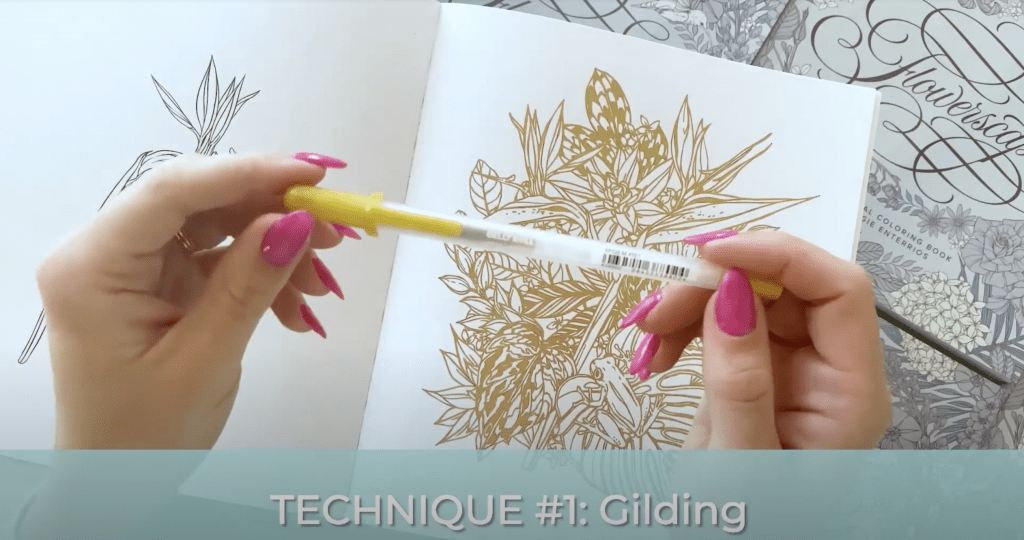
The one singular goal of this gilding technique is to trace the lines of the illustration with a gel pen. It truly is a one step tutorial: trace the lines of the illustration!
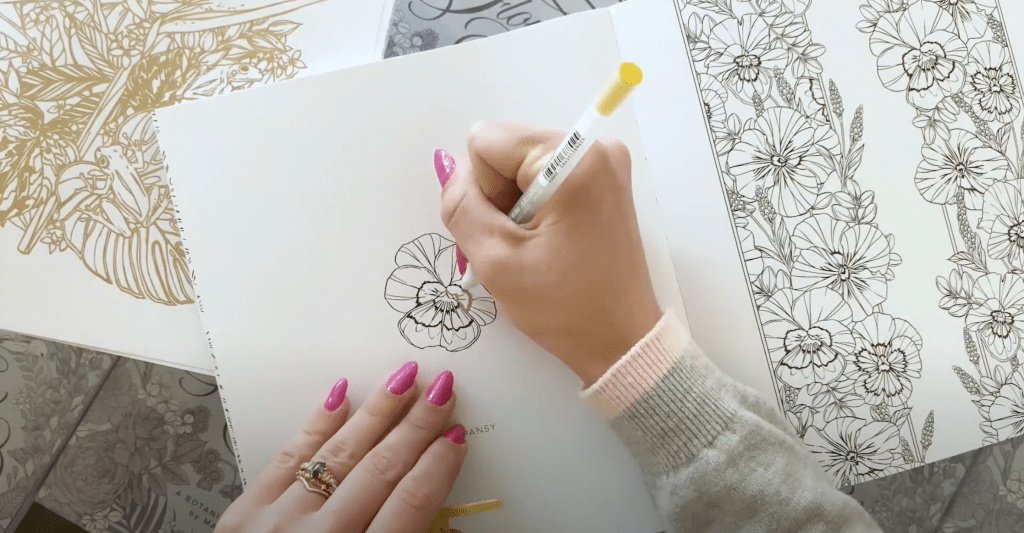
Maggie recommended tracing one section at a time. Make sure your lines are dry and then move on to another section. You don’t want to have to worry about smudging.
The most important thing is to cover 100% of the black line work. You want to make sure it looks like it’s foiled.

When it’s finished, it’s suuuuuper impressive, especially in larger compositions. You could even frame these – they’re so beautiful!
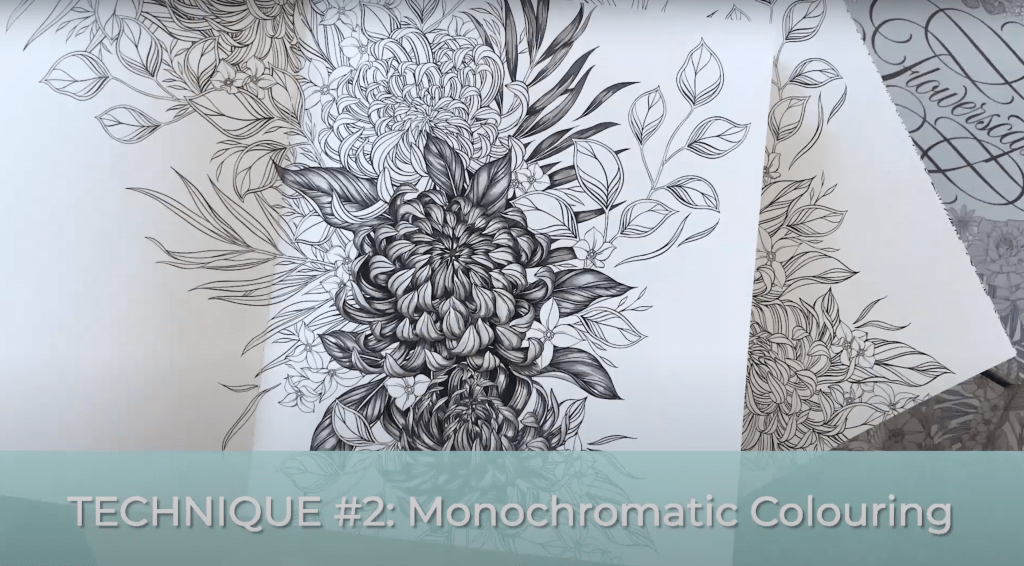
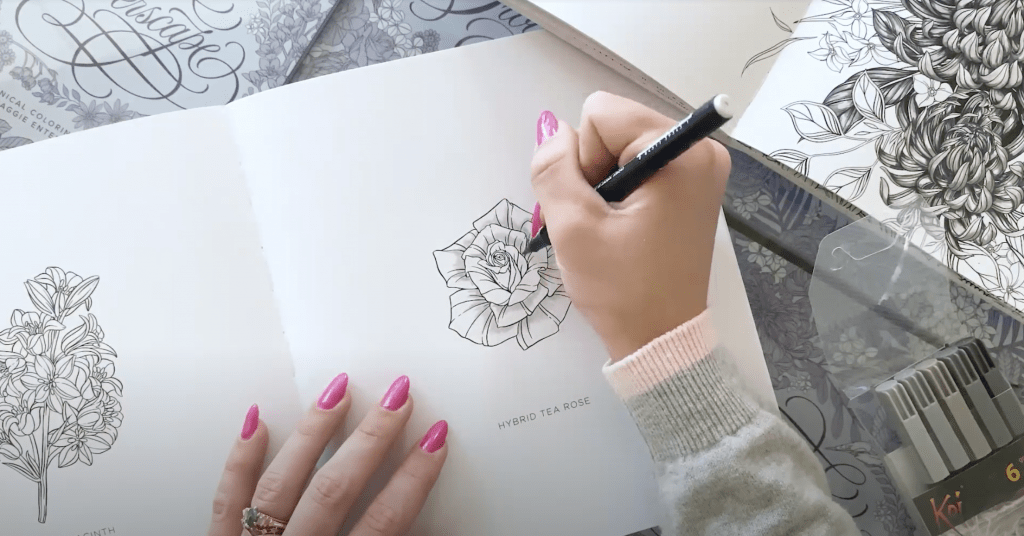
Technique 2: Monochromatic Colouring
Maggie had never done a tutorial on this technique until she shared it with us! Lucky us!!
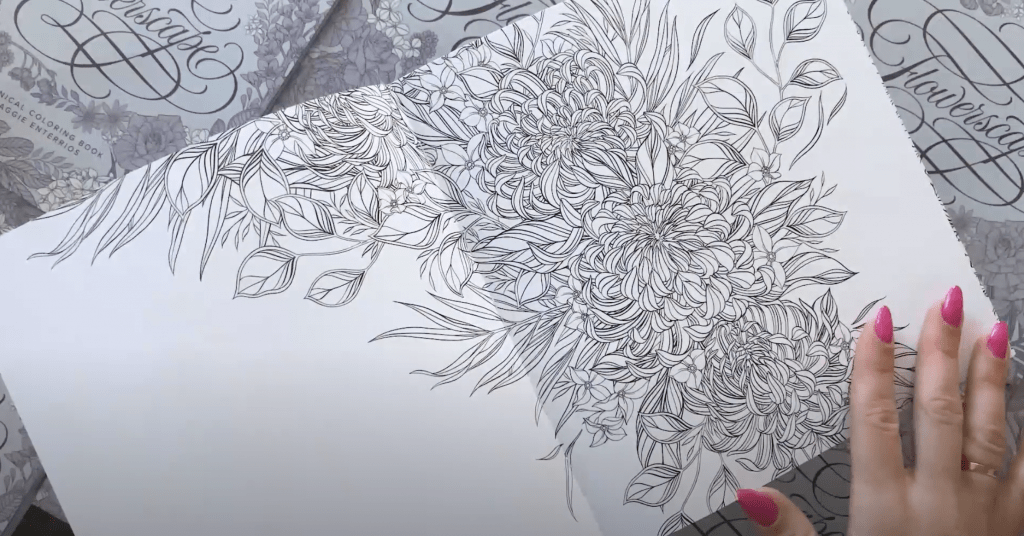
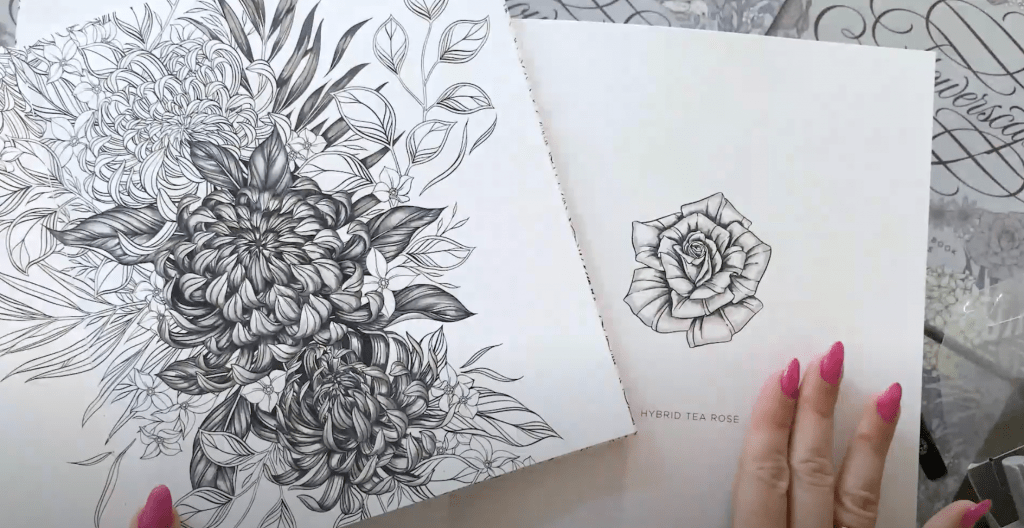
For this one, Maggie used Koi Watercolour Brush Markers in shades of gray. You can use as many of the colours as you want, but Maggie used just three for this smaller project.
Step 1: Start with your lightest colour, like light cool gray, and colour the insides of the petals. Start at the base of the petals, and fan out from the base. You want to stick with light strokes. It helps to imagine there’s a ribbon of highlight going around the outside of each petal, and you’re colouring the insides.
This doesn’t have to be perfect. It’s super forgiving, and you’re using the lightest pen.

REMEMBER: Be sure you’re fanning out from the base of each petal. If it helps, clockwise motion. Just find your groove, and build up from here.
Step 2: Take a slightly darker colour, like light warm gray, and colour the lines you just drew. Only come up about halfway from the previous lines. You want to keep close to the base but only go up about halfway. You’re essentially just adding a little extra shading, and layering the gray on top of the lighter colour. This creates depth!
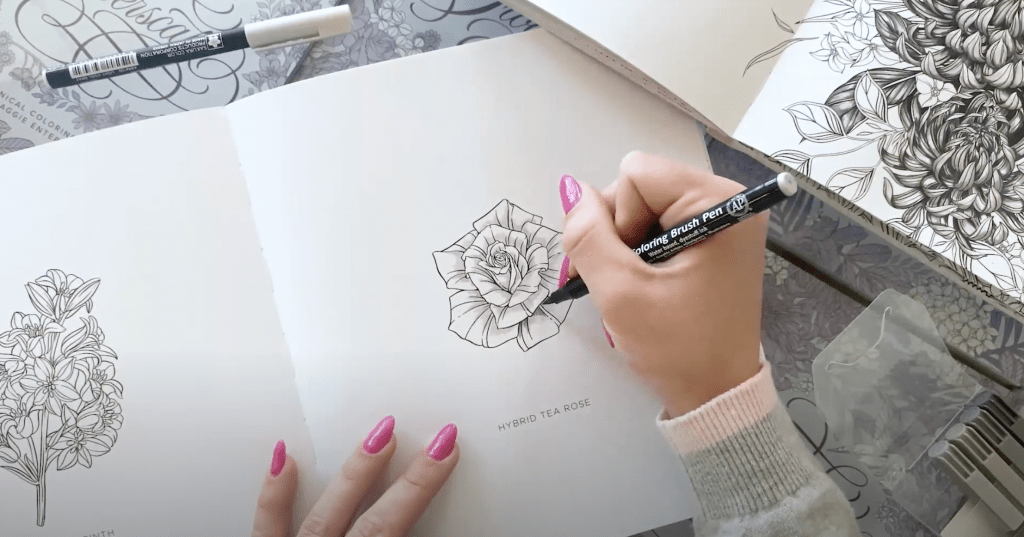
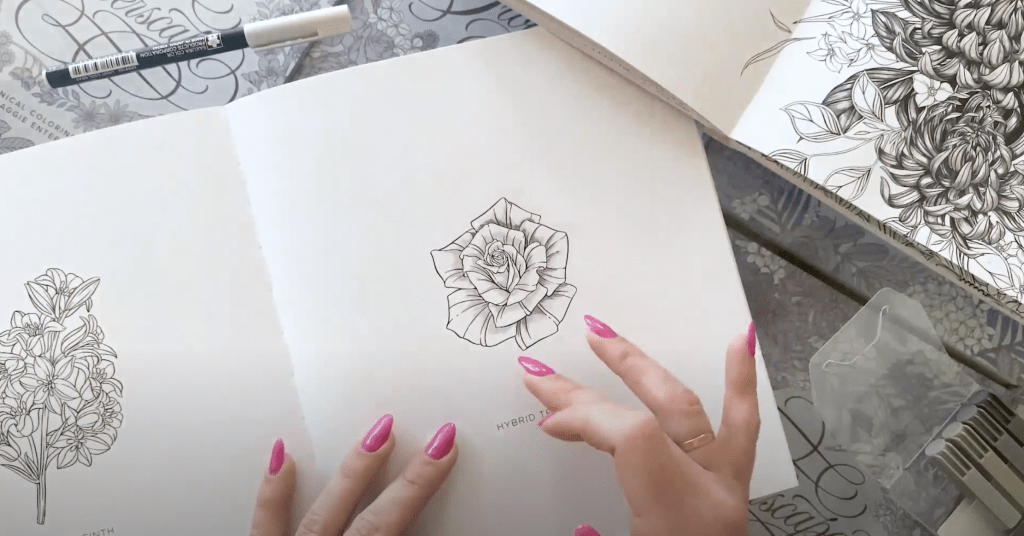
Maggie assures that the first layer is the hardest. After that, your eyes adjust and you can see what you’re doing. You can see which petals lay on top of others and can even add an extra pop of shadow if you know it’s underneath. You’ll continue into the center of the flower (this is the most forgiving area since the details are so small).
Note: Maggie’s colouring book pages are all 160 gsm. It’s really lovely, thick paper. You can layer multiple layers of markers without any paper pilling, which is AMAZING.
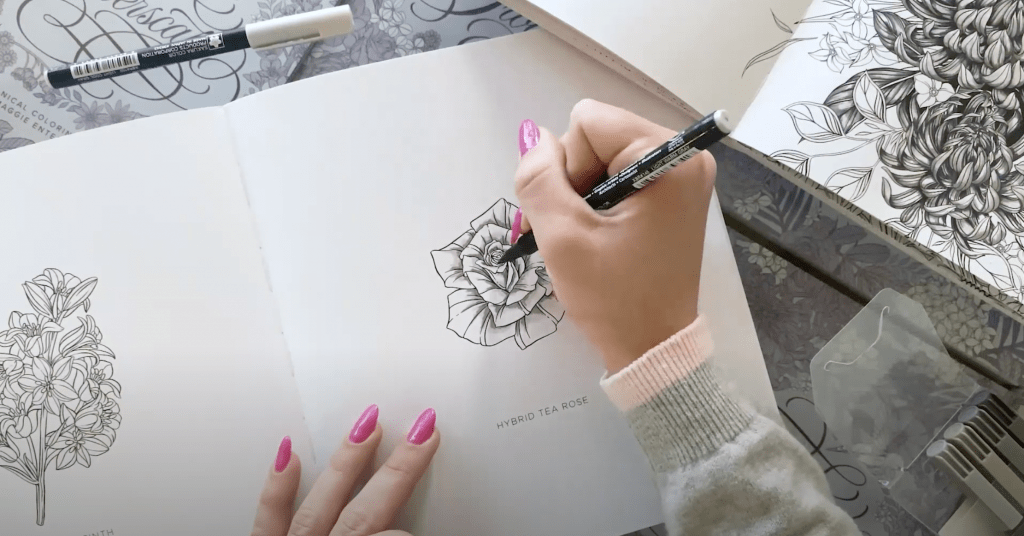
Step 3: You’ll want a darker colour, like a dark warm gray, for this one. Make minor dark strokes at the base of the petal. You could even do just a line, but Maggie made tiny half strokes on hers. You’ll want to continue doing this into the center.

Maggie said this is really good shading practice and actually how she learned to draw. She used to do this with a pencil!
Step 4: Grab your lightest colour marker from step 1, and now work through on the outside of the petals. Same sketchy strokes you did in step one at the base. You’ll notice at the center of each petal there’s a white ribbon. Adding this lighter colour makes the curve of the petals really apparent. It also adds a lot of contrast with the paper colour.

Look at that before and after!! You can see how much curve there is! SO dimensional! Seriously so so cool.

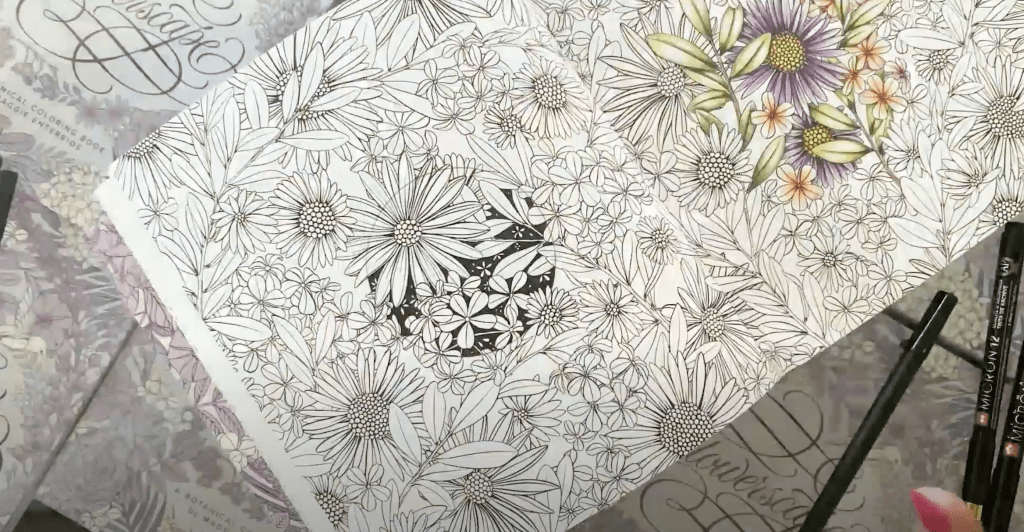
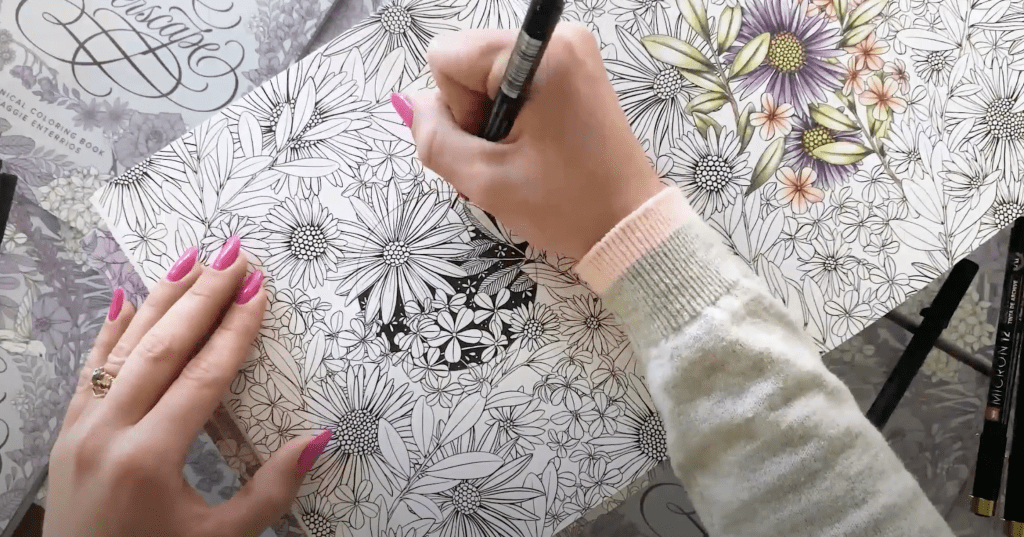
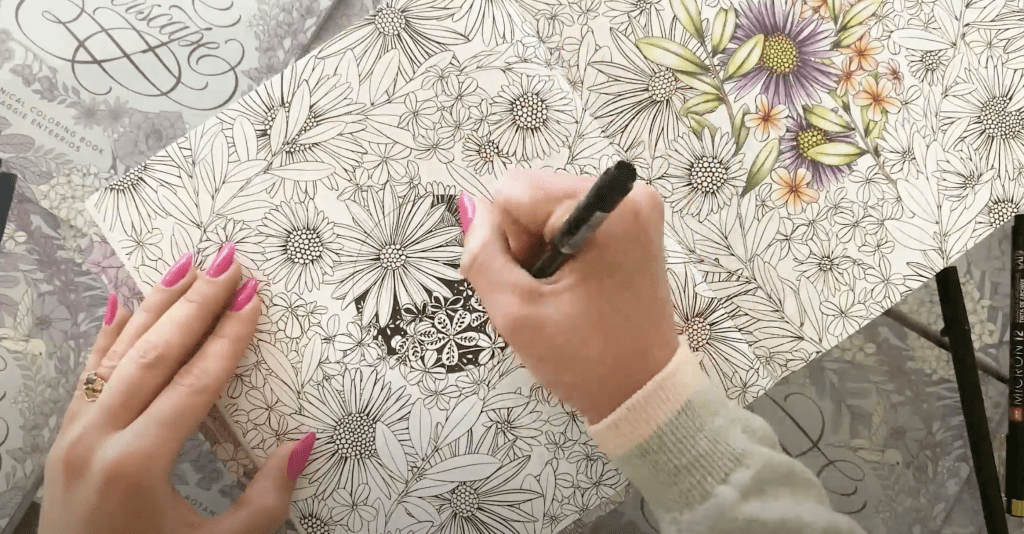
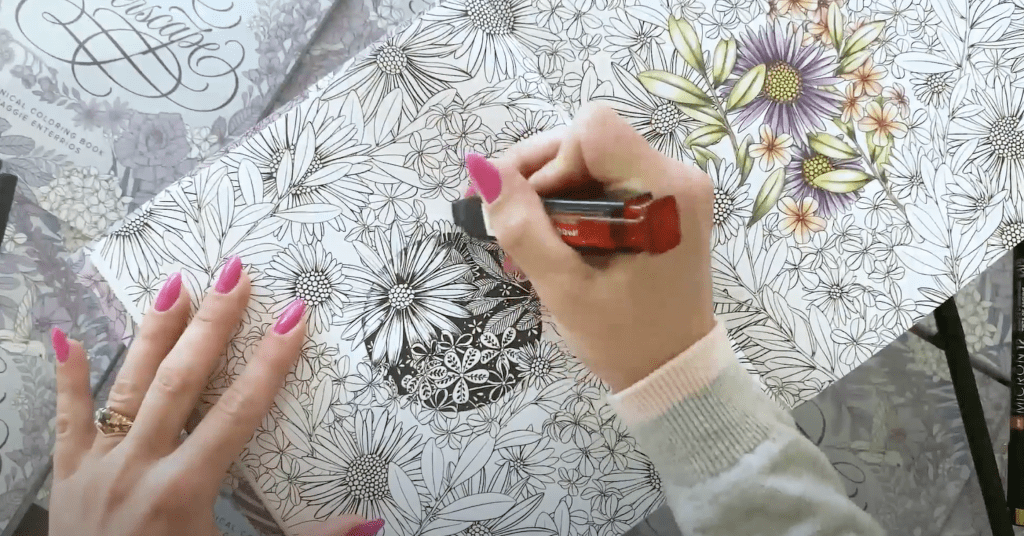
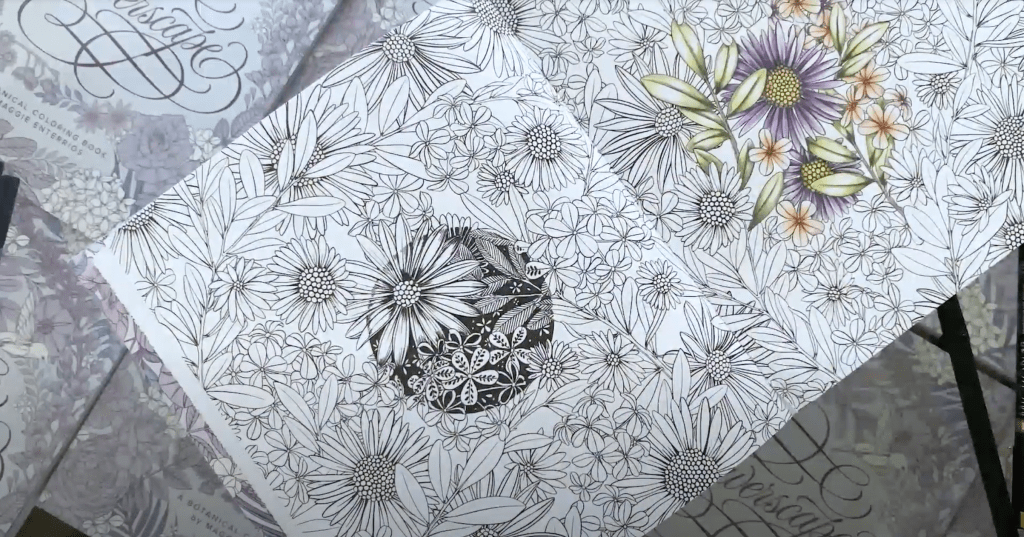
Technique 3: The Patterned Orb
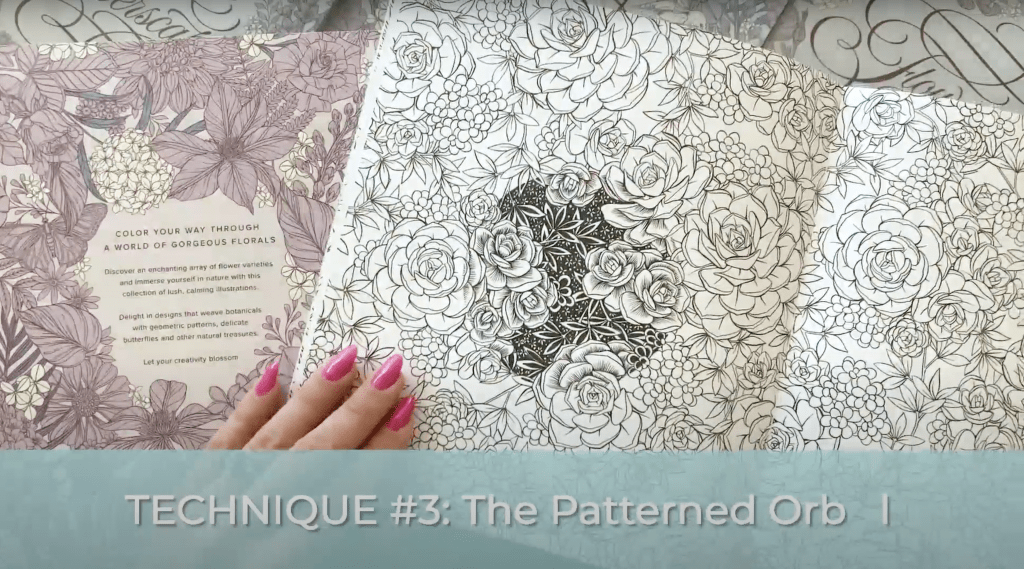
Step 1: Use a glass and trace a circle using a pencil. Don’t feel the need to go super light. You need to be able to see the edge of the circle.
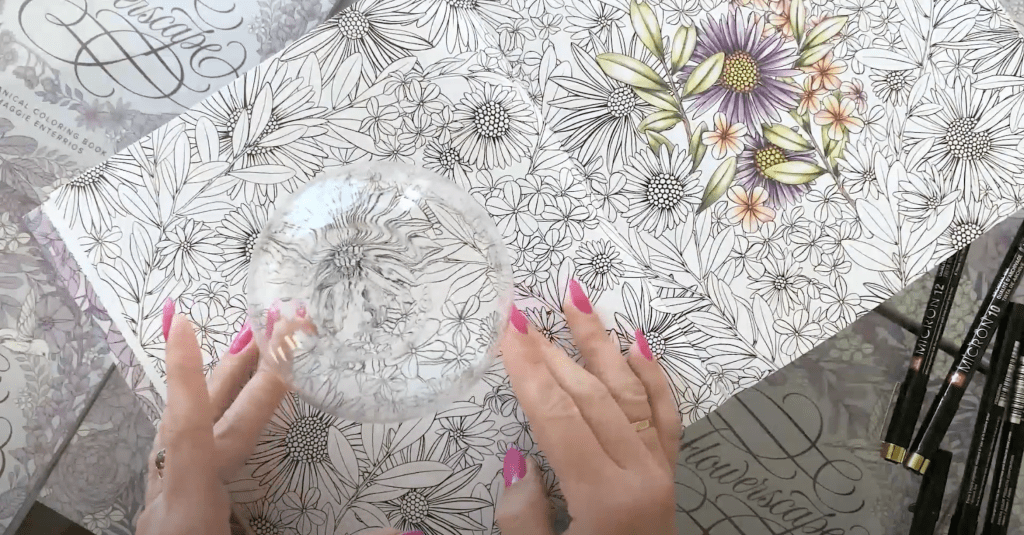
Step 2: This step is optional, but this is a great way to make your project more custom. Using a Pigma Micron 05, you’re going to work inside the circle. You can add some five petal flowers and circles, things like that, in the negative space to really make it you own.
Step 3: Using a Pigma MB Brush Pen, fill in the space with black. Anything inside the circle, around all of the shapes, you want it pure black. Not everyone has a ton of time to fill in a whole two page spread, so Maggie’s orb technique allows you to work in a smaller space while still making it feel like a work of art.

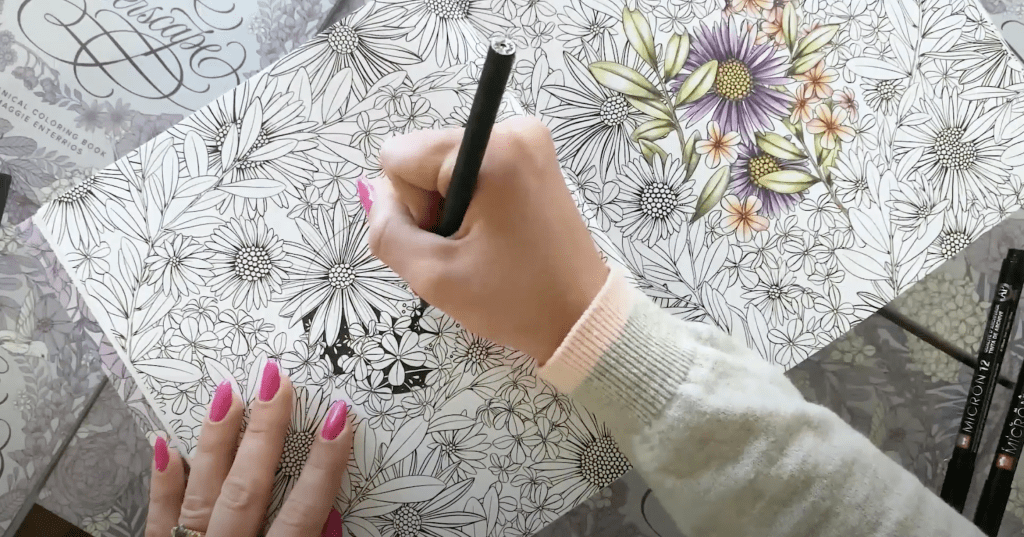
Step 4: Grab your Pigma Micron 05 from Step 2, and start filling in some of the shapes with details. Every element inside your orb should have some customization on it. Filling it with a pattern (like stripes on the leaves), color blocking, adding little details.
There really are no rules but so many options. You could do this with any shape (a circle, a square, a letter even). And you could use any colour and any medium (colored pencil, marker, watercolour). Try different patterns, different nib sizes, etc. So many options!
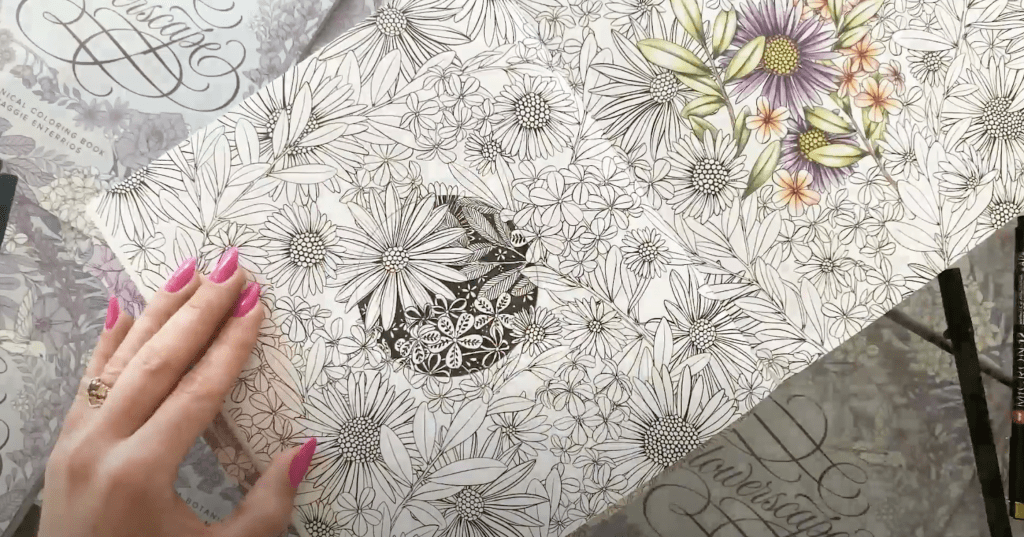
Maggie assured us that any way you fill the shape is going to look awesome. Part of the joy of creating these techniques is allowing failure. From Maggie’s experience, none of this sprung out of her perfectly the first time. She said too much rigidity in expectations leads to disappointment which can lead to giving up.
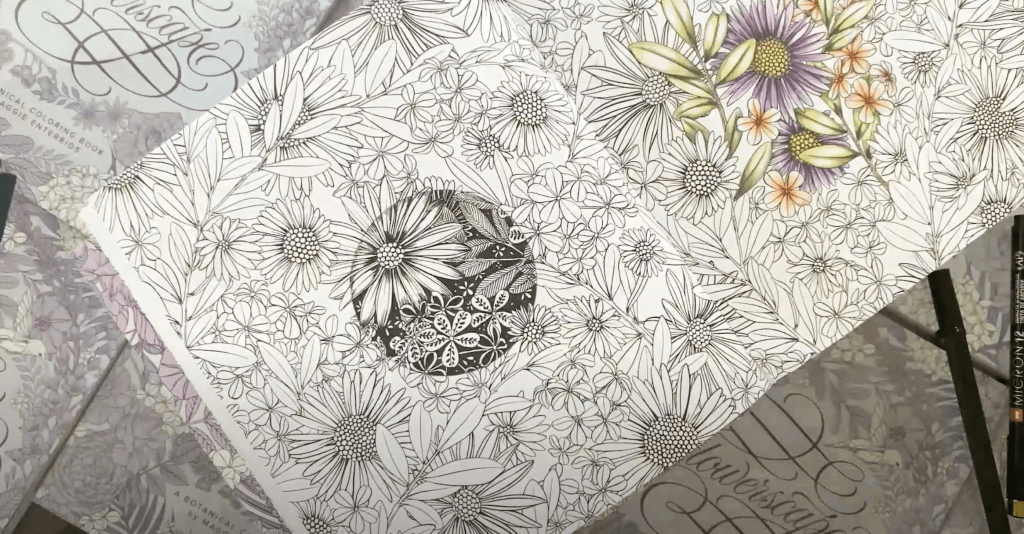
The joy of creating is there are no boundaries. Except the boundary of your orb – stay inside your orb shape.
Step 5: Grab your eraser and erase all the pencil lines. Maggie’s eraser of choice is here.
SOOOOO pretty!!
And that’s a wrap!
Seriously, I LOVE these techniques. They’re pretty simple to do and require supplies I already have on hand. I just never would have thought to do them on my own!
Wanna connect with Maggie? Or go buy her amazing colouring book? Or both?
Maggie is known as @littlepatterns across the internet! You can find her all over the place, but here are quick links to her Instagram and website.
Flowerscape: A Botanical Coloring Book is available where books are sold. You can find out more about it here or on Instagram!
And finally, your dad joke…
I love the colour purple.
More than red and blue combined!


That was so satisfying. Feeling overwhelmed to finish the whole page….what colors to use…loved the pattern technique and the orb…or letter or shape!!!! Loved the light grey color choices….def going to try your techniques and also liked and followed you in Instagram!
We need to know some more coloring hacks! I’ve searched online and only find basic ‘tips’. Does anyone have any? Can Maggie show us some more?