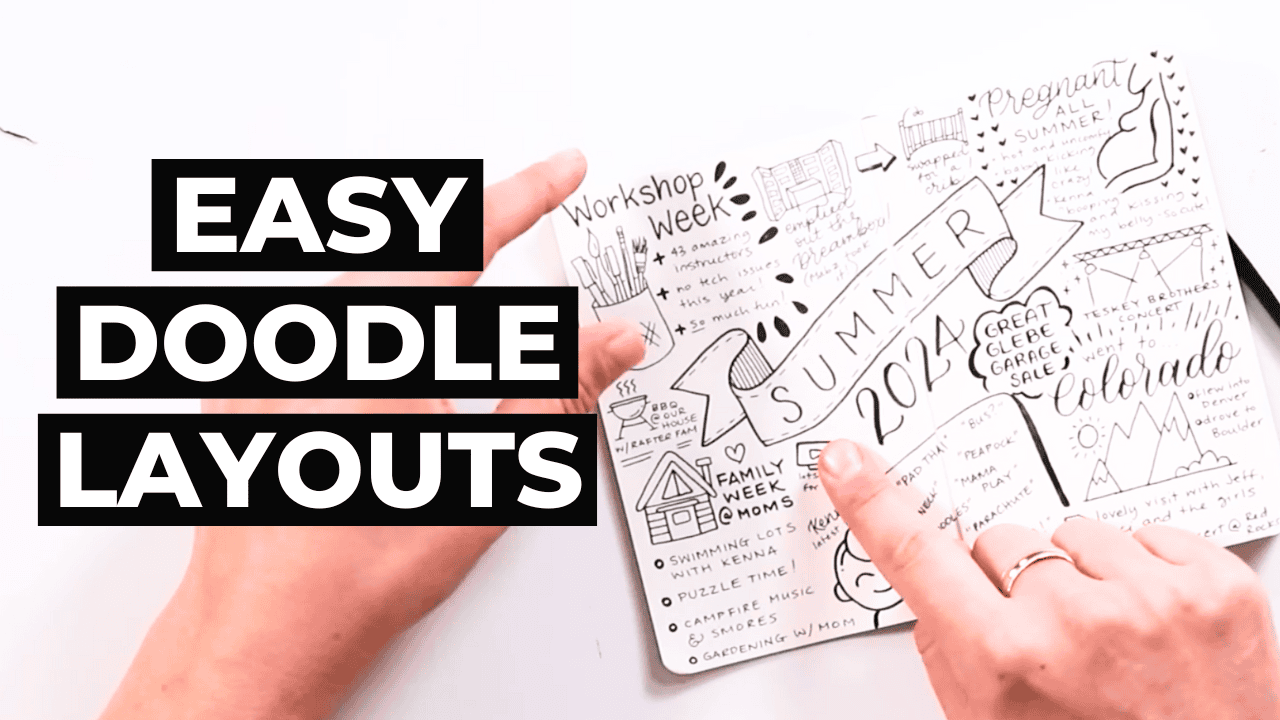
One of my favourite things to do with my hand lettering, calligraphy and doodling skills is creating what I call a “doodle journal”.
It’s essentially just a fun way for me to capture my everyday life but to do it artistically rather than just writing like a normal journal.
Let me show you!
First Things First…
The links below may be affiliate links where appropriate. This means that your purchase through these links may result in a few cents in payment to me, to support creating further resources like this one! That being said, I will never suggest supplies that I do not personally use and fully recommend.
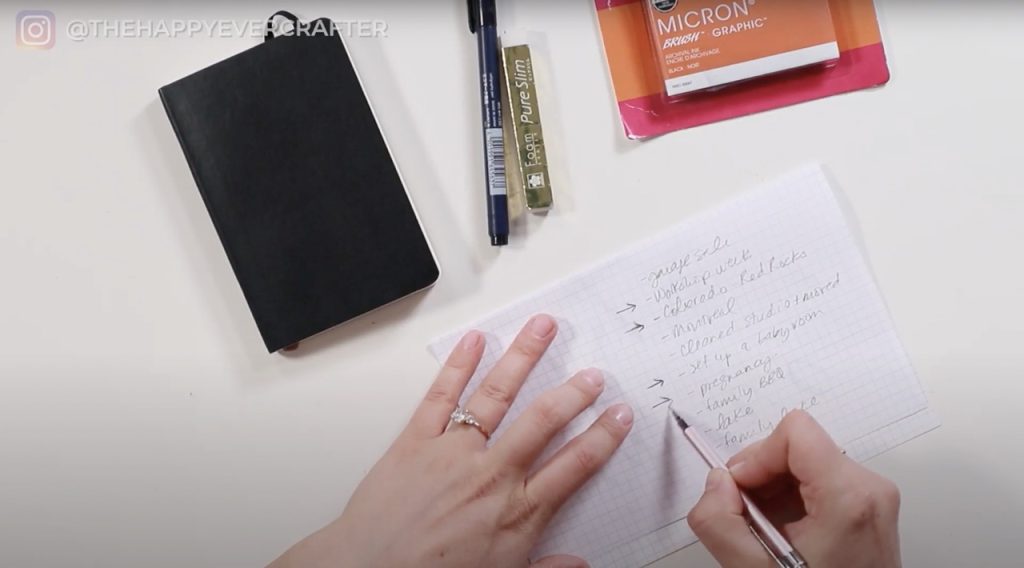
Supplies Used
You’ll find more about this below – keep scrolling!
- Pencil
- Tombow Fudenosuke (hard tip)
- Micron Pens
- Small journal – I prefer one with dots and really like pocket sized Moleskine soft cover journals!
Rather watch than read? Check out the quick video by clicking the video below!
What you need to know…
There are SOOOOO many ways you can do this, but I want to show you my preferred process…
Personally, I like to use it as a time to practice my hand lettering skills and make little doodles… and keep it nice and simple.
I also limit myself to using black pens, so that I can never be like “oh I don’t have my supplies”…
I ALWAYS have these supplies with me.
With just a pencil, a Tombow Fudenosuke (hard tip) brush pen, Micron pens, and a journal…
Let’s get started!
Let’s Get Started!
I try to keep this as simple as possible.
Step #1: Make a list
I like to start by making a list of the things that happened that I want to document for whatever period of time I’m writing about (for some it’s one day, for some it’s a week, for some it’s a month!).

Step #2: Decide which ones are “doodle able” things
I also try to rank them, picking things that are most important
Step #3: Set up a title somewhere
This could just be the date, the season, etc.
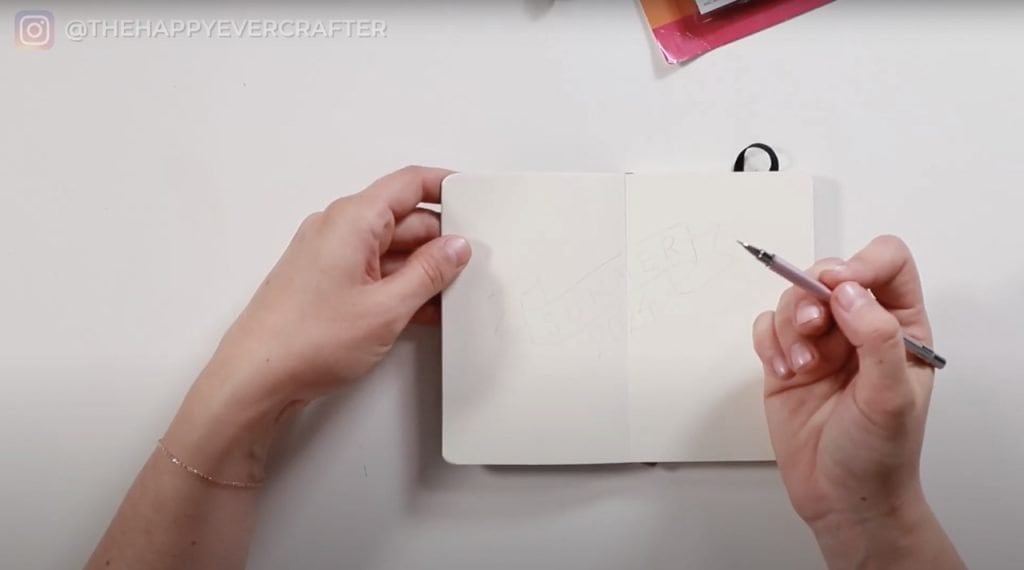
Step #4: Start randomly filling out bigger doodles first
These are usually the only steps I do in pencil. The rest I use pen/ink and just go for it!
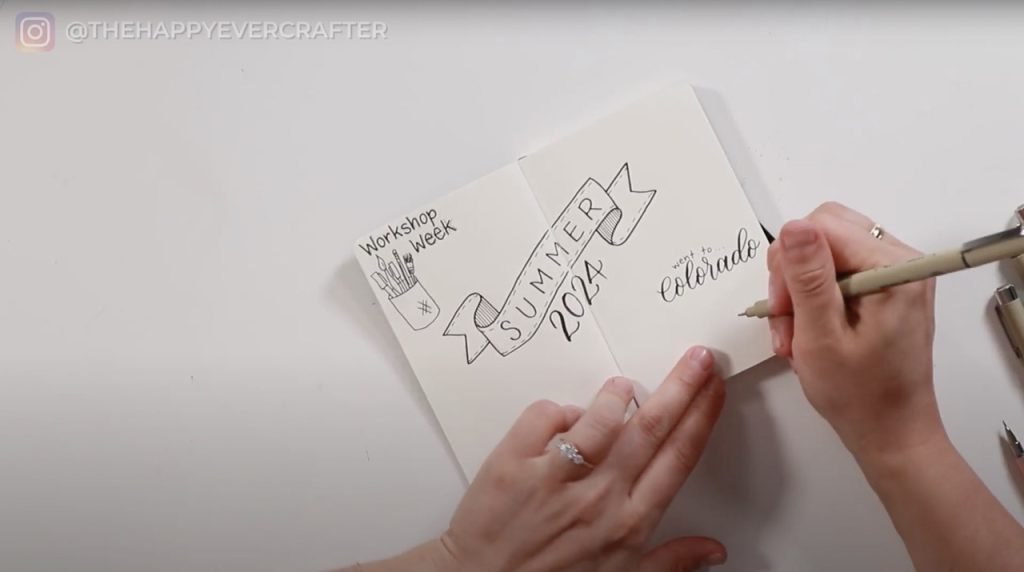
Step #5: Fill in smaller spaces with less important details
Step #6: Fill in whatever spaces are left with more doodles, embellishments, etc
That’s a Wrap!
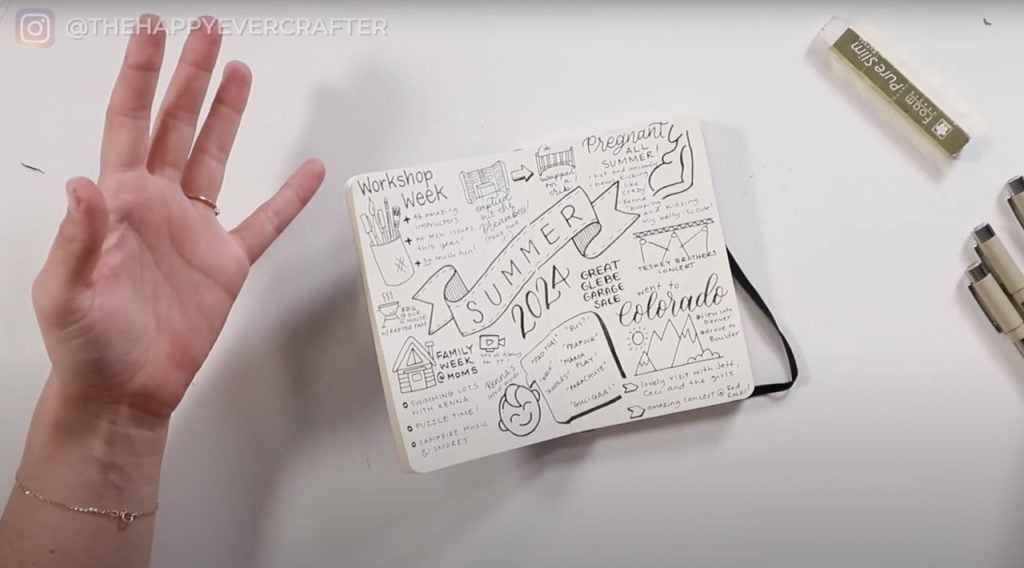
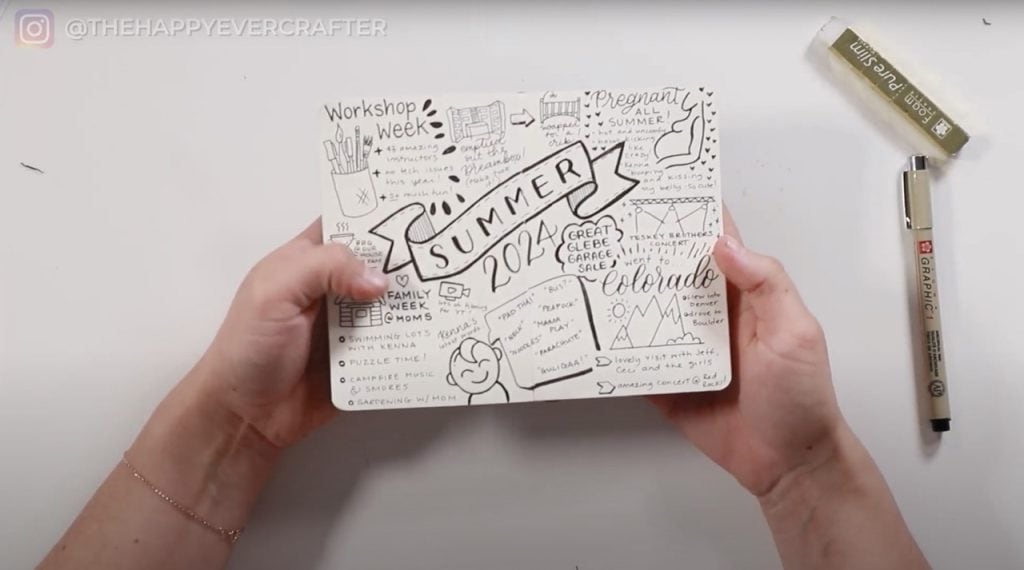
And there you have it! A completed doodle journal page.
Honestly, these do not ever have to be PERFECT.
I find they look amazing no matter what when they’re so filled in densely like this.
And they’re just so fun to look back on!
I’d LOVE to see your journal doodles! Be sure to tag me on Instagram: @thehappyevercrafter
And finally, your dad joke…
Why are giraffes so slow to apologize?
Because it takes them a long time to swallow their pride.


Dear Becca,
These were great. I have been trying to understand and learn doodling. It’s one thing to copy or learn certain doodles from internet/ YouTube but how do I go about it. How do I start and doodle without copying, is there a course for that too ? Also when I write in calligraphy and want to add doodles, most of the time I forget and then go back to your tutorials. I Please guide